Webcams are not kind to skin. Cheap sensors, harsh overhead light, and aggressive video compression team up to flatten your complexion, exaggerate redness, and turn every blemish into a focal point. If you have ever joined a call and thought "that is not what my skin looks like," you are right — it usually isn't. This guide covers exactly how to make skin look good on webcam, starting with the free fixes that matter most and then the real-time tools that polish what lighting alone can't.
We will go in the right order: understand the problem, fix lighting and camera position first (because no filter saves a badly lit face), then layer on cosmetic touch-ups for smoothing, blemish cleanup, even tone, glow, and tired-looking under-eyes. By the end you should be able to set this up in a couple of minutes and look noticeably better on your very next call.
1.Why Your Skin Looks Bad on Webcam
Two culprits do most of the damage, and neither is your actual skin.
Lighting. Most people sit under a ceiling light or in front of a window. Top-down or back light drops harsh shadows into pores, fine lines, and the under-eye area, and it makes any texture or redness pop. The camera meters for the brightest thing in frame, so a bright window behind you leaves your face underexposed and muddy. Mixed light is just as unkind: a warm lamp on one side and cool daylight on the other splits your face into two different colors that no software handles cleanly.
Compression. Video calls send a heavily compressed stream. Codecs smear fine detail, crush color gradients, and amplify noise in low light — which is exactly why skin can look blotchy, patchy, or weirdly orange even when it looks fine in the mirror. Add a low-resolution webcam and the effect compounds: the encoder is throwing away data it never captured cleanly in the first place, and your complexion is usually the first thing to suffer.
The takeaway: a lot of "bad skin" on camera is really bad input. Fix the input and you are most of the way there before you touch a single filter. That is why the order in this guide matters so much.
2.Free Fixes First: Lighting, Camera, Position
Before any software, get the fundamentals right. These cost nothing and have the biggest single impact.
Light your face from the front. Put your main light source — a window, a lamp, or a ring light — in front of you, slightly above eye level, not behind. Front light fills in shadows, evens out the complexion, and gives skin a natural glow. iPhone Life recommends soft, front-facing light to avoid harsh shadows and reduce visible texture on camera. Diffuse it if you can; a sheet of paper or a softbox turns hard light into flattering light. If you only change one thing today, change this.
Raise the camera to eye level. Stanford Medicine's telehealth guidance advises positioning the camera at or slightly above eye level so you are looking roughly into the lens. A camera below your chin foreshortens the face, throws light up into the nostrils, and emphasizes the under-eye and jaw. Stack the laptop on a few books or use a stand if you need to — the difference is immediate and unflattering when you get it wrong.
Use a sharper webcam. A 1080p or better camera captures more real detail, so compression has more to work with and your skin reads as smooth rather than noisy. Built-in laptop cameras are often the weak link, and they tend to perform worst in exactly the dim rooms where most calls happen.
Why this order matters: smoothing a dark, shadow-heavy frame just blurs the shadows. Light and position fix the cause; software then refines the result instead of fighting it.
Get these three right and your skin already looks dramatically better. Software is for the last 20% that lighting can't reach — not a substitute for the basics.
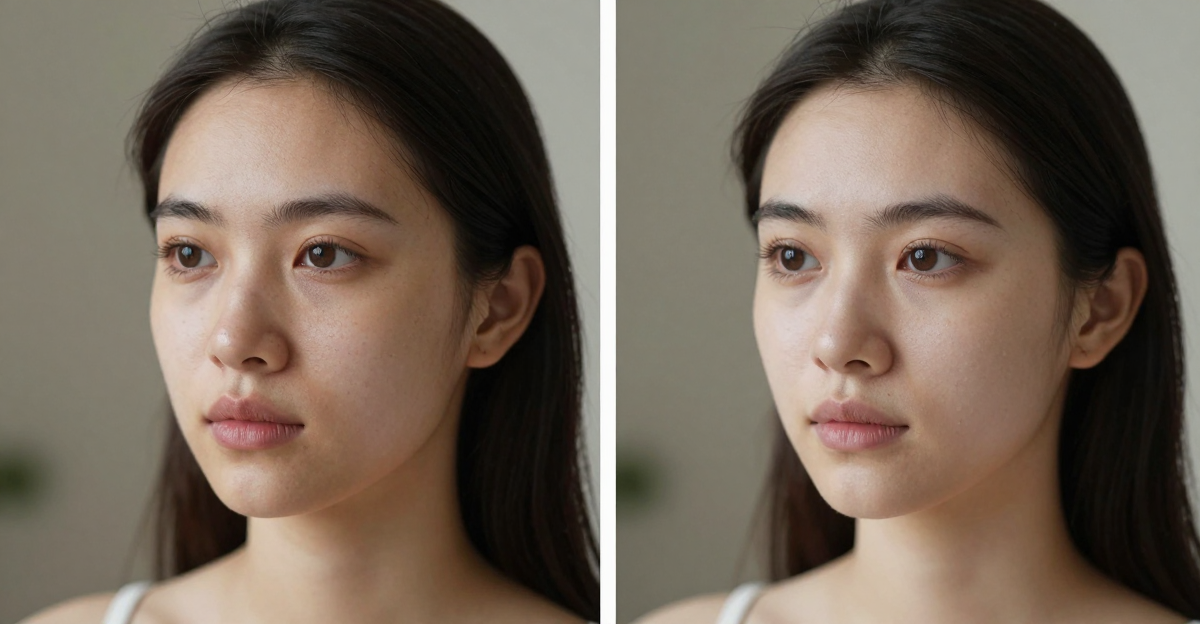
3.How to Make Skin Look Smoother and Clearer With GlowCam
Even with perfect lighting, a real complexion has texture, the occasional breakout, redness, and tired eyes — and the camera magnifies all of it. This is where a real-time skin layer helps. GlowCam by Imagera AI is a Chrome extension that applies cosmetic beautification to your webcam feed live, so it works in Google Meet, Zoom (web), Microsoft Teams, Webex, Whereby, and Discord (web).
The part that matters for privacy and performance: it is 100% on-device, built on WebGL and MediaPipe. Your webcam feed is never uploaded anywhere, and you don't need a discrete GPU to run it. The processing happens in your browser before the frame ever reaches the call, which also means there is no extra latency from a round trip to some server.
Here are the skin tools relevant to looking good on camera:
- Smoothing — softens texture, pores, and compression noise while keeping you recognizable, not plastic.
- Blemish / pimple cleanup — reduces the appearance of spots and blemishes using frequency-separation-style retouching, the same idea photo editors use.
- Even tone — calms localized redness and patchiness so your complexion reads consistent, without flattening your natural skin color (it is tuned to work on darker and brown skin, not just light skin).
- Glow — adds a healthy, lit-from-within sheen.
- Warmth & brightness — nudges a tired or washed-out frame toward a healthier read.
- Under-eye brighten — lifts the shadow under the eyes, the single biggest "I look exhausted" giveaway on a long call.
- Fair / lighten — subtly evens and lifts skin luminance while preserving your natural chroma.
Beyond skin, GlowCam also includes light makeup (lipstick, blush, teeth whitening, eye brightening), hair recolor and reshape (PRO), and background blur or replace. A master on/off toggle instantly restores your raw, unfiltered feed whenever you want it — handy when you want to confirm exactly what the effect is doing.
An honest note: GlowCam reduces the appearance of blemishes, pimples, redness, and under-eye circles cosmetically, in real time. It is not a medical or dermatological treatment and does not treat or cure acne. If a spot needs real treatment, see a dermatologist — GlowCam is purely a live cosmetic retouch. Think of it as good lighting plus a light touch of retouching, applied to live video instead of a photo.
4.Why People Care: Appearance Anxiety Is Real
Wanting to look good on camera is not vanity — it is tied to how draining video calls feel. Self-view makes us hyper-aware of our own face, and that "self-focused attention" is a documented driver of Zoom fatigue.
People who are unhappy with their on-camera appearance are more likely to experience Zoom fatigue, driven by the self-focused attention created by constantly seeing your own face. (Source: studyfinds.org)
About 13.8% of women versus 5.5% of men report feeling "very" to "extremely" fatigued by video calls, and 57% of workers aged 25–34 report exhaustion, with 49% saying being on camera is more tiring than audio-only. (Source: speakwiseapp.com)
When you are more comfortable with how you look, the self-monitoring loop quiets down — and the call gets a little less exhausting. Looking after the input (light, camera, a subtle retouch) is as much about how the call feels as how you appear.
5.GlowCam vs Built-In Touch-Up Tools
Several platforms ship a basic touch-up. They are fine for a quick blur, but limited in scope. Here is an honest comparison.
| Capability | Zoom Touch Up | Teams Touch Up | GlowCam |
|---|---|---|---|
| Skin smoothing | Yes (single slider) | Yes | Yes, adjustable |
| Blemish / pimple cleanup | No | No | Yes |
| Even skin tone | No | No | Yes |
| Under-eye brighten | No | No | Yes |
| Glow / warmth | Studio effects (limited) | No | Yes |
| Works across Meet, Zoom, Teams, Webex, more | No (per-app) | No (per-app) | Yes (browser-wide) |
| On-device, feed never uploaded | Yes | Yes | Yes |
Zoom offers "Touch Up My Appearance" (overall smoothing) plus some studio effects; Microsoft Teams has its own Touch Up and a partnered Maybelline makeup app. These are useful but tied to one platform and offer a single broad-strokes effect. GlowCam works across every supported browser-based call and gives you per-effect control over smoothing, blemishes, tone, and under-eyes, so you are not stuck with one all-or-nothing slider.
One transparency note: Google Meet is the platform we have fully end-to-end tested. The other browser-based platforms use the same on-device technique, but Meet is the one we verify against directly.
6.How to Set It Up (Under 2 Minutes)
- Install GlowCam from the Chrome Web Store.
- Get your lighting and camera right first (front light, eye-level camera) — that is the foundation.
- Open your call in Chrome on Google Meet, Zoom web, Teams, Webex, Whereby, or Discord web.
- Open the GlowCam popup and start in the Skin tab. Nudge smoothing up until texture softens but you still look like you.
- Add even tone to calm redness, a touch of glow and warmth for a healthy read, and under-eye brighten if you look tired.
- Use blemish cleanup to reduce any visible spots.
- Toggle the master switch off and on to compare against your raw feed and dial it back until it looks natural.
There is a 7-day free trial with no credit card required. During the trial, the Skin, Makeup, and Background tools are free to use. After that it is $19.99/month or pay-per-use credits.
7.Quick Tips for the Most Natural Result
- Less is more. Push smoothing to the point where pores soften but stop before skin goes waxy.
- Fix light before filters. A small lamp in front of you beats heavy smoothing every time.
- Match your warmth to the room. Over-warming under cool office light looks orange.
- Spot-treat with under-eye brighten rather than cranking overall brightness, which washes you out.
- Recheck after you move. If you change seats or the sun shifts, your lighting changes — glance at the self-view and re-tune.
You can read more in our guide on how to look better on video calls, or explore the beauty filter for Zoom and virtual makeup for video calls.
8.Ready to Look Your Best on Camera?
Get the lighting right, raise the camera to eye level — then let GlowCam handle the polish your webcam can't. Smooth skin, fewer visible blemishes, even tone, and brighter under-eyes, all processed on your own device with nothing uploaded.