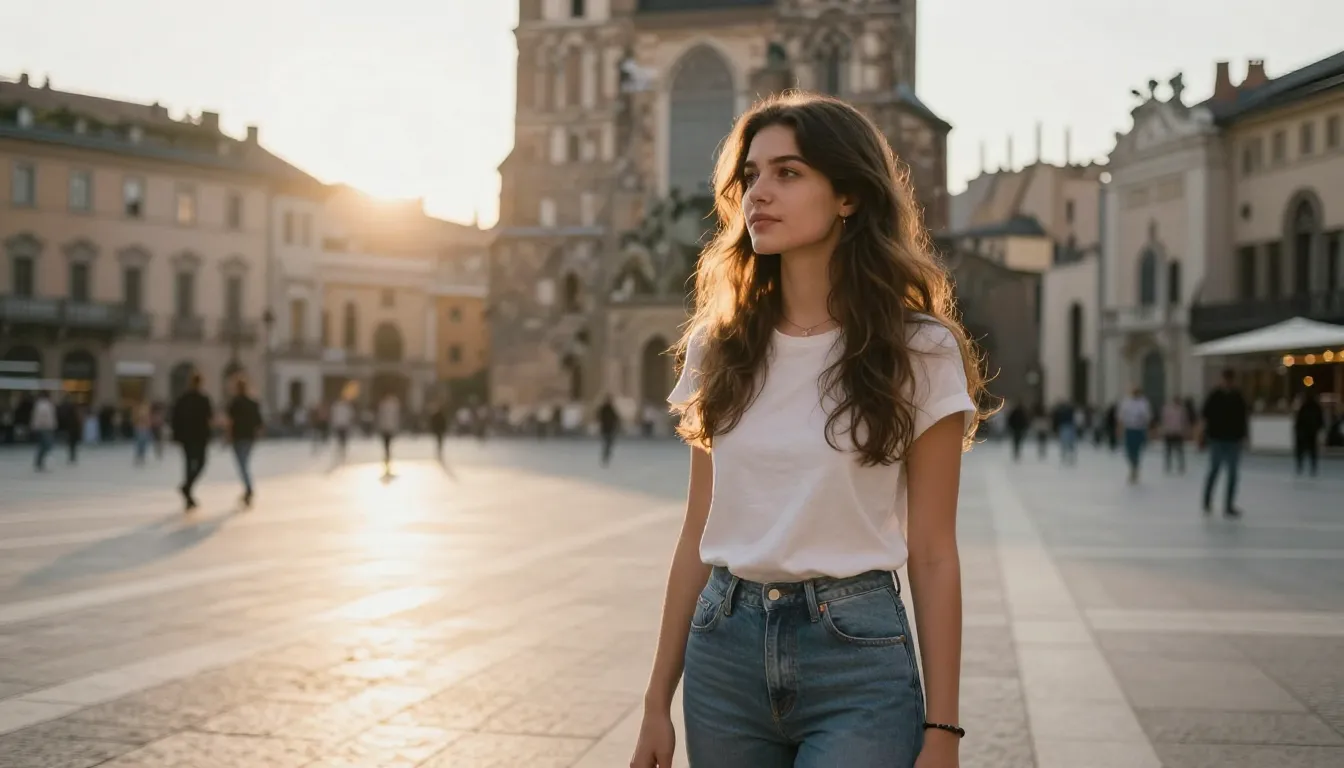
To make realistic AI images, you have to fix the four things that give AI away: plastic-looking skin, flat or generic lighting, a "too clean" digital look with no camera character, and eyes that lack depth. Get those right and output crosses from "obviously AI" to "is that a real photo?"
You don't need to hand-tune obscure model settings to do it. This guide covers the concrete levers that control realism, the prompts that reinforce them, and the finishing step that fixes the last 10% — plus an honest decision guide for which approach fits your goal.
0.1What a realism finishing pass actually does
| Before (flat AI look) | After (added detail) |
|---|---|
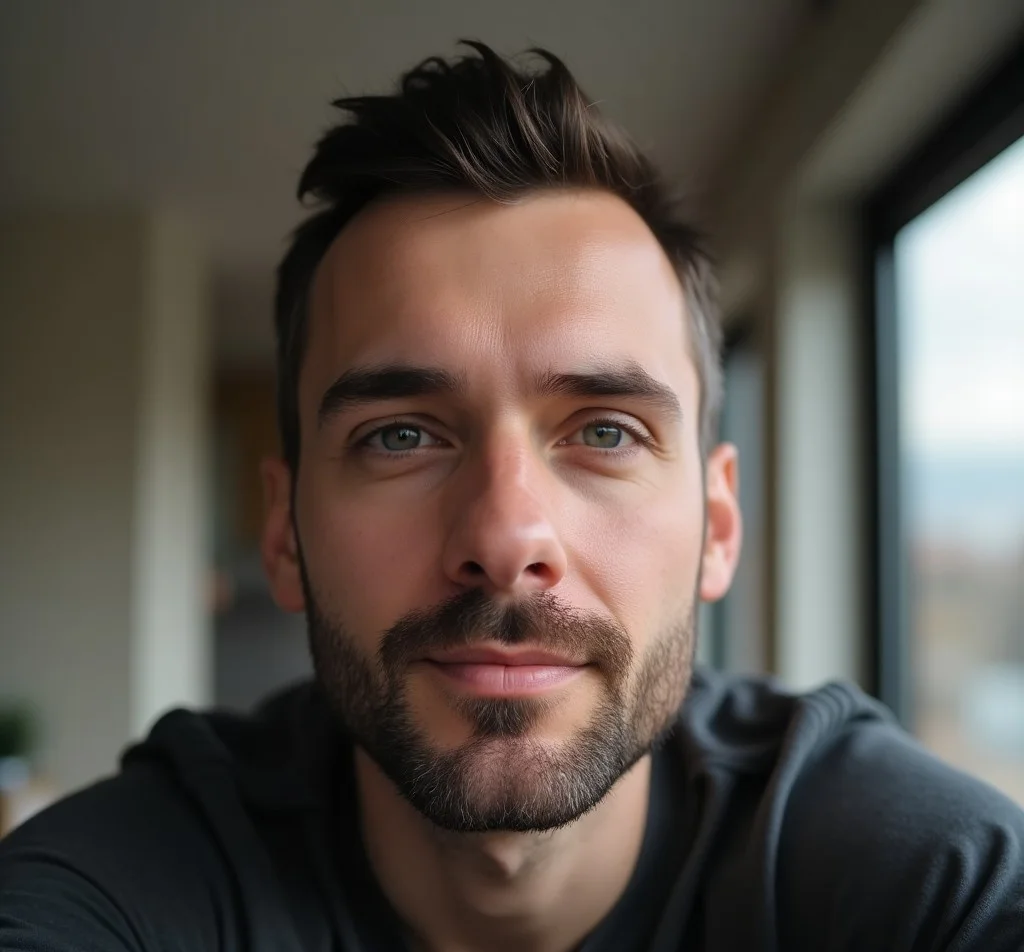 | 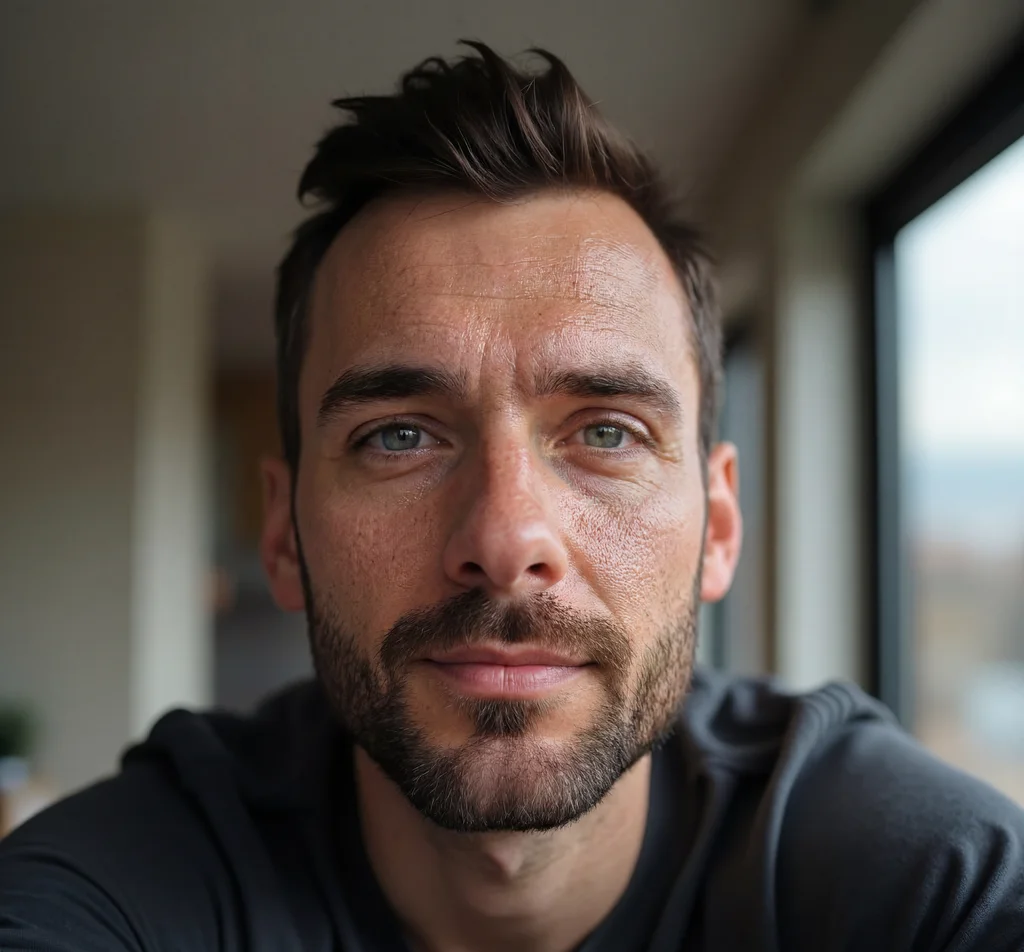 |
Before → after with Imagera's Extreme Detailer (detail-enhancement pass).
Quick answer: The most realistic AI images in 2026 come from pairing a high-fidelity base model with photorealism-tuned LoRAs, then generating at 4K-8K resolution with real-camera detail cues (skin texture, lens grain, natural lighting) — Imagera renders these in under 60 seconds per image.
1.How do realistic-image LoRAs actually improve photorealism?
LoRAs are lightweight adapters (often 20-200MB versus a 6GB+ base model) that steer generation toward a specific look — skin pores, film grain, or camera glass. Stacking 2-3 photorealism LoRAs on Imagera in 2026 helps reduce plastic-looking artifacts, and you can dial each one's weight from 0 to 1 for control, generating 4K output in under 60 seconds without training your own model. When a ready-made adapter cannot hold a specific face, product or style, you can train your own LoRA online from a handful of reference images — no GPU required.
The same stacking logic carries over to video, with a tighter ceiling of three adapters per generation and datasets made of clips rather than stills — see MiniMax H3 LoRA training for how the two workflows differ.
2.Which settings make AI faces look most realistic in 2026?
Keep LoRA weight near 0.6-0.8 in the LoRA trainer and generator, render at 4K or 8K for crisp detail, and add texture cues like "shot on a 50mm lens" for natural depth. Faces tend to give themselves away first in the skin and eyes, so Imagera's detail-enhancement pass targets those two regions to keep features sharp and consistent across a batch.
3.Why AI images look fake (and what actually fixes it)
Base image models are trained on billions of pictures, so they know what a photo generally looks like. What they miss are the small, physical details that make a photo read as real:
- Skin is smooth and plastic — no pores, no fine lines, an unnatural even glow
- Eyes are flat — no iris texture, weak catchlights, sometimes subtly asymmetric
- Lighting is generic — no clear source, no believable shadow falloff
- The image is "too clean" — zero grain, zero lens character, an airless digital sheen
- Textures are smoothed — hair, fabric, and surfaces lack fine detail
Every fix below targets one of these. You can address them at generation time (settings and prompts) and at finishing time (a realism pass). The best results use both.
4.The five realism levers, ranked by impact
Here are the approaches that move the needle, ordered by how much they improve realism per unit of effort. In Imagera these are bundled into a realistic style (Real Camera mode) and a finishing pass, so "using" a lever usually means choosing a realistic style rather than tuning raw model parameters.
4.11. Skin texture (highest impact for people)
The single biggest tell in AI portraits is airbrushed skin. Real skin has pores, faint lines, slight color variation, and subsurface scattering — the way light glows through it. The fix is to add controlled imperfection, not remove it.
- In the prompt:
natural skin texture, visible pores, subtle skin imperfections - In the negative prompt:
smooth skin, airbrushed, plastic, waxy - Avoid pushing "beauty" or "flawless" language — it undoes everything
4.22. Lighting with a clear direction
Generic, flat lighting screams render. Believable light has one dominant source, a direction, and shadows that fall off realistically.
- Pick a real setup and name it:
soft window light from the left,golden hour, warm directional light,studio key light with soft fill - Keep it to one primary source — conflicting lights look fake
- Realistic shadows matter as much as realistic highlights
4.33. Camera and lens cues
Real photos carry the fingerprint of the camera that took them: depth of field, focal-length compression, mild vignetting. Prompting these adds the "shot on a real camera" quality.
- Name a plausible rig:
shot on a full-frame camera, 85mm lens, f/1.8, shallow depth of field - Add optical honesty:
natural bokeh, slight vignette - Don't overdo it — a subtle blur reads real; an extreme one reads staged
4.44. A finishing realism pass (fixes the last 10%)
Even a good generation often keeps a faint digital sheen. A finishing pass re-introduces the tiny irregularities a real sensor produces — authentic noise and film-like grain — so the image stops looking "too perfect." This is what closes the final gap between good AI and believable photo.
Imagera's AI Image Humanizer applies exactly this: real camera noise and film grain rather than a filter. Run it on a generation that's almost there and it usually finishes the job.
4.55. Eye and hair detail
The smallest lever, but worth a mention because eyes are where viewers instinctively look.
- Prompt for
detailed eyes, iris texture, natural catchlights - Realistic hair means individual strands, not a hair-shaped blob — a higher-detail setting or a light upscale helps here
5.Presets vs. custom models: which approach fits you?
There's more than one route to realism. Here's an honest comparison so you pick the one that matches your goal — not the one with the most hype.
| Approach | Best for | Effort | Realism ceiling | Trade-off |
|---|---|---|---|---|
| A realistic style / Real Camera mode in the generator | Most people, one-off realistic images | Lowest | High | Less fine control than manual tuning |
| Prompt engineering (the levers above) | Dialing in a specific look | Medium | High | Requires iteration and testing |
| Finishing / humanizer pass | Rescuing a "too clean" generation | Low | High | It refines, it can't fix a broken base image |
| Custom model trained on your subject | A recurring face, product, or brand style | High (one-time) | Highest for that subject | Only pays off if you reuse the same subject |
How to choose:
- Need one realistic image now? Choose a realistic style plus the prompt levers, then run the finishing pass. This handles the large majority of cases.
- Chasing a very specific mood or style? Lean on prompt engineering and iterate.
- Generating the same person, product, or house repeatedly? A custom-trained model learns that one subject and will out-realism any generic setting for it — but it only pays off with reuse. For a one-off, it's overkill.
6.LoRA for realistic portraits: train your own, don't hunt for a "best" model
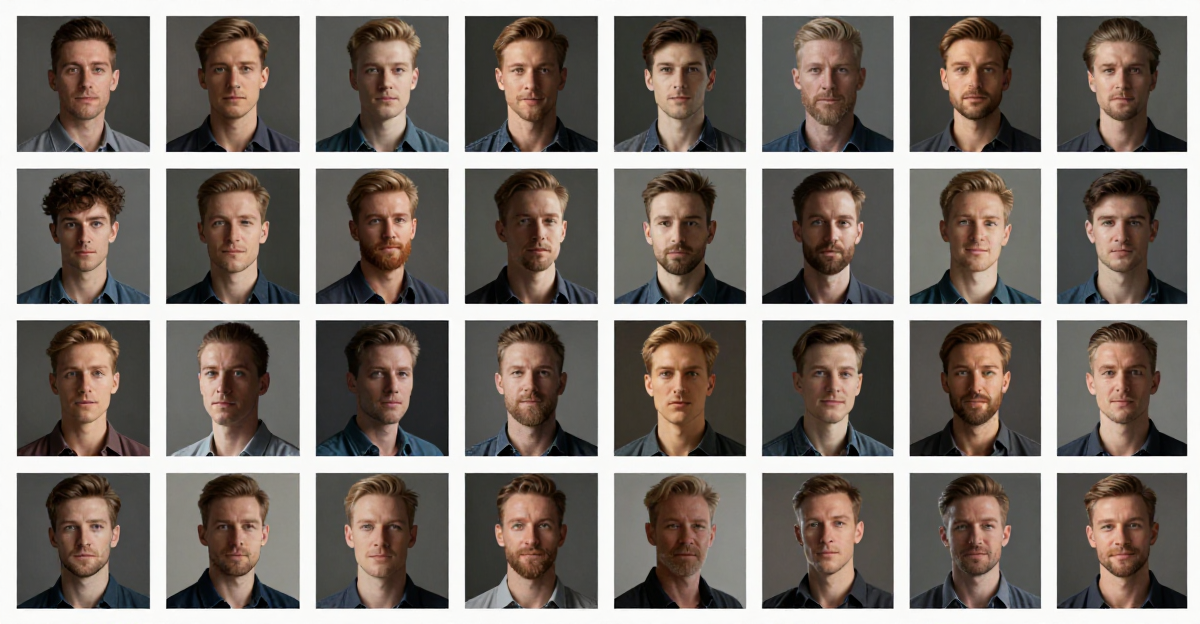
If you searched for the "best LoRA model" for realistic images, here's the honest answer: the model that beats every generic download is one trained on your subject. A LoRA is a small add-on that teaches a base image model a specific look — a particular face, a product, or a house — so it renders that subject consistently across many prompts instead of guessing a new interpretation each time. For repeatable realism (the same person shot after shot, in different scenes and lighting), that consistency is the whole game, and no off-the-shelf model gives you it for your face.
Rather than sending you to download a third-party LoRA and wire up your own GPU, Imagera trains one for you from your own photos:
- Bring your own subject. Upload a set of photos of the face, product, or style you want to reproduce. Imagera trains a custom model on that subject — no local GPU, no environment setup.
- Repeatable identity. Once trained, you can generate that same subject in new scenes, outfits, and lighting while it stays recognizably itself — the payoff a generic realism style can't match for a recurring subject.
- Realism still comes from the recipe. A custom model handles who is in the image; the realism levers above — skin texture, directional lighting, camera cues, and the finishing pass — handle how real it looks. Combine both for the strongest result.
When a custom LoRA is worth it: a personal brand or creator who needs many on-brand portraits, an ecommerce store shooting the same product in dozens of scenes, or anyone reusing one face or style repeatedly. When it isn't: a single one-off image — a realistic style plus the prompt levers and the finishing pass will get you there faster and cheaper.
For the full walkthrough, see how to train a LoRA model online with no GPU and what a LoRA actually is.
7.A repeatable recipe for realistic portraits
Put the levers together in order:
- Choose a realistic style (or Real Camera mode) in the Image Generator.
- Write a prompt that names the subject, lighting direction, and camera: "Candid portrait of a woman by a window, soft directional light from the left, natural skin texture with visible pores, shot on a full-frame camera, 85mm lens, f/1.8, shallow depth of field, natural catchlights."
- Add a negative prompt:
airbrushed, plastic skin, smooth, waxy, oversaturated, cartoon. - Generate a few variations and pick the most believable base — don't fixate on the first.
- If the winner still looks a touch "clean," run the AI Image Humanizer to add authentic noise and grain.
- Optional: a light upscale to sharpen hair and eye detail without over-smoothing.
This sequence deliberately front-loads the cheap, high-impact steps and only reaches for training when reuse justifies it.
8.Common mistakes that keep AI images looking fake
- Prompting for "perfect" or "flawless." Perfection is the opposite of realism. Real photos have imperfections.
- Stacking every effect at maximum. Extreme depth of field, heavy grain, and hard lighting together look staged, not real.
- Ignoring the eyes. Flat, dead eyes undo good skin and lighting instantly.
- Skipping the finishing pass. A clean generation is 90% there; the last 10% is the noise and grain a real sensor adds.
- Over-upscaling. Aggressive upscaling can smooth away the very texture that made the image believable. Upscale gently.
9.What is the best LoRA for realistic AI images?
The best LoRA for realistic AI images is one trained on the exact subject you want to reproduce — your face, your product, or your brand look — not a generic "realism" model you download and hope fits. A downloaded realism LoRA nudges a base model toward a photographic style; a LoRA trained on your subject locks in identity so the same person or object comes out recognizable across dozens of prompts. For repeatable realism, that identity lock is what separates believable from merely pretty.
That distinction matters because searches for "best loras" and "ai lora download" usually chase a shortcut that does not exist for identity work. A public realism LoRA can improve skin and lighting on generic faces, but it cannot know your face, so it invents a new interpretation every generation. Below is how the two paths actually compare for the goal each search implies.
| What you want | Downloaded / generic realism LoRA | Custom LoRA trained on your subject |
|---|---|---|
| One realistic image of any person | Works well — style nudge is enough | Overkill for a single throwaway image |
| The same face across many scenes | Fails — reinvents the face each time | The core use case; identity stays consistent |
| A product shot in dozens of settings | Inconsistent product shape and branding | Holds the exact product across scenes |
| Realistic skin texture on generic faces | Helps, but still needs the finishing pass | Helps, plus keeps your subject's real features |
| Setup effort | Find, download, wire up a GPU pipeline | Upload photos; Imagera trains it with no GPU |
If your goal is "make one image look real," you do not need any LoRA — the realism levers and finishing pass above are faster. If your goal is "make my subject look real, again and again," a custom-trained LoRA is the honest answer, and Imagera trains one from your uploaded photos so you skip the download-and-configure step entirely.
10.Which LoRA or realism approach fits a realistic skin LoRA search?
If you searched for a "realistic skin LoRA," what you actually want is skin that reads as photographed — pores, fine lines, subsurface glow — not a smoothed mannequin. A dedicated skin LoRA is one route, but for most people the faster path is a realistic style plus the skin-texture prompt levers above, then a targeted detail pass. Imagera's Skin Detailer rebuilds realistic pore and texture detail on faces without the trained-model overhead, which covers the "realistic skin LoRA" intent for one-off images.
Here is how to map the common LoRA-style searches to the approach that will actually get you there fastest, so you spend effort where it pays off rather than hunting a download that may not match your subject at all.
| Your search / goal | Fastest realistic path in Imagera |
|---|---|
| "realistic skin LoRA" — natural pores and texture | Realistic style + skin prompt levers, then Skin Detailer |
| "best LoRA models" for a recurring face | Train a custom LoRA on that face |
| "LoRA AI model" for a product catalog | Custom LoRA on the product, plus product photography tools |
| "realistic LoRA" for one-off portraits | Real Camera realistic style + AI Image Humanizer finishing pass |
| Agency reusing a brand style across assets | Train a custom brand LoRA on your reference assets |
For the training walkthrough behind any of the custom-LoRA rows, see how to train a LoRA model online with no GPU. LoRA training and image generations are priced in credits inside Imagera, so a one-off realistic image and a trained custom model are separate line items — another reason to choose training only when you will reuse the subject enough to justify it.
11.How do LoRA training and realistic generation combine for the strongest result?
A custom LoRA and the realism recipe do two different jobs, and the strongest results come from stacking them: the LoRA fixes who or what is in the image, and the realism levers fix how real it looks. Train the LoRA once on your subject, then run every generation through a realistic style and the finishing pass. Neither alone is enough — a perfectly consistent face still needs pores, directional light, and sensor grain to read as a photo.
In practice the workflow looks like this. First, train a LoRA from a clean set of your subject's photos so identity is locked. Second, generate with a realistic style and a prompt that names lighting direction and a plausible lens, exactly as in the recipe above. Third, run the AI Image Humanizer to add authentic camera noise, then optionally a gentle upscale for hair and eye detail. This is why "best LoRA" and "make it look real" are two separate problems that people often conflate — solving one does nothing for the other, and only the combination clears both. For the deeper background on how LoRAs actually adapt a base model, what a LoRA is walks through the mechanics.