AI detection tools flag images by identifying patterns that separate AI output from real photography. To make AI images undetectable, you need to understand what detectors look for — and systematically address each detection vector.
This isn't about adding random noise or running a blur filter. Detection tools are sophisticated. Making images truly undetectable requires addressing specific technical characteristics that cameras produce and AI generators don't.
Here's the step-by-step process.
1.What Makes AI Images Detectable
Detection tools analyze 5 primary vectors. Each one needs to be addressed:
| Detection Vector | What Tools Look For | Why AI Fails |
|---|---|---|
| Noise fingerprint | Camera sensor noise patterns | AI produces no noise or synthetic noise |
| Skin/texture | Pores, fine lines, micro-texture | AI renders smooth, poreless surfaces |
| Compression | JPEG compression artifacts | AI output has different compression signatures |
| Frequency spectrum | Spatial frequency distribution | AI has distinct frequency patterns |
| Metadata | EXIF data, C2PA credentials | AI images lack camera metadata |
Addressing only one or two vectors isn't enough. Detection tools use multi-signal analysis — they flag images when any vector looks suspicious. You need to address all five.
2.Step 1: Generate a High-Quality Base Image
Start with the best possible AI generation. The base image quality determines how convincing the final result can be.
In Imagera AI:
- Go to the AI Image Generator
- Write a detailed, photorealistic prompt — describe lighting conditions, camera angle, time of day
- Specify a realistic photography style (not "digital art" or "illustration")
- Generate at the highest available resolution
Prompt tips for photorealism:
- Include camera details: "shot on Canon R5, 85mm f/1.4"
- Describe natural lighting: "golden hour sunlight through window"
- Add imperfection cues: "slightly messy hair, natural expression"
- Avoid perfection words: skip "perfect," "flawless," "beautiful"
A photorealistic base requires less post-processing than a stylized one.
3.Step 2: Add Authentic Camera Noise
Detection vector addressed: Noise fingerprint
This is the most important step. Real camera sensors produce specific noise patterns — luminance noise (brightness variation) and chrominance noise (color variation) — that follow predictable distributions based on ISO, sensor size, and light conditions.
AI images are either noise-free or have uniform synthetic noise. Detectors identify this instantly.
Using Imagera's Real Camera Noise tool:
- Upload your generated image
- Select a camera profile (Canon, Sony, Nikon — each has different noise characteristics)
- Set the ISO simulation (higher ISO = more visible noise, more authentic for indoor/low-light)
- Apply and preview
Camera profile selection guide:
| Scenario | Camera Profile | ISO Setting |
|---|---|---|
| Outdoor portrait, daylight | Canon R5 / Sony A7IV | ISO 100-400 |
| Indoor portrait, window light | Sony A7III / Nikon Z6 | ISO 800-1600 |
| Event/party shot | Canon R6 / Sony A7S | ISO 3200-6400 |
| Street photography | Fuji X-T5 / Ricoh GR | ISO 400-1600 |
Match the noise profile to the scene. Indoor shots should have more noise than bright outdoor shots.
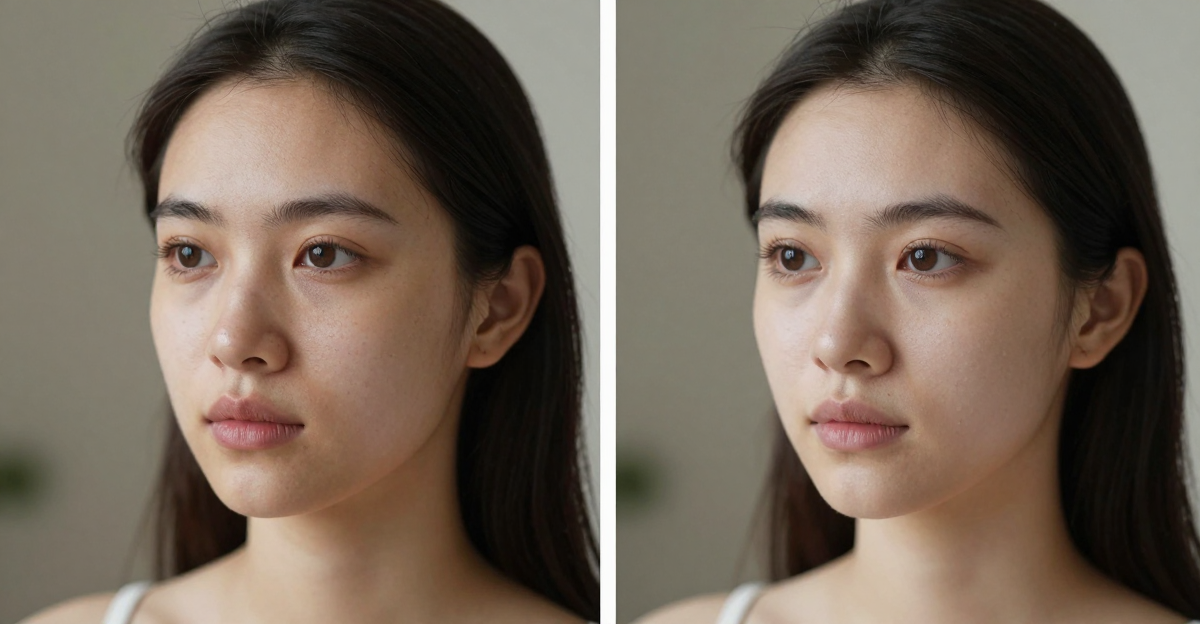
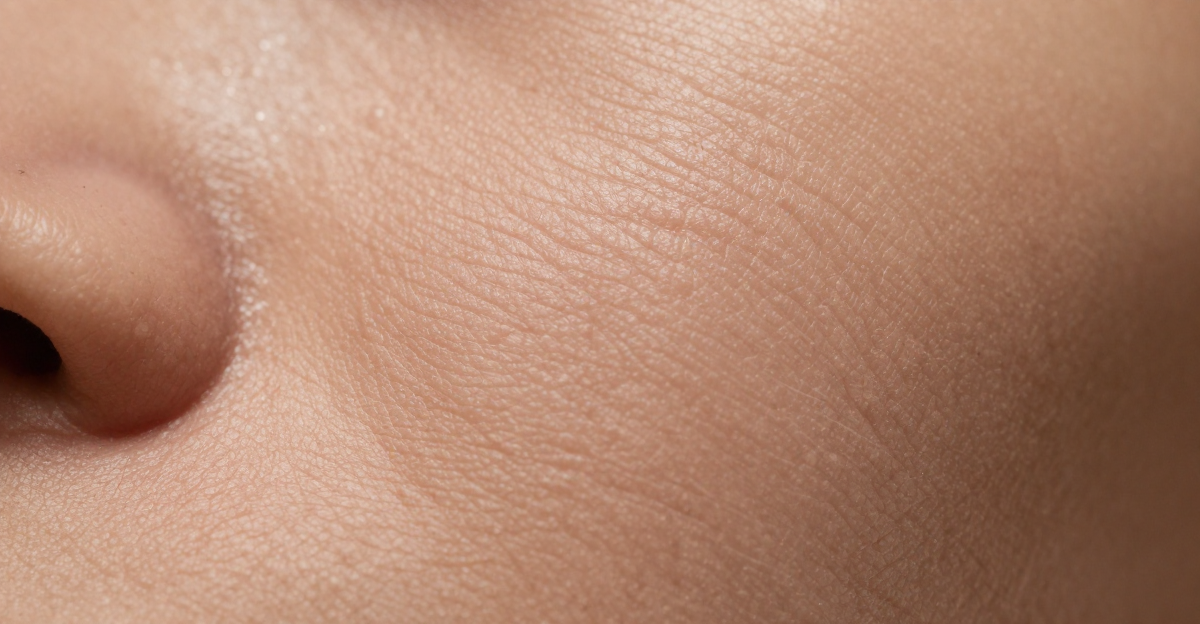
4.Step 3: Add Skin and Surface Texture
Detection vector addressed: Skin/texture smoothness
AI skin is the second most common detection tell. Real skin has visible pores, micro-wrinkles, subtle discoloration, and uneven texture. AI renders smooth, uniform surfaces.
Using Imagera's Skin Detailer:
- Upload the noise-processed image
- Adjust pore visibility, fine line intensity, and texture randomness
- Set zone-specific detail (forehead texture differs from cheeks)
- Apply at a natural intensity — overdoing it looks artificial in the opposite direction
For non-portrait images, use the Extreme Detailer to add surface texture to fabrics, materials, landscapes, and objects. Real photographs have micro-detail that AI tends to smooth over.
5.Step 4: Apply Authentic Compression
Detection vector addressed: Compression patterns
Camera JPEGs have specific compression characteristics — block artifacts at boundaries, quality gradients across the image, and chroma subsampling patterns. AI output has different compression signatures even after saving as JPEG.
In Imagera:
- The export pipeline automatically applies camera-authentic JPEG compression
- Select quality level 85-92 (matching typical camera defaults)
- Enable chroma subsampling (4:2:0, matching real cameras)
If working outside Imagera: Save your image through a process that mimics camera JPEG encoding. Simple "Save as JPEG" in Photoshop doesn't match camera compression. You'd need to apply the specific quantization tables that cameras use — which is why an automated pipeline is more reliable.
6.Step 5: Handle Metadata
Detection vector addressed: Metadata absence
Stripping metadata (no EXIF data) is actually suspicious — it suggests the image was processed to hide its origins. The ideal approach adds plausible metadata.
Options:
- Leave Imagera's default metadata (identifies as processed, which is common for stock/professional photos)
- Use ExifTool to add camera-consistent EXIF data if submitting to platforms that check (camera model, lens, aperture, date)
Important: Don't add C2PA content credentials — those are cryptographically signed and can't be faked. Absence of C2PA is normal for images from cameras that don't support it (most real cameras don't).
7.Step 6: Verify with Detection Tools
Before using your images for anything important, verify they pass detection:
- Hive AI — should show "Likely Human" or low AI probability
- Illuminarty — should not identify a specific generator
- AI or Not — should return "Not AI"
If any tool flags your image, adjust parameters:
- Increase camera noise intensity slightly
- Add more surface texture detail
- Try a different camera noise profile
- Regenerate with a more photorealistic prompt
See our complete detection tool comparison for accuracy benchmarks.
8.The Full Pipeline: Under 2 Minutes
| Step | Tool | Time |
|---|---|---|
| Generate base image | Image Generator | 15-30 sec |
| Apply camera noise | Real Camera Noise | 10-15 sec |
| Add skin/surface texture | Skin Detailer or Extreme Detailer | 15-20 sec |
| Export with authentic compression | Built-in pipeline | 5 sec |
| Verify with detection tools | External tools | 30-60 sec |
| Total | ~90 seconds |
All steps run in your browser — no downloads, no local GPU required. Plans start at $4.99/month.
9.Common Mistakes That Get Images Flagged
Adding random Gaussian noise instead of sensor noise. Detection tools can tell the difference between camera-characteristic noise and random pixel variation. Real sensor noise follows specific distributions based on photon counting statistics.
Over-processing. Too much noise, too much texture, too aggressive compression — these create their own detection signatures. Subtlety is key.
Ignoring the prompt. A photorealistic post-processing pipeline can't save an image that was prompted as "digital art, vibrant colors, fantasy style." Start with a photorealistic base.
Using the same settings for every image. Real cameras produce different noise at different ISOs, different compression at different quality settings. Vary your parameters to avoid creating a new detectable pattern.
Skipping verification. Always test before critical use. Detection tools update their models regularly, and what passed last month might not pass today.
10.Ethical Considerations
Making AI images undetectable is a tool — like any tool, it can be used responsibly or irresponsibly.
Responsible uses:
- Professional photography supplementation
- Stock photography creation (you're the creator, you have rights)
- Marketing materials for your own products
- Creative projects where AI is the medium
Irresponsible uses:
- Impersonating real individuals
- Creating fake evidence
- Fraudulent testimonials
- Non-consensual intimate imagery
The technology is neutral. Your intent determines the ethics. If you'd be comfortable explaining your process when asked, you're using it responsibly.
For more context on the ethics and broader approach, read our comprehensive guide: How to Bypass AI Detection.
11.Common Questions
11.1Can I make Midjourney or DALL-E images undetectable?

Partially. You can import images from other generators into Imagera and apply the camera noise + texture pipeline. However, results are better when the base image is generated in Imagera, since our generation models are already optimized for photorealism before post-processing.
11.2How long do these techniques remain effective?
Detection tools update their models periodically, but the fundamental approach — adding authentic camera characteristics — addresses the physics of photography, not just current algorithm weaknesses. Camera noise, sensor patterns, and compression artifacts are real phenomena that detectors expect to see. This makes the approach more durable than simple adversarial tricks.
11.3Is this the same as adversarial attacks on AI detectors?
No. Adversarial attacks add invisible pixel patterns designed to fool specific classifiers. They are fragile (break when images are compressed or resized) and only work against specific detector versions. Our approach adds genuine photographic characteristics that make images physically similar to real photographs.
11.4Do I need all the steps, or can I skip some?
For casual social media use, camera noise alone often provides sufficient protection. For high-stakes applications (stock submissions, professional profiles, marketing campaigns), the full pipeline produces the most reliable results. Each step addresses a different detection vector.
11.5Does image resolution matter for detection?
Higher resolution images provide more data for detection analysis, making them theoretically easier to analyze. However, higher resolution also allows for more convincing texture and noise detail. The net effect is roughly neutral — focus on the quality of your post-processing rather than resolution.
Part of the AI Detection & Authenticity series. See also: Is This AI Generated? | AI Image Detector Comparison | AI Image Checker Tools | AI Art Detector Guide