To compress a signature image for a form, crop tightly around the ink, set the pixel size with Resize in the Image Compressor, then run Compress only if the file is still too big. Type the limit as KB × 0.00095, so 20 KB is 0.019. Our 700 × 300 px test signature went from 42,895 to 19,643 bytes.
For photo limits and the 2026 tables for IBPS, SSC, UPSC and NEET, see the exam photo and signature guide. This page covers the signature file only.
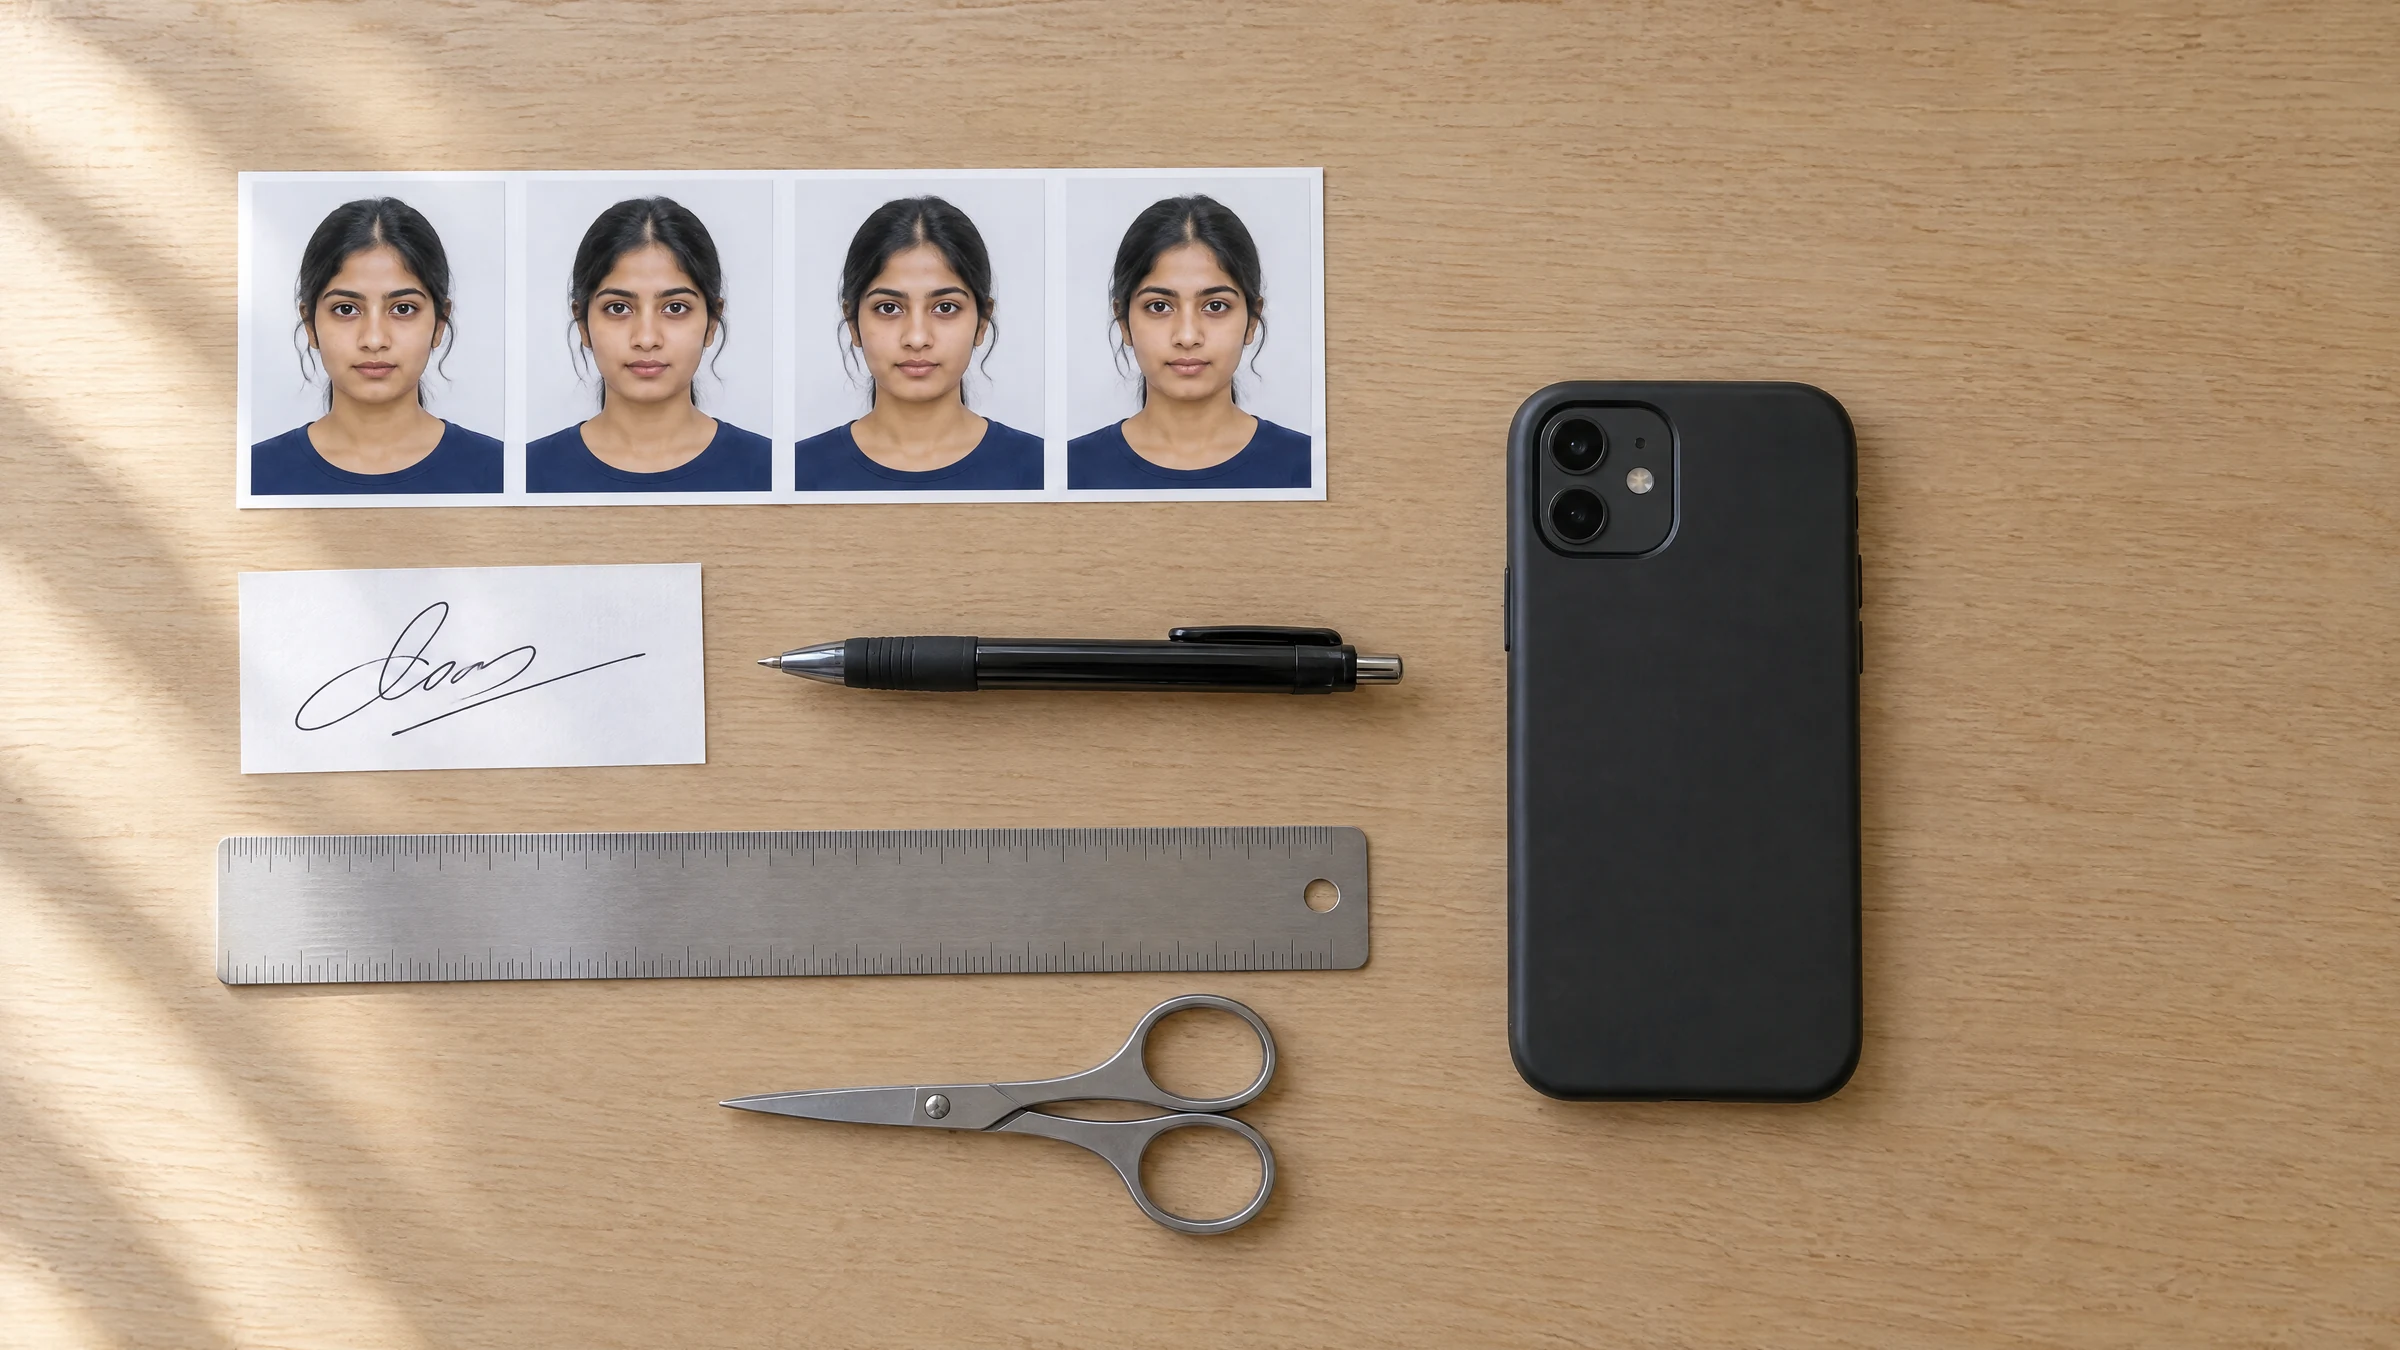
The artwork at the top of this page is an illustration, not a product capture.
What do I type in the compressor for a signature's KB limit?
Multiply the limit in KB by 0.00095 and round down, then type that number in Target size (MB). The field counts 1 MB as 1,048,576 bytes, so typing 0.02 for 20 KB would allow 20,971 bytes, which is over a 20 KB cap counted as 20,000 bytes. Each value below fits the limit either way, whether the portal counts a kilobyte as 1,000 or 1,024 bytes.
| Signature limit | Type in Target size (MB) | Largest file allowed (bytes) |
|---|---|---|
| 10 KB | 0.009 | 9,437 |
| 20 KB | 0.019 | 19,922 |
| 30 KB | 0.028 | 29,360 |
| 50 KB | 0.047 | 49,283 |
| 100 KB | 0.095 | 99,614 |
Type the value rather than clicking the arrows: they jump by 0.05, which is more than a whole 50 KB limit. Values under 0.05 are accepted, and the 20 KB test on this page used 0.019. For a 100 KB limit on other files, see compressing an image to 100 KB.
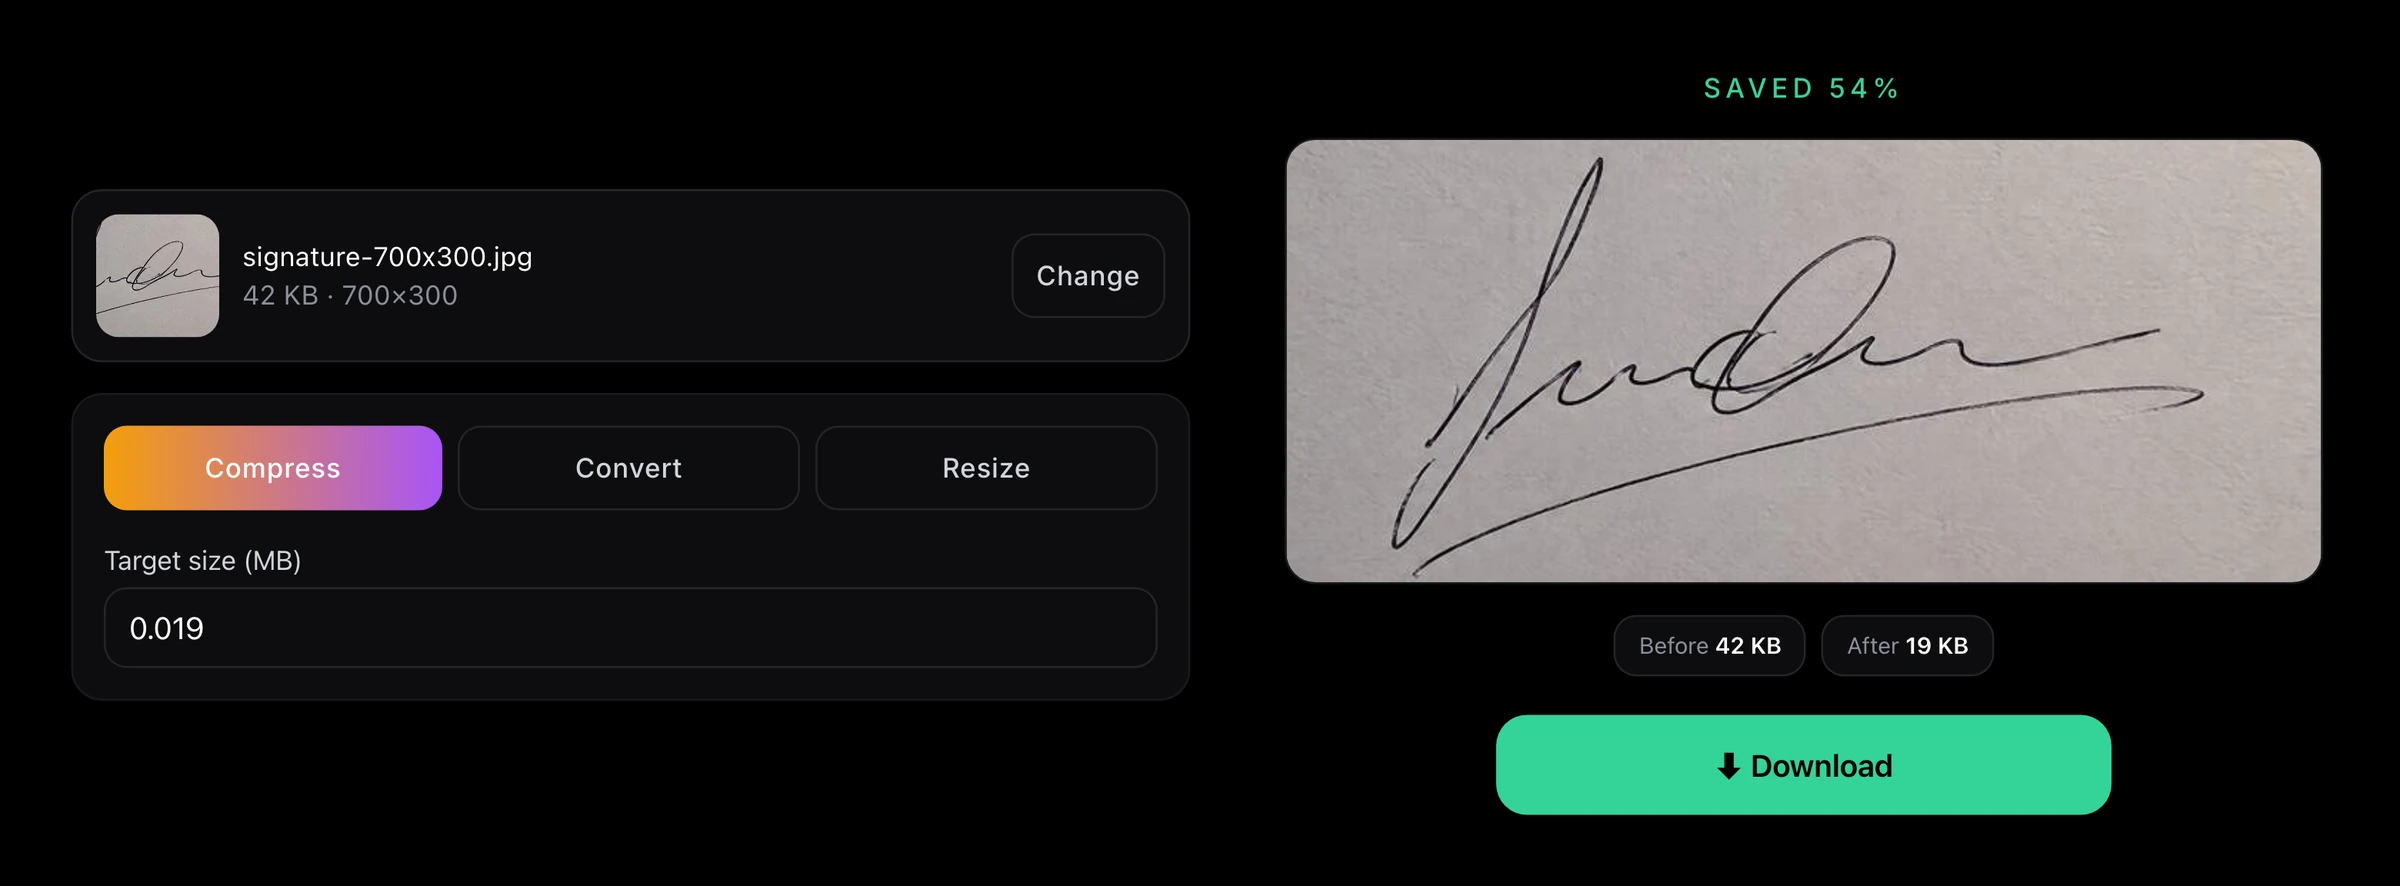
Two real product captures from our test, placed side by side: the settings, and the result card that replaces them after you press Process. The card counts 1 KB as 1,024 bytes and rounds, so its "19 KB" is 19,643 bytes.
How many pixels does a signature need to stay legible at 10–20 KB?
In our test, 350 × 150 px was enough. We cropped one signature to 7:3 and ran it through the live tool on 22 September 2026. At 350 × 150 px it was 12,155 bytes with clean strokes. At 700 × 300 px, compressed to 19,643 bytes, the thin lines stayed dark and continuous. At 140 × 60 px they did not.
| Pixel size | Steps in the tool | File size |
|---|---|---|
| 140 × 60 px | Resize 140 | 2,826 bytes |
| 350 × 150 px | Resize 350 | 12,155 bytes |
| 700 × 300 px | Resize 700, then Compress 0.019 | 19,643 bytes |
At 140 × 60 px the strokes turn grey and the loops merge where lines cross. That file is also under a 10 KB minimum, and Compress can't add bytes. If a notice sets both a minimum and a maximum, resize to a size that lands inside the range first, then compress only if you are over the top.
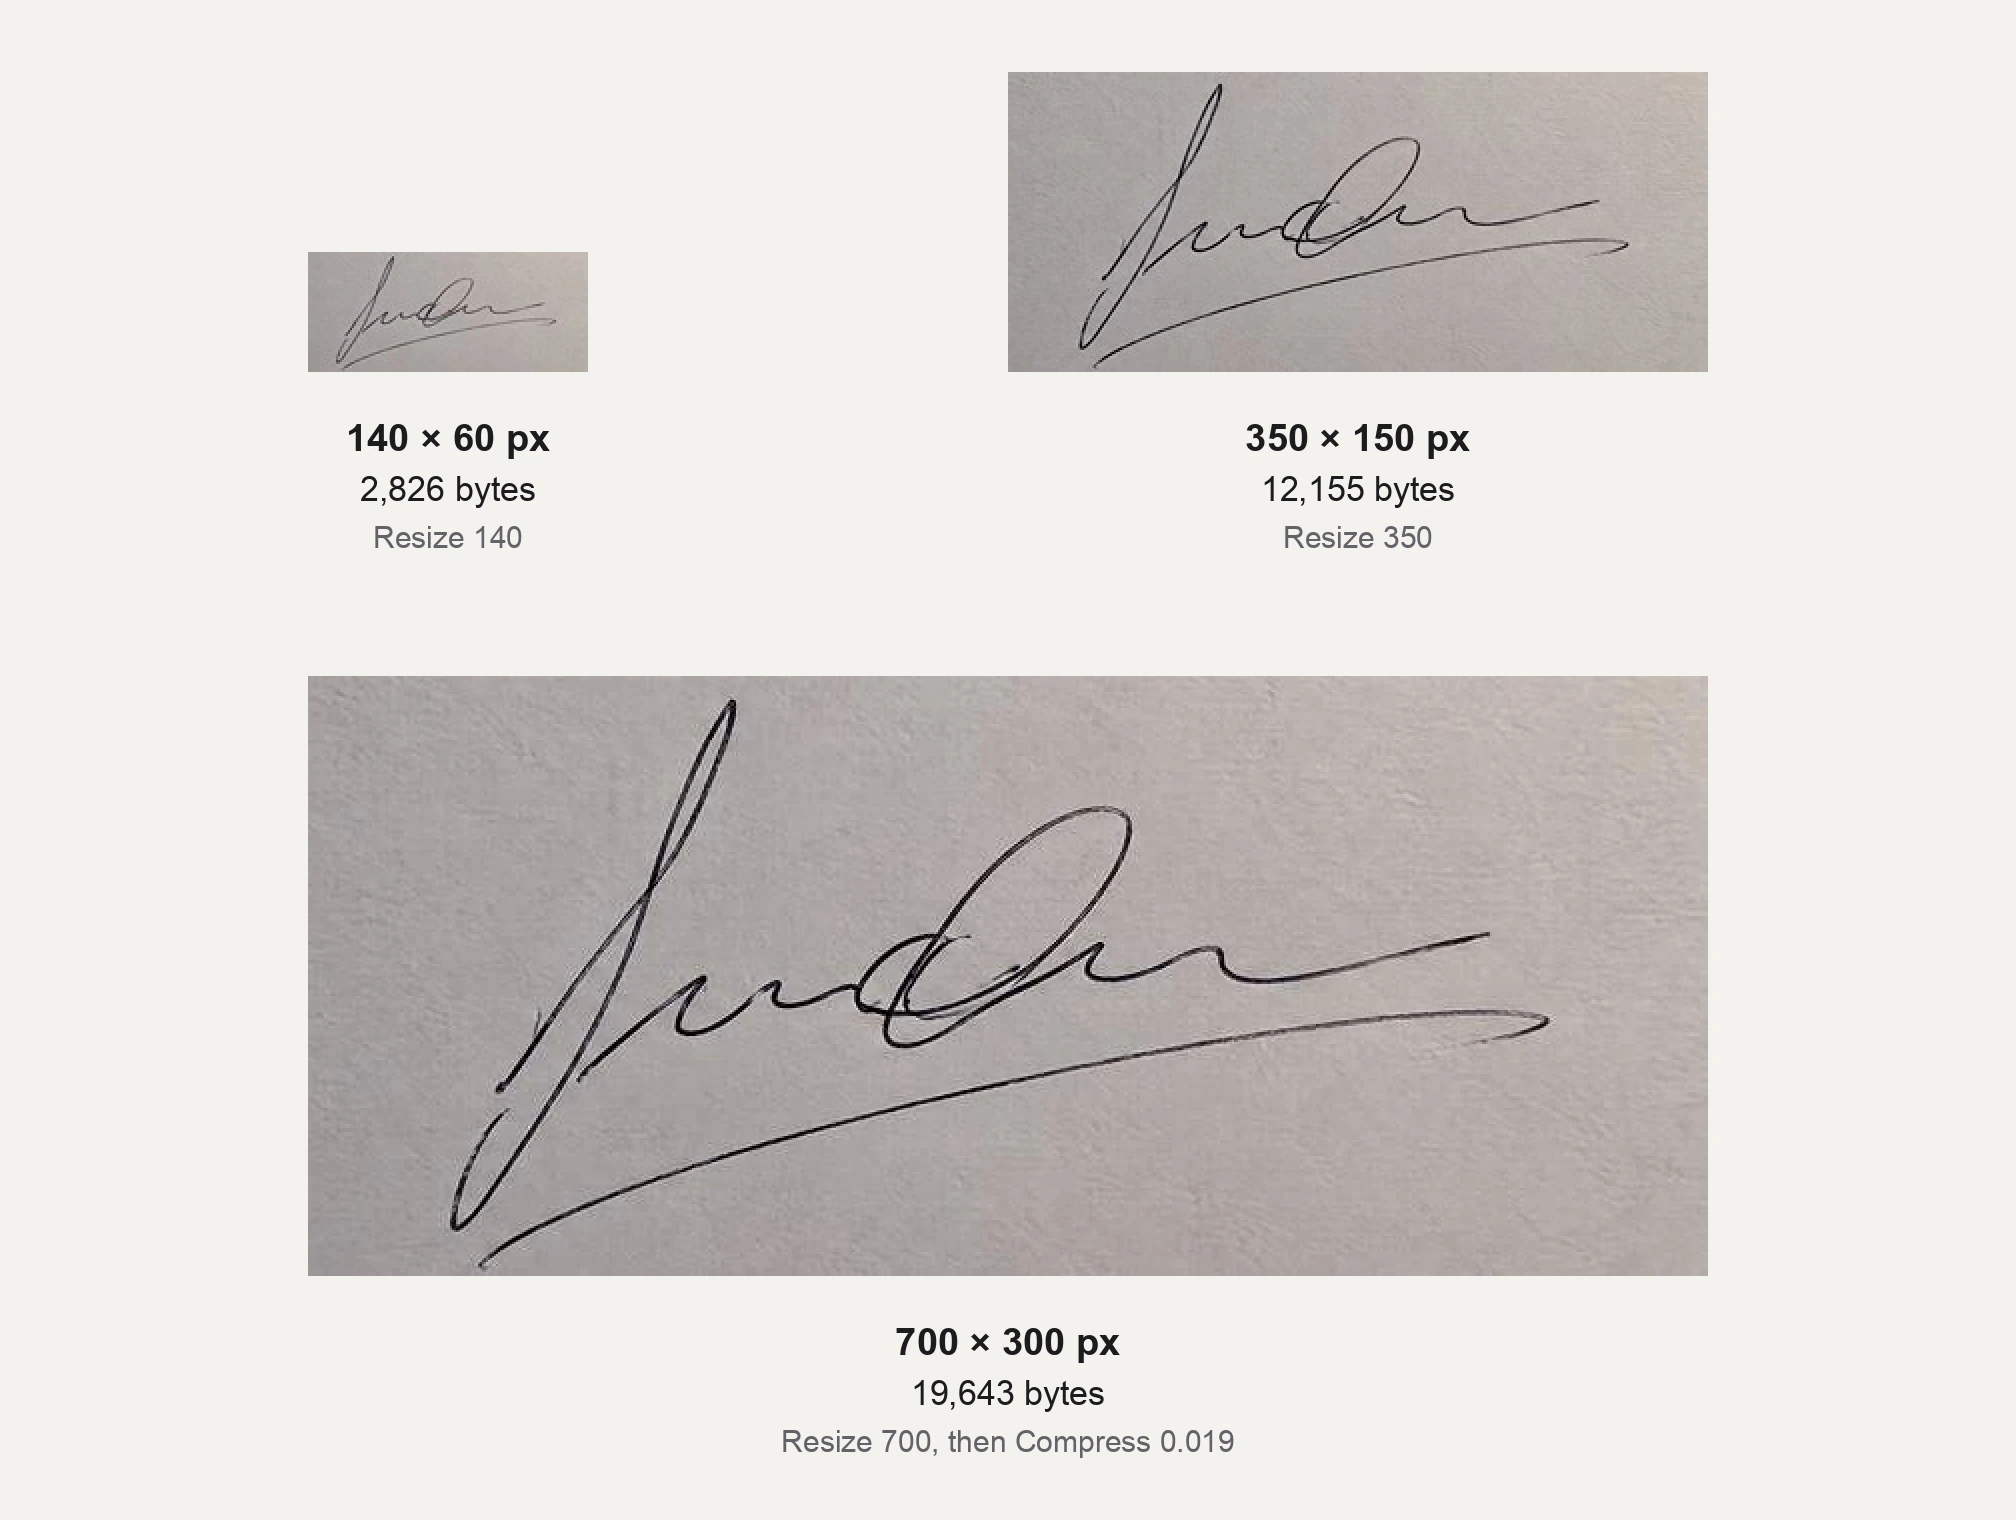
Real result, drawn at actual pixel size in a full-width desktop window; narrower screens scale it down. The paper in our test image came out grey; yours should look white, so photograph it in even daylight. The signature is AI-generated, not a real person's.
How do I compress a signature step by step?
Sign, photograph, crop, resize, check the bytes, and compress only if the file is still too big. The order matters: Resize sets the pixel count, which decides most of the file size, and Compress only trims what is left. Signing, photographing and cropping happen on your phone.
- Sign your name in black ink on plain white paper, then photograph the page flat in even daylight.
- Crop tightly around the ink on your phone. The tool has no crop. If the notice gives a pixel size, crop to its shape: 140 × 60 is 7:3, and a 300 × 100 box is 3:1.
- Open the Image Compressor, add your cropped signature, choose Resize and type the longer side in Max width/height (px), for example
350. The other side follows your crop. Resize never enlarges past your original. - Download and check the exact bytes. On Windows use Properties, on a Mac use Get Info. The result card rounds and counts 1 KB as 1,024 bytes.
- If the file is over the limit, load it again, choose Compress and type the value from the table above.
- If the file is under the minimum, resize again from your cropped original with a larger longer side.
Compress keeps the pixel size and lowers JPG quality in 5% steps, up to ten times, ending near 60%. If the file still doesn't fit, it returns that last attempt without a warning, so a file that stays over the limit needs a smaller pixel size, not a second Compress. It saves a JPG unless you chose another format under Convert or Resize first.
How do I make the UPSC three-signature image?
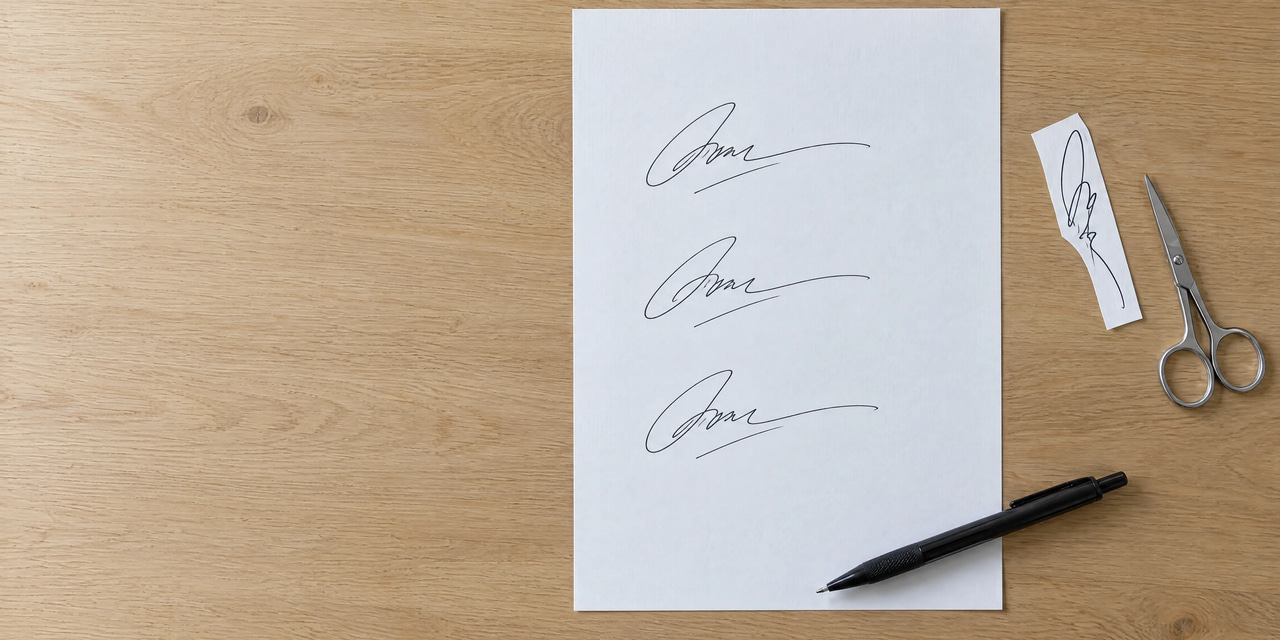
According to Vajiram & Ravi's UPSC guide (updated 27 August 2026), UPSC CSE 2026 asks for one JPG showing your signature three times, one below the other, in black ink on plain white paper without lines. The guide gives 20–100 KB and image dimensions of 350 to 500 pixels, without saying which side. The official notice overrides any guide.
We tested a sheet with three signatures on 22 September 2026:
- Cropped tight to the ink (about 1:2), Resize 500: 240 × 500 px at 26,753 bytes, inside 20–100 KB, but only 240 px wide.
- The same crop, Resize 350: 168 × 350 px at 13,514 bytes, under the 20 KB minimum.
- Cropped to 7:10 with paper left on both sides, Resize 500: 350 × 500 px at 35,272 bytes. Both sides fall inside 350–500 px, and the size is inside 20–100 KB.
None of these files was over 100 KB, so Compress wasn't needed. Unless your notice gives an exact size, crop the stack to about 7:10 with even space between the signatures, Resize to 500, and check the bytes.
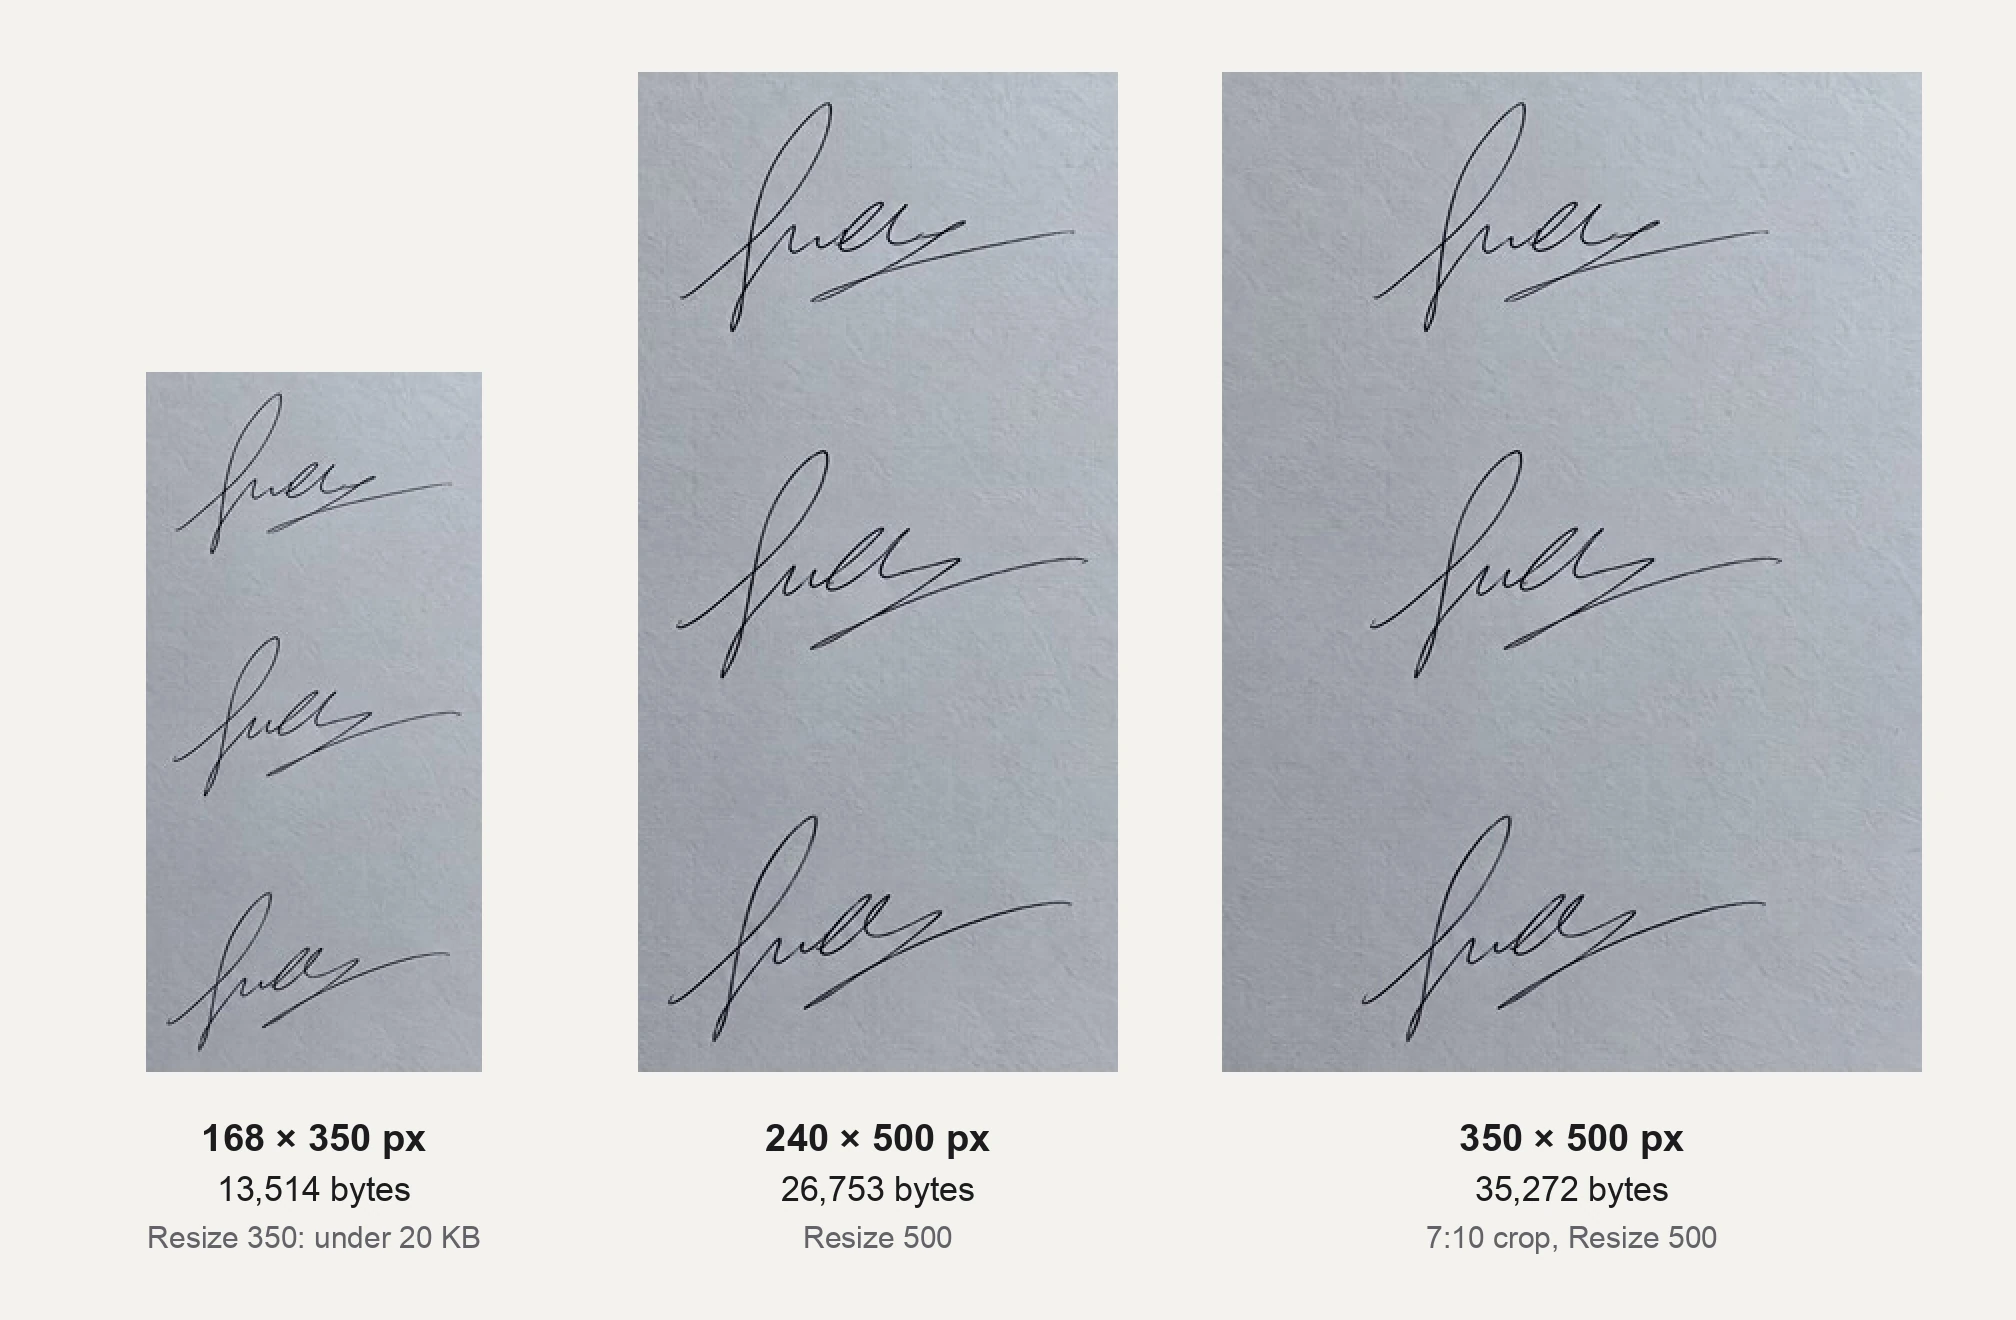
Real result from the live tool, drawn at actual pixel size in a full-width desktop window; narrower screens scale it down. The paper in our test image came out grey-blue. UPSC asks for plain white paper, so your upload should look white: photograph the sheet in even daylight. The signatures are AI-generated, not a real person's.
What makes a signature scan fail even when the size is right?
A correct file size is only one check. Notices also set rules for ink, background, shape and content, and the compressor changes none of them. Fix these when you sign, photograph and crop, because a small file with the wrong ink or a missing signature still fails.
- Ink and case. Guidely's IBPS PO 2026 guide (23 July 2026) asks for a running signature in black ink on white paper and says one in capital letters is not accepted. Vajiram & Ravi's UPSC guide also asks for black ink.
- Background. The UPSC guide asks for plain white paper with no lines or coloured background. Photograph the page in even light so the paper doesn't come out grey.
- Content. The UPSC guide says the image must contain exactly three signatures, upright and in order.
- Shape. The IBPS PO guide gives 140 × 60 px as preferred, at 10–20 KB. Check whether your notice says preferred or mandatory.
Why does the form still reject my signature file?
A form can reject a signature file for being over the maximum, under the minimum, in the wrong format or at the wrong pixel size. Read the exact byte count first, because the size on screen is rounded. Each cause has one fix:
- Over the maximum after Compress: the pixel size is too large for the target. Resize smaller, then compress again.
- Under the minimum: Compress only removes bytes. Resize again from the cropped original with a larger longer side.
- Wrong format: leave Format on JPG, which Compress uses unless you changed it under Convert or Resize.
- Cut to the wrong shape: crop again on your phone. Cropping after compressing creates a new file whose size you haven't checked.
Is my signature uploaded anywhere?
No. Resize and Compress run in your browser, and the image never leaves your device. The page sends our server only a usage check with the tool name and a device ID. Each Resize or Compress counts as one run, and five runs work before the tool asks you to sign in.
You can check this yourself in a desktop browser:
- Open the Image Compressor, add your signature and choose the settings.
- Open the developer tools (F12 on Windows, Cmd+Option+I on a Mac) and select the Network tab.
- Press Process and watch the new rows.
When we did this on 22 September 2026 without signing in, one request sent data: a POST named free-tool-charge, 79 bytes, containing only the tool name and a device ID. The other new rows were GET requests that load the compressor's code or read site settings, and blob: rows that stay inside your browser. The finished file's link also starts with blob:, which means your browser made it. Chrome may list a preflight row for the same address, which carries no data.
Your cookie choices can add rows. If analytics or marketing cookies are on, as they are by default in some regions, you will also see analytics and ad requests. They record page activity, which can include the file name shown on screen, but not the image. To leave them out, turn off Analytics and Marketing under Cookie Preferences in the footer, then reload the page. Error monitoring can also send an occasional report. None of these requests carries your image.
For more tools that work this way, see our roundup of private image tools that run in the browser.
How we tested
- Date and tool: 22 September 2026, the live Image Compressor, using Resize and Compress.
- Inputs: AI-generated test images, not a real person's signature: one signature cropped to 7:3, and one sheet with three signatures, cropped tight to the ink (about 1:2) and, separately, to 7:10.
- Runs: Resize 140, 350 and 700 on the single signature, then Compress
0.019on the 700 px file; Resize 500 and 350 on the tight three-signature crop, and Resize 500 on the 7:10 crop. - Measured: the exact byte count of each downloaded file, not the rounded KB on the result card, and how the strokes look at actual pixel size.
- Privacy check: the browser's Network tab while pressing Process, without signing in.