A transparent background PNG is just a regular image file where the background pixels carry no color — they are fully see-through. Drop it onto any slide, website, or design and it blends in perfectly. The tricky part used to be getting there: you either needed Photoshop or you had to upload your photo to some website and hope it came back clean.
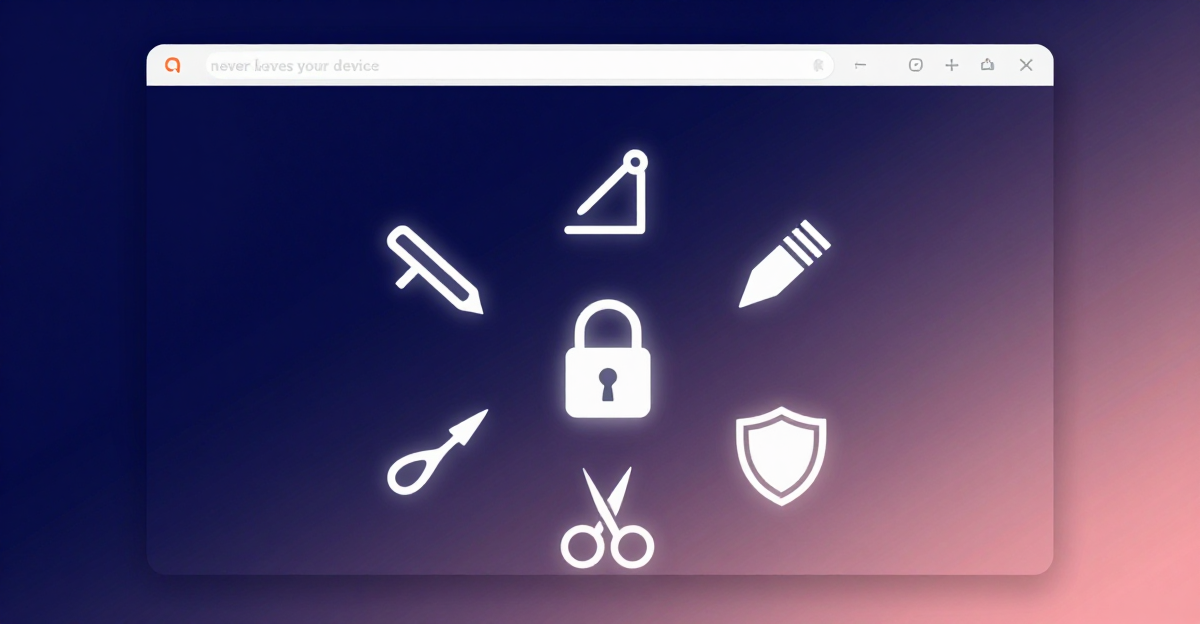
Neither of those is necessary anymore. Imagera's free Background Remover runs the entire process inside your browser. Open the tool, drag in your photo, and within a few seconds the subject is isolated on a transparent background ready to download as a PNG. No account. No upload. No waiting.
The rest of this guide explains when you actually need a transparent PNG, what the checkerboard preview means, how different tools compare, and how to get a clean cut every time.
1.What Is a Transparent Background PNG?
PNG (Portable Network Graphics) is one of the few image formats that supports an alpha channel — a hidden layer that records how transparent each pixel is, on a scale from fully opaque to fully invisible.
When a PNG has a transparent background, the subject pixels are opaque and the background pixels are transparent (alpha = 0). Most image editors and design tools honor this: put the image on a white slide and the background looks white; put it on a dark slide and the background looks dark. The image adapts to whatever is behind it.
JPEG does not have an alpha channel, so you cannot save a transparent background as a JPEG. You will always need PNG (or WebP, which also supports transparency). If someone sends you a "transparent JPEG," the background is actually white — it just looks transparent on a white screen.
2.Why the Checkerboard Pattern?
When you open a transparent PNG in a browser or image editor, the transparent areas usually display as a grey-and-white checkerboard. This is not a bug. It is a standard visual convention that means "this area has no color — it is see-through."
The checkerboard is just a preview indicator. It will not appear in your final design. When you place the PNG over a blue background in Canva, for example, the checkerboard disappears and the blue shows through instead.
If you export the PNG and re-open it in a viewer that does not support transparency (such as the default Windows Photo viewer or some email clients), the transparent area may render as white or black. The file is still correct — that viewer just fills transparent areas with a default color. Your design tool will handle it properly.
3.When Do You Actually Need a Transparent PNG?
Knowing when to use a transparent PNG saves a lot of wasted effort. Here are the most common scenarios:
Logos on websites and presentations. A company logo almost always needs a transparent background so it can sit cleanly on any color — a white header, a dark footer, a colored slide template. A logo saved as JPEG with a white box around it looks unprofessional on anything but a white surface.
Product photos for e-commerce. Amazon, Shopify, Etsy, and most other platforms let you place products on a white canvas or show them in lifestyle mockups. Cutting the product out to a transparent PNG first gives you control over both: place it on pure white for marketplace listings, then drop the same file into a scene for social media.
Profile picture cutouts. For custom team pages, LinkedIn banners, or event materials, removing the background from a headshot and placing it on a branded color or gradient makes a cleaner visual.
Stickers and overlays. Any time you layer images — a person in front of a different city, a brand logo on a product mockup, a graphic element on a poster — the top layer needs a transparent background.
Social media graphics. Instagram carousels, Pinterest pins, and YouTube thumbnails often use cutout subjects layered over text or colorful backgrounds. Starting with a clean transparent PNG makes this straightforward in Canva, Adobe Express, or any editor.
4.What Makes a Good Background Removal Tool?
All background removers aim to do the same thing — separate the subject from the background — but the quality of the result varies significantly depending on how well the tool handles edges. Here is what to look for:
Edge accuracy on hair and fur. Straight edges on products and logos are easy. The real test is hair: fine strands, wispy ends, flyaways. A poor tool will clip them off or leave a halo of the original background color. A good tool preserves the fine detail.
Handling complex or similar-color subjects. If your subject is a dark jacket in front of a dark wall, the tool has to understand the scene semantically, not just by color difference. Color-contrast-based tools struggle here; AI-based tools handle it significantly better.
Output file quality. Some free tools compress the output, degrade resolution, or add watermarks. The tool should return the same pixel dimensions as your input, at full quality.
Privacy. If the photo is sensitive — a client's face, a product that has not launched, internal documents — you may not want it on a third-party server. A browser-based tool that processes the image locally removes that concern entirely.
5.How Imagera's Free Background Remover Works
Imagera's free Background Remover processes your image entirely inside your browser using on-device computation. The image is never sent to a server. You can verify this by turning off your internet connection after the page loads — the removal still works.
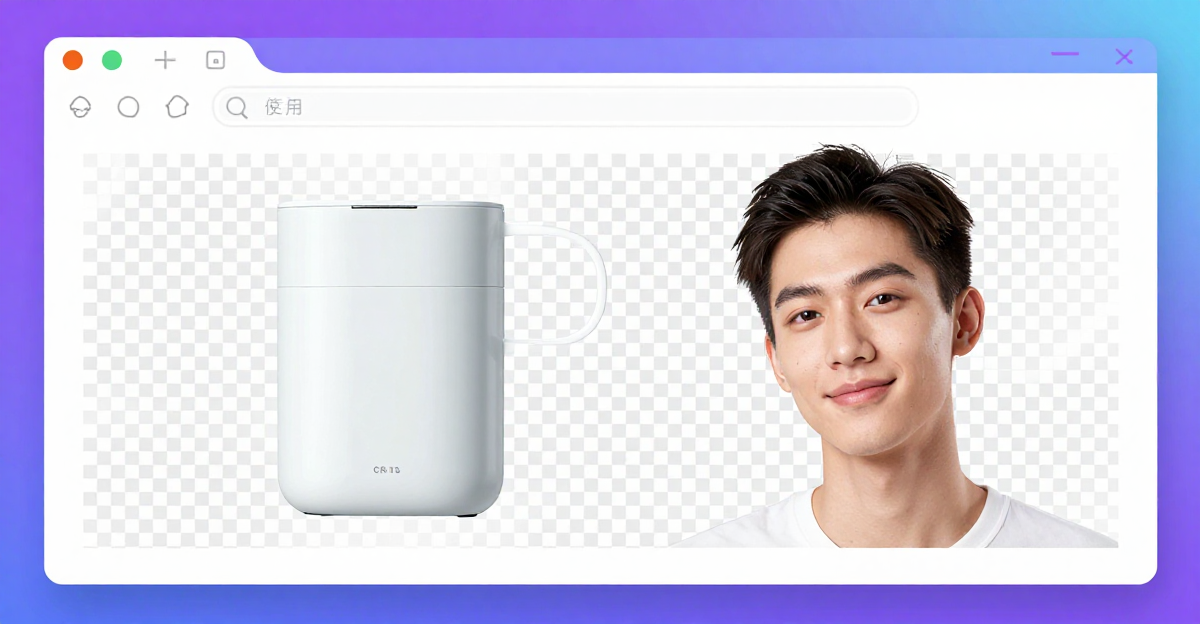
The tool identifies the main subject of the image — person, product, animal, object — and separates it from the background. The result is a PNG with a transparent background, available to download immediately at the same resolution as your input.
It works well on:
- People and portraits (including complex hair)
- Products on cluttered backgrounds
- Logos and graphics with irregular edges
- Animals and pets
- Objects with defined shapes
The output is a standard PNG file with an alpha channel, compatible with Canva, Figma, Adobe Express, PowerPoint, Google Slides, Shopify, and any other tool that accepts transparent PNGs.
6.Step-by-Step: Remove a Background and Download a Transparent PNG
Follow these steps to go from a regular photo to a clean transparent PNG in under a minute.
-
Open the tool. Go to imagera.ai/free/background-remover in any modern browser on desktop or mobile. No account or sign-in is required.
-
Load your image. Click the upload area or drag and drop your image directly onto the page. Supported formats include JPG, PNG, and WebP. For best results, use an image where the subject is clearly visible and reasonably well-lit.
-
Wait for the cutout. The tool processes the image on your device. Depending on image size and your hardware, this takes a few seconds. You will see the subject isolated on the checkerboard preview when it is done.
-
Review the edges. Zoom in on the edges of the subject, especially around hair or fine details. If the cut looks clean, proceed. Most images come back clean on the first pass.
-
Download the PNG. Click the download button. The file saves to your device as a PNG with full transparency. The filename typically reflects the original file name.
-
Use it anywhere. Drop the downloaded PNG into Canva, Figma, your website CMS, a presentation, or any design tool. The background will be transparent and will adapt to whatever surface you place it on.
That is the entire process. Nothing was uploaded or stored.
7.Transparent PNG for Logos: A Few Extra Tips
Logos have specific requirements that are worth calling out separately.
Always keep the original. Before you remove the background, save a copy of the original logo file. Transparent PNG versions are outputs, not working files.
Watch for white-on-white issues. If your logo has white elements and you are removing a white background, a color-contrast-based tool will eat the white parts of the logo along with the background. AI-based tools handle this better because they understand the logo as a shape, not just a color region. Test with a small crop first.
Check all the edges. Logos often have fine type, thin lines, or delicate corners. Zoom in at 100% or more after removal to check that nothing has been clipped. If the edge quality is not right, re-run with a slightly higher-resolution version of the logo if you have one.
Save at 2x resolution if you can. If your logo source is 600px wide and you need it at 300px, start with the 600px version. Remove the background, then scale down. Scaling down preserves more edge detail than working at target size.
Use PNG, not WebP, for maximum compatibility. WebP also supports transparency and is smaller, but some older tools, email clients, and CMS platforms do not handle WebP reliably. PNG is the safest choice for logos going to unknown destinations.
8.Transparent PNG for Product Photos
Product photography for e-commerce has a straightforward workflow once you have a good background remover.
Shoot the product on a simple background — white, grey, or a single muted color makes the removal cleaner and faster. Remove the background to get a transparent PNG. From that PNG you can:
- Place the product on a pure white (#FFFFFF) background for Amazon and marketplace listings
- Layer it into lifestyle scenes or mockups
- Add a drop shadow underneath for a floating look
- Resize to different aspect ratios for different platforms (square for Instagram, landscape for Google Shopping)
Working from a transparent PNG is more flexible than re-editing the original photo every time because the cutout is already done.
9.Comparison: Background Removal Options
| Tool | Cost | Processes locally? | Max resolution | Output format |
|---|---|---|---|---|
| Imagera free Background Remover | Free | Yes — browser only | Full resolution | PNG |
| Remove.bg | Free (limited) / Paid | No — server upload | 0.25MP free / full on paid | PNG |
| Canva background remover | Paid plan required | No — server upload | Full resolution on paid | PNG |
| Adobe Express | Free tier / Paid | No — server upload | Limited free / full on paid | PNG |
| GIMP (desktop app) | Free | Yes — local install | Unlimited | PNG and others |
| Photoshop | Subscription | Yes — local install | Unlimited | PNG and others |
Imagera's free tool is the only browser-based option in this list that processes locally at full resolution with no cost and no account. For anyone who wants a quick, private, full-quality result without installing software or paying for a plan, it is the most practical choice.
For heavy production workflows — hundreds of images per day, complex compositing — a desktop app or paid API-based solution may be a better fit. For individuals, small teams, and occasional use, the browser tool covers the need.
If privacy is a factor in your decision, the guide to safe online image editing walks through what different tools do with your data and how to evaluate the risk.
10.Common Problems and How to Fix Them
The edge looks rough or jagged. This usually happens with low-resolution images. If you can source a higher-resolution version of the photo, the removal will be cleaner. If you are stuck with the low-res version, zoom out — jagged edges are often less visible at normal viewing size.
Part of the subject got removed. This can happen when the subject and the background are very similar in color. Try using a slightly different source image with better contrast. Alternatively, if you are working with a logo or graphic, recreate it as a vector (SVG) where possible, since vectors are already resolution-independent and background-free.
There is a faint halo around the subject. A color halo (a thin ring of the original background color at the edge) is a common artifact. It tends to show up more on dark subjects removed from light backgrounds or vice versa. Placing the cutout on a background close in tone to the original helps minimize its visibility, or you can do a quick edge-clean pass in any basic image editor.
The background shows through in semi-transparent areas. Some subjects have naturally semi-transparent edges — think gauze fabric, glass, or hair against a bright sky. These areas are genuinely difficult for any automated tool to handle perfectly. For most use cases the result is still good enough; for critical work (packaging, advertising materials) a manual touch-up step may be needed.
11.Privacy Note
Imagera's free Background Remover runs entirely on your device. Your photos are not uploaded, not stored, and not visible to anyone else. This is particularly relevant for product images that have not launched, client headshots, or any personal photos you would rather keep off third-party servers. For more context on why this matters, see the overview of the best private no-upload image tools.
12.Frequently Asked Questions
12.1What file format should I save a transparent background image as?
PNG is the standard choice because it supports full transparency through an alpha channel and is widely compatible with design tools, CMS platforms, and browsers. WebP also supports transparency and produces smaller file sizes, but is less universally supported — especially in older tools and email clients. JPEG does not support transparency at all.
12.2Why does my transparent PNG look white when I open it?
Some image viewers — including the default Windows Photos app and certain email clients — do not render transparency correctly. They fill transparent areas with white or black as a default. Your file is not broken. Open it in a design tool (Canva, Figma, PowerPoint, Photoshop) to confirm the transparency is intact: you will see the checkerboard pattern instead of a white fill.
12.3Can I remove the background from a logo to get a transparent PNG?
Yes. Imagera's free Background Remover works on logos and graphics as well as photos. The main caveat is logos with white elements on a white background — the tool needs enough visual distinction to identify the logo shape. If your logo has a transparent or clearly colored background already, the removal is straightforward.
12.4How do I make a product photo background white vs transparent?
These are two different outputs. A transparent PNG has no background — it is see-through. A white background PNG has the background painted solid white (hex #FFFFFF). If you want a white background: remove the background to get the transparent PNG, then open it in any image editor and place it on a white canvas before exporting as PNG or JPEG. Marketplace listings like Amazon typically require a pure white background, not transparency.
12.5Does transparent background removal work on mobile?
Yes. Imagera's free Background Remover works in mobile browsers on both iOS and Android. Performance depends on your device's processing speed, but modern phones handle it well. You can download the resulting PNG directly to your phone's camera roll or files app.
12.6Is the checkerboard pattern part of my PNG file?
No. The checkerboard is a standard preview convention used by image software and browsers to indicate transparent areas. It is generated by the viewer, not stored in the file. Your downloaded PNG contains transparent pixels in those areas — when you place the image in a design tool, the actual background shows through instead of a checkerboard.
12.7Can I use a transparent PNG in PowerPoint and Google Slides?
Yes. Both PowerPoint and Google Slides support transparent PNG files. Insert the image using the standard Insert > Image workflow and the background will be transparent, showing whatever is behind the image on your slide. This works for logos, product cutouts, and portrait cutouts.
12.8What is the difference between a transparent background and removing the background?
They refer to the same outcome: the background area becomes transparent. "Removing the background" is the action; "transparent background PNG" is the result. Some tools use one phrase, some use the other — they are interchangeable in practice.
A transparent background PNG is one of the most useful outputs in everyday design work, and getting one no longer requires Photoshop or a paid subscription. Imagera's free Background Remover handles logos, products, portraits, and most everyday subjects cleanly, in your browser, with the full-resolution PNG ready to download in seconds.
If you regularly need to compress images for web alongside removing backgrounds, the image compression guide for smaller files covers a complementary free tool for that task.