You can complete this on Imagera without installing software: upload a real source file, describe the change, confirm credits up front, generate, and review before you publish. Fix Pixelated Video Free: 4 Ways to Restore HD — this guide covers the steps, quality checks, and when to open related tools.
How to Fix a Pixelated Video
Pixelation happens when a video has too few pixels for the size you're viewing it at — the blocky squares you see are the pixels themselves, stretched. It shows up in old phone clips, screen recordings, heavily compressed downloads, zoomed-in footage, and anything exported at a low bitrate.
Here's the honest part most guides skip: you cannot recover detail that was never recorded. What you can do is intelligently rebuild it. Modern AI enhancers analyze each frame, reconstruct sharp edges and texture, remove compression blocks, and then upscale the result to HD or 4K. The four methods below go from "quick and free" to "actually restores detail," so you can pick what fits.
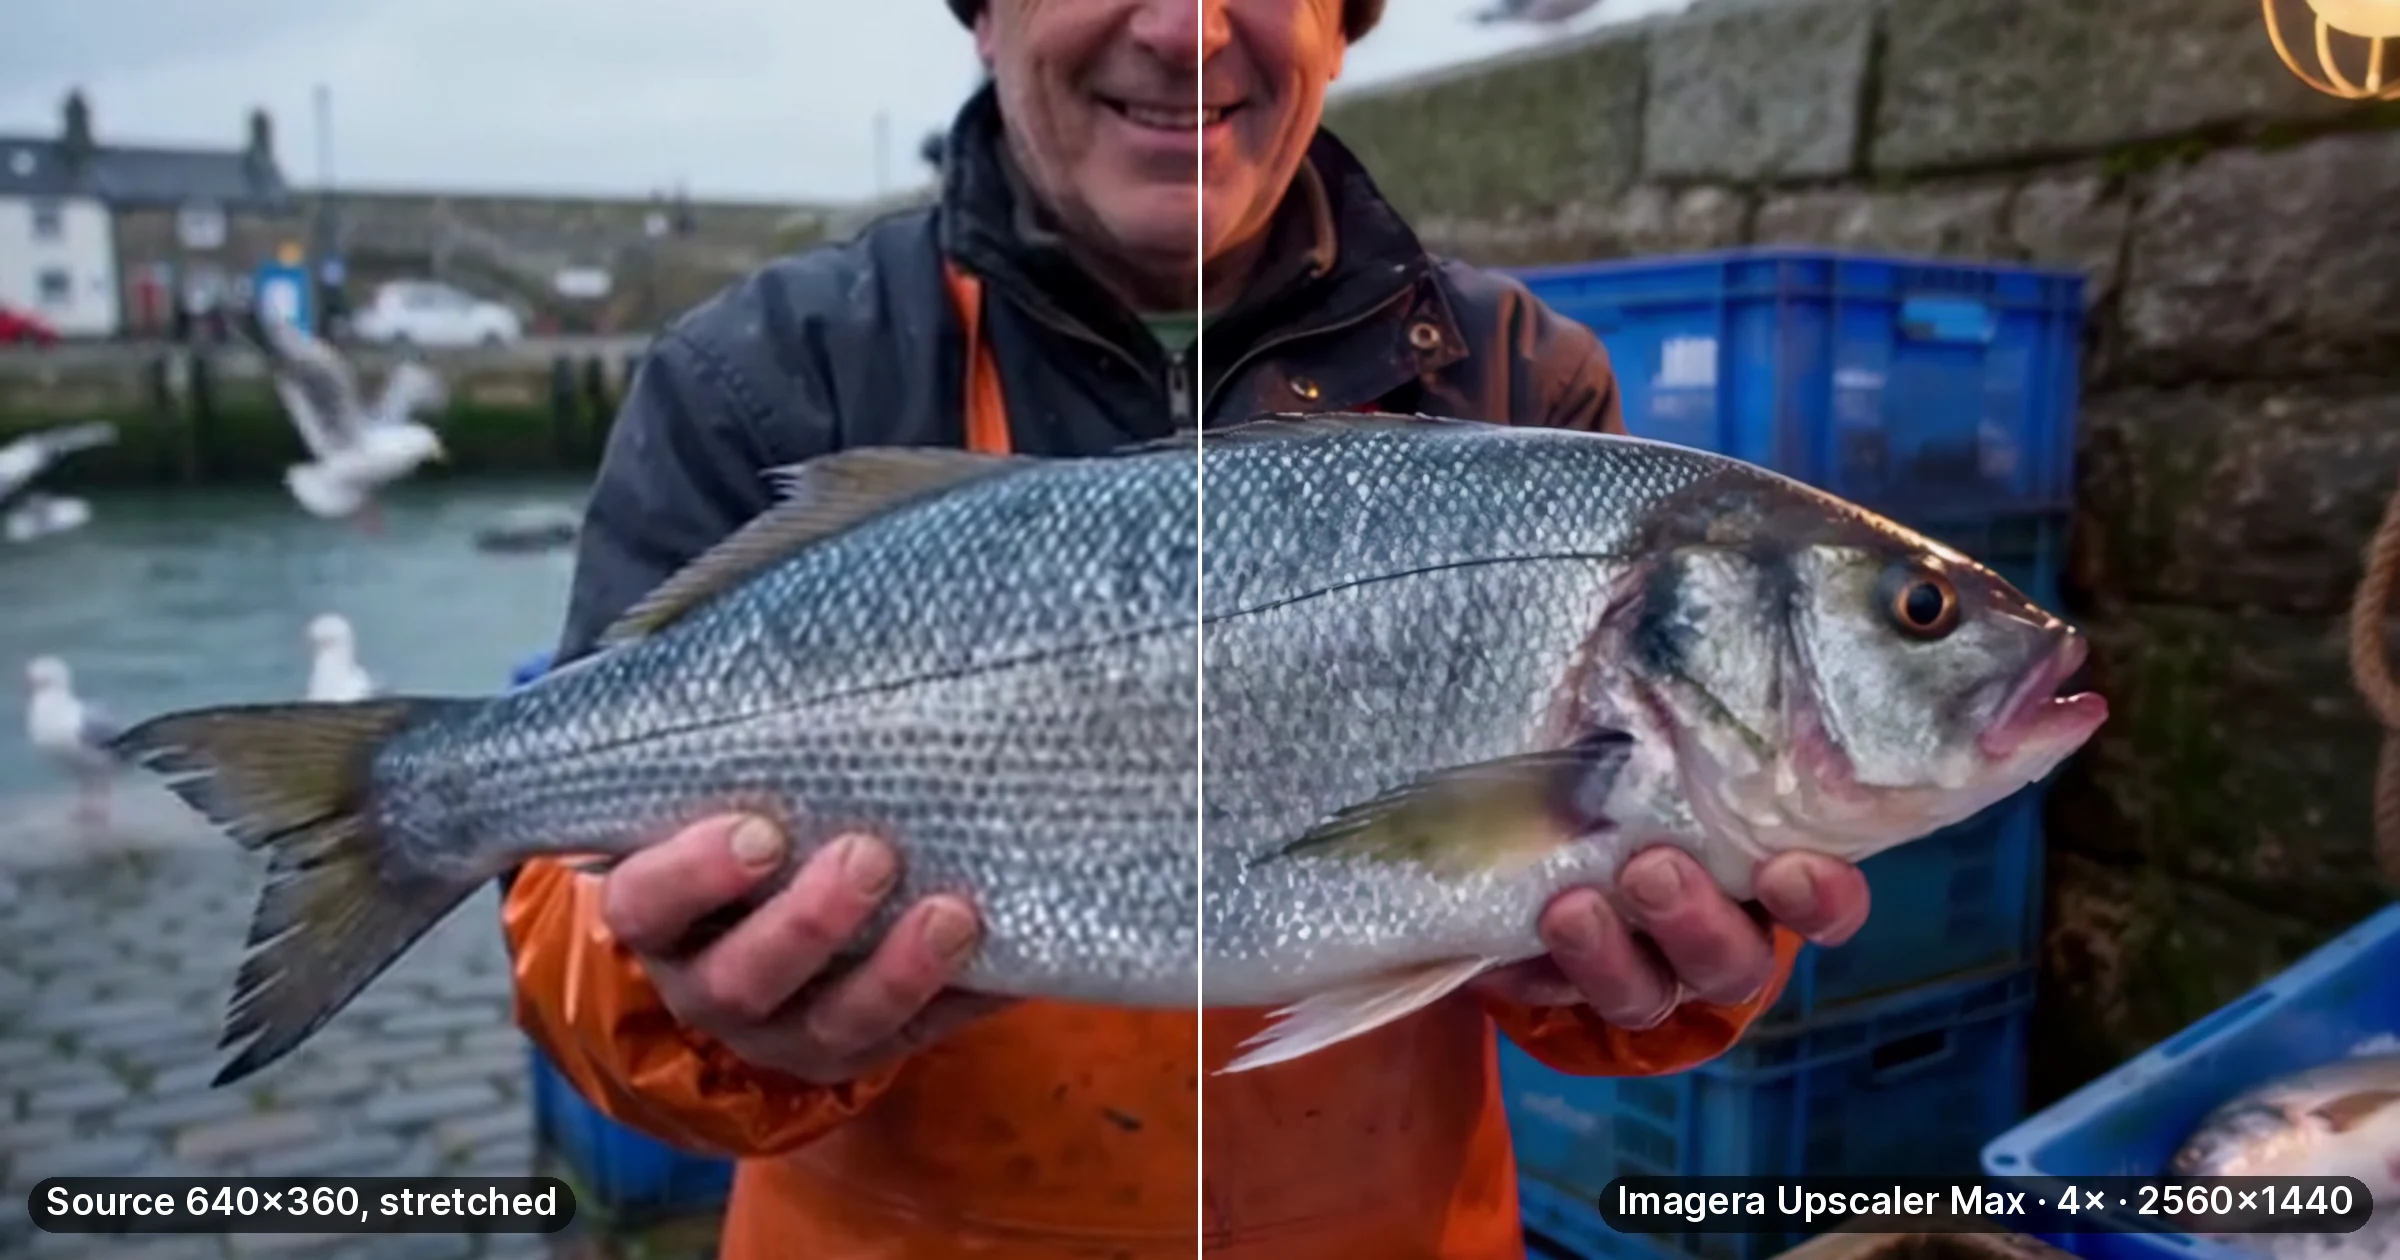
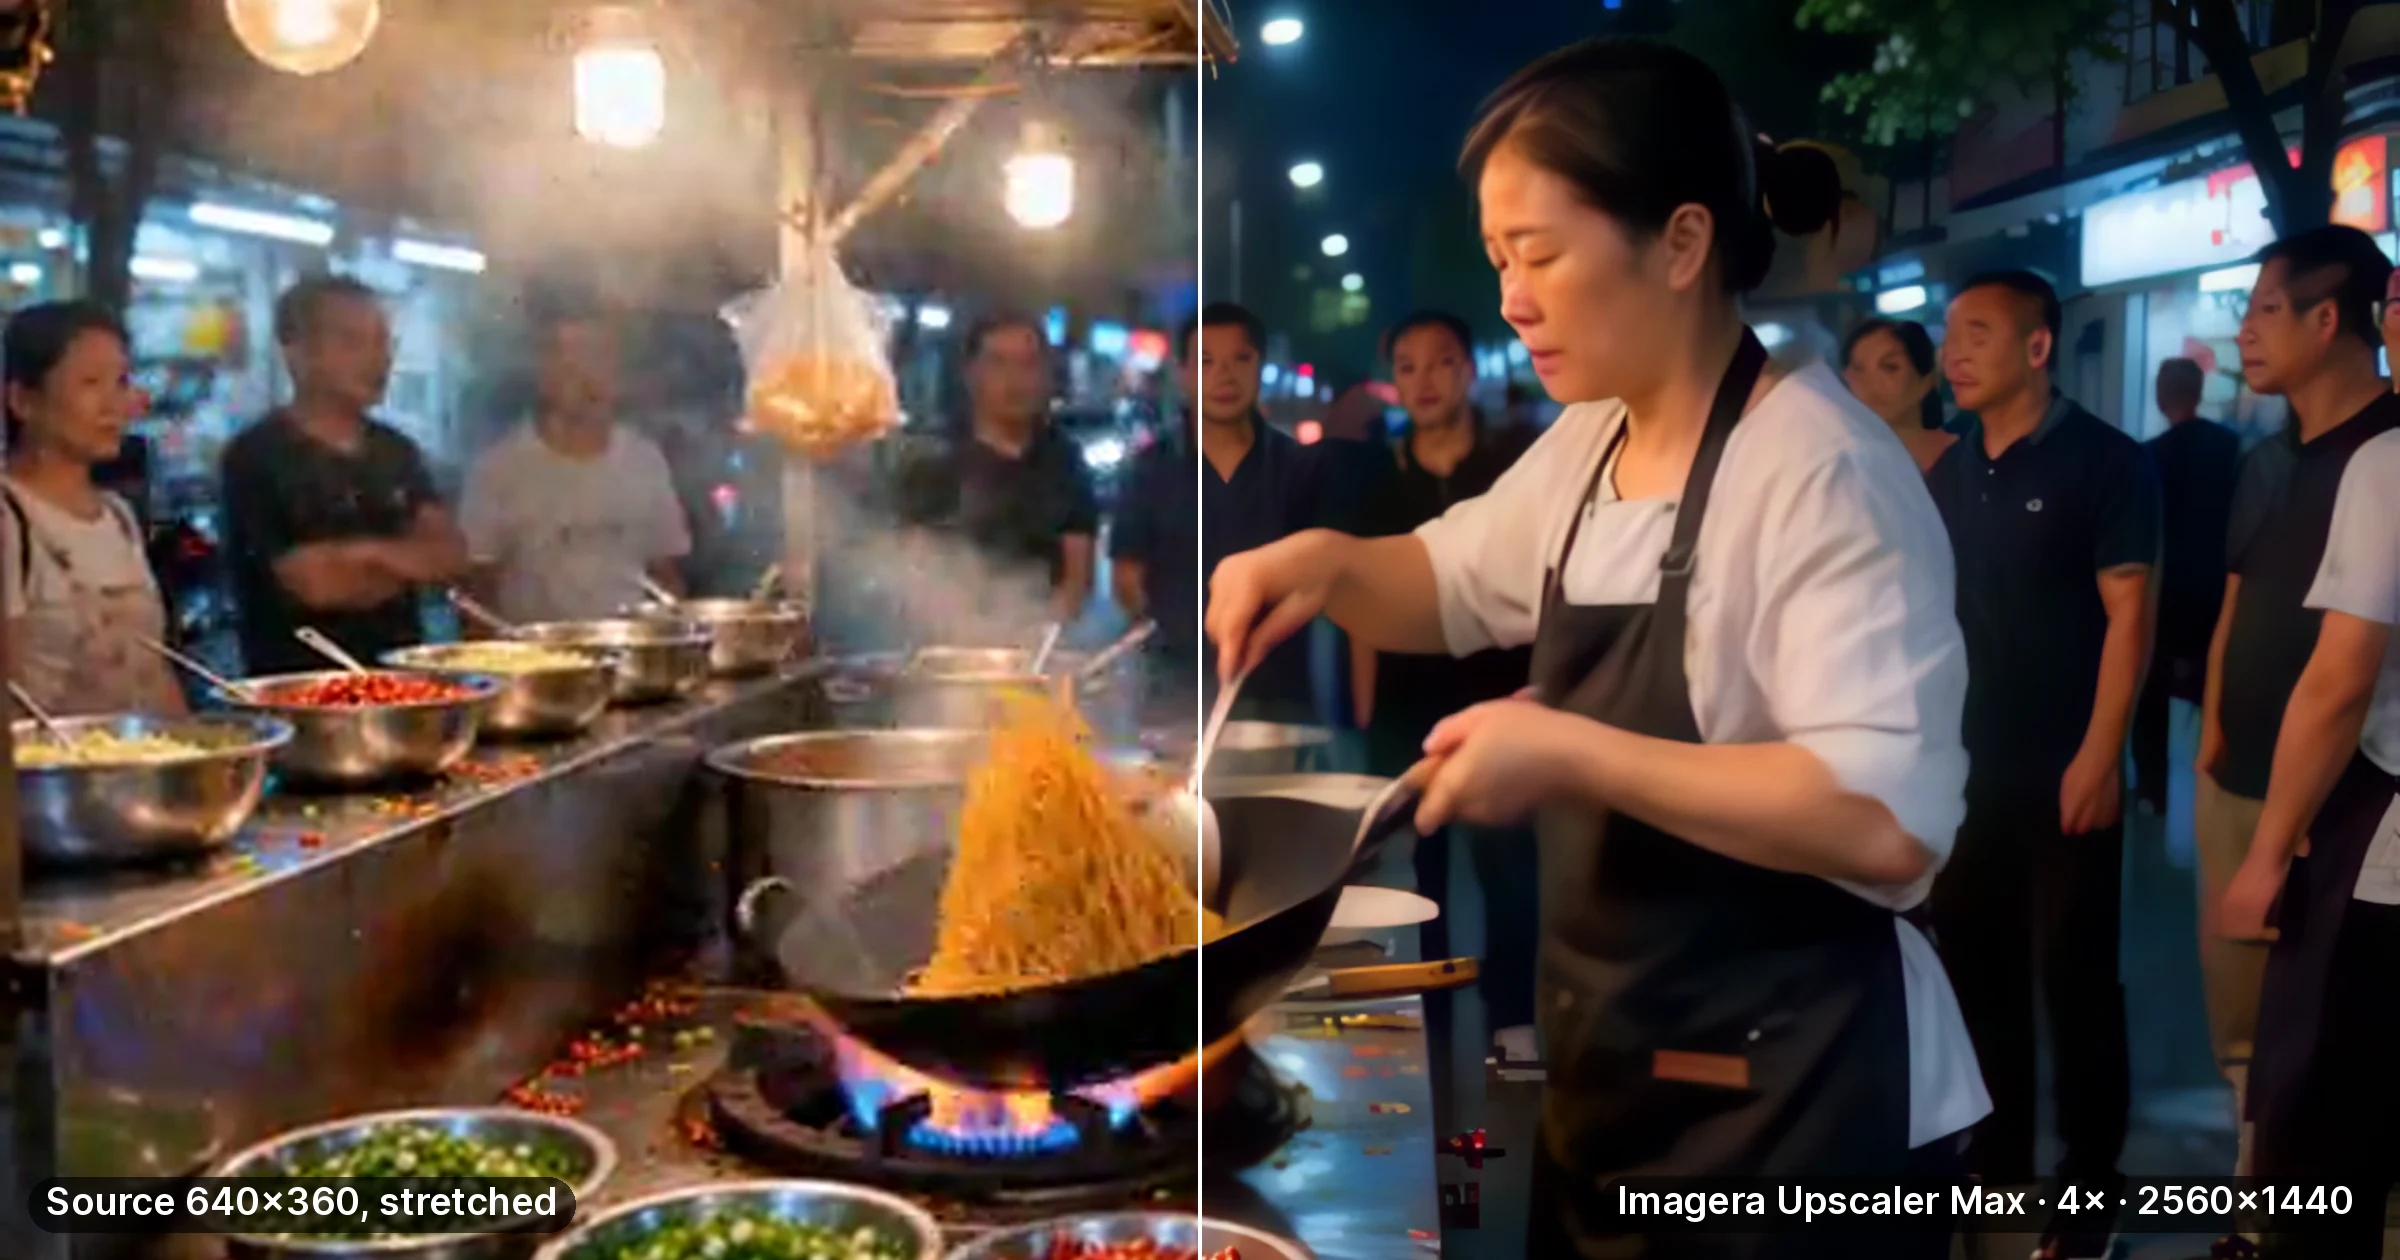
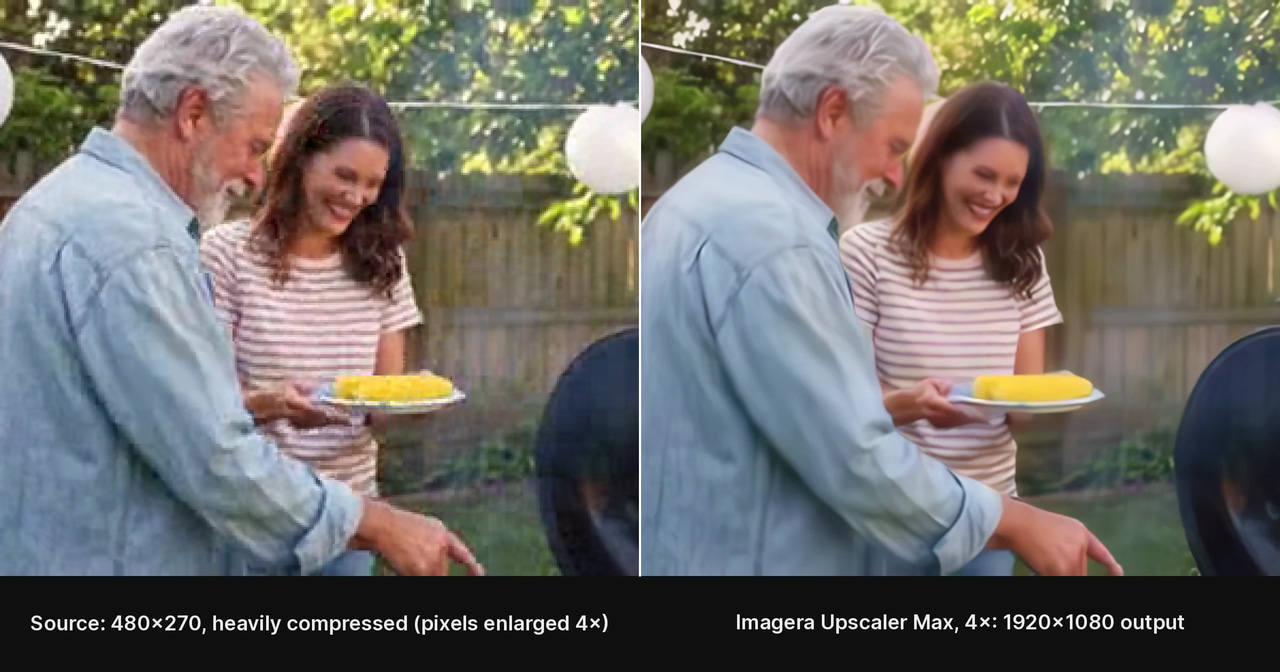
Real result: Imagera Upscaler Max (Video Enhancer), 4×, 5 seconds, 150 credits. The source is a clip generated for this test, downscaled to 480 by 270 and re-encoded at 0.25 Mbps. Left half: the source with its pixels enlarged; right half: the 1920 by 1080 output.
Quick answer: Imagera fixes pixelated video by re-generating lost detail with AI upscaling, restoring blurry, low-resolution clips to sharp HD or 4K, typically in under 5 minutes with no editing skills required.
How can I fix a pixelated video for free without downloading software?
Imagera's cloud video tools are available from your browser without a desktop installation. Upload a supported clip, choose the available output settings, and review the credit quote before generating. Start with a short sample to check whether the model improves the source; processing time and achievable detail depend on the input and selected settings.
Why does upscaling reduce pixelation better than simple resizing?
Basic resizing stretches the same pixels, so a 480p clip stays blocky at 1080p. Imagera's AI instead reconstructs missing detail, adding up to 4x the pixel count with sharper edges and cleaner motion. Because it rebuilds texture rather than duplicating existing pixels, it recovers detail that plain scaling can't, which is why it clears up visible blocking artifacts.
Why your video looks pixelated
- Low resolution — a 480p clip shown on a 1080p screen is stretched 2.25×, so every original pixel becomes a visible block.
- Heavy compression — messaging apps and social re-encodes throw away data to shrink file size, leaving "macroblocking."
- Digital zoom — cropping in enlarges the pixels you kept.
- Old sensors — early phone and webcam footage simply captured less detail.
Knowing the cause matters: compression artifacts and low resolution need reconstruction, not just sharpening. Sharpening a blocky video only makes the blocks crisper.
Method 1 — Quick free fixes (mask the blur)
Before anything else, rule out playback issues:
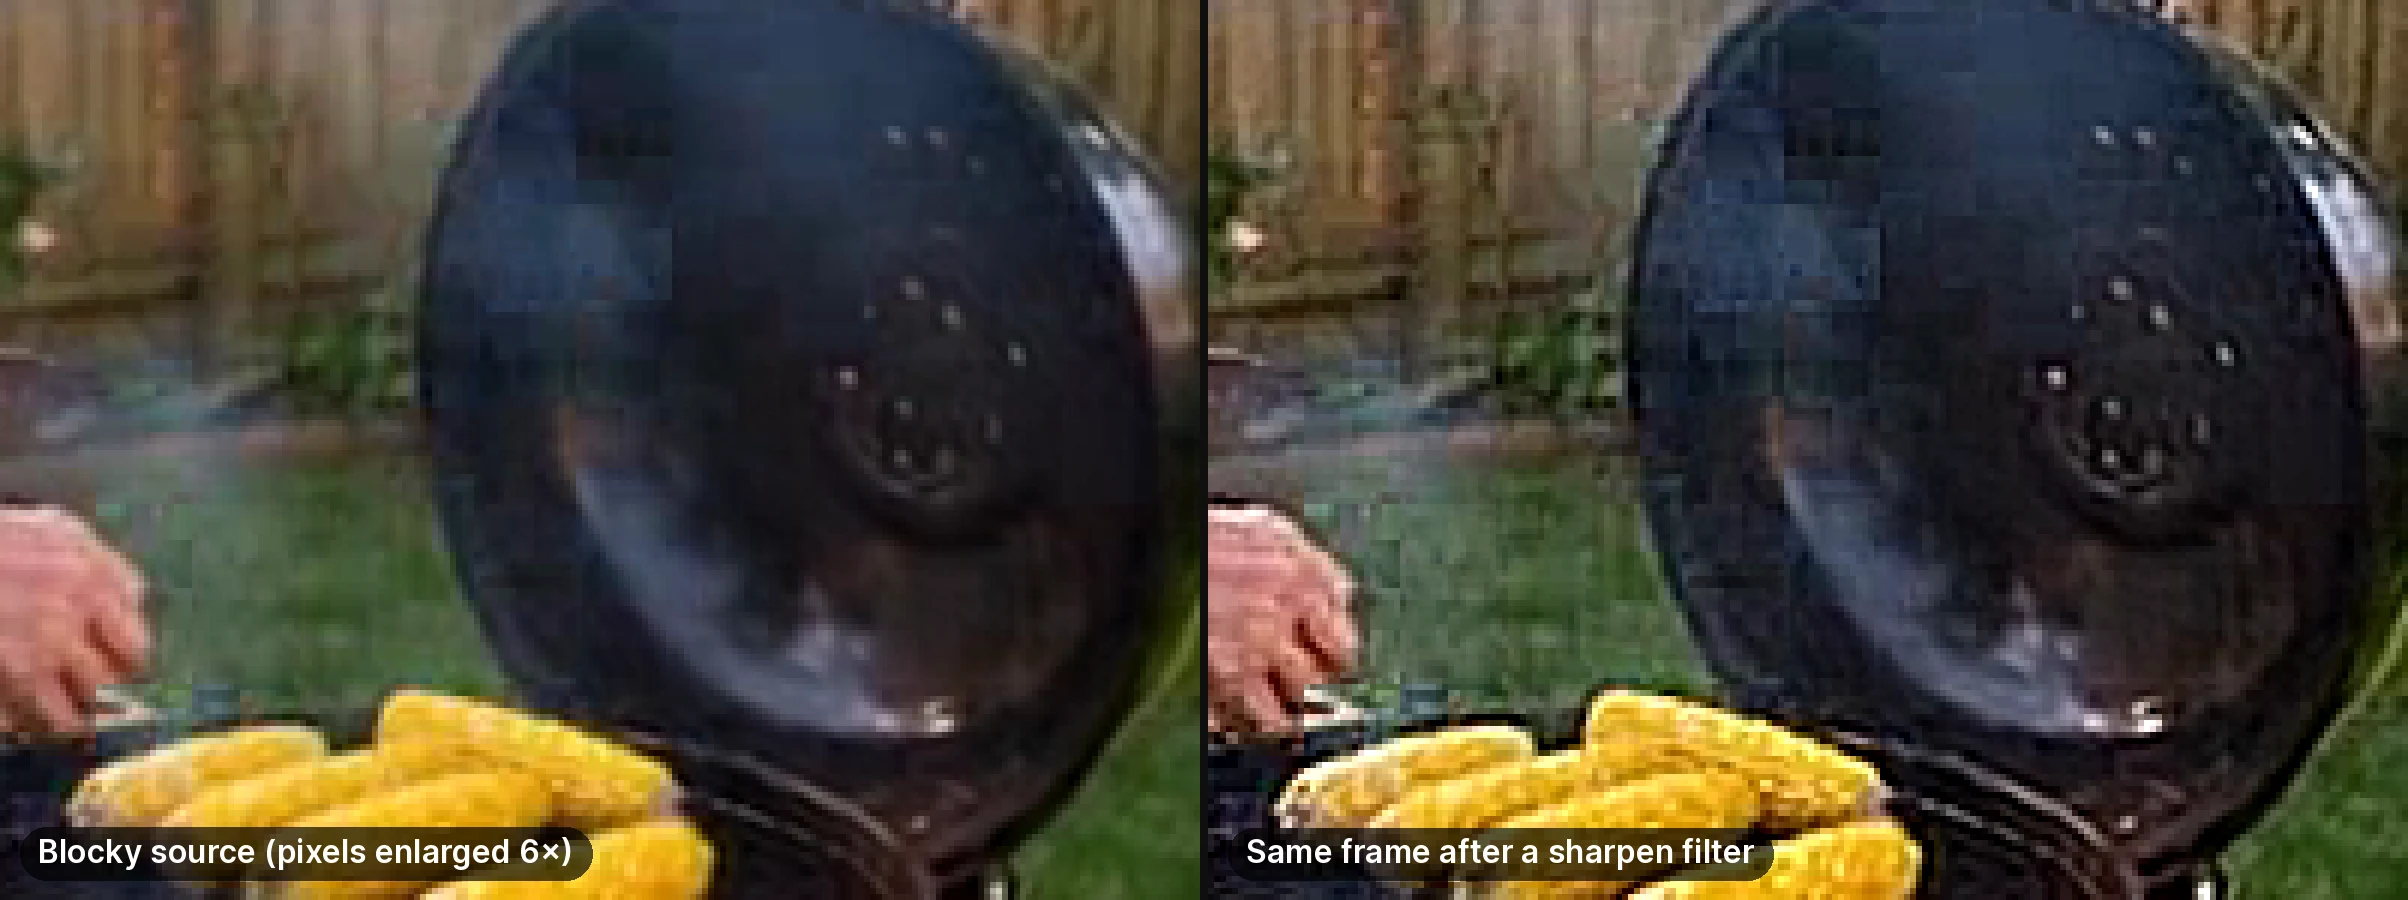
Demonstration with a generic sharpen filter on the 480 by 270 test source: sharpening does not remove compression blocks.
- Check the source resolution. Play the file at 100% zoom. If it's 360p/480p, no player setting will make it truly sharp.
- Let it fully buffer. Streaming players drop to a low-res proxy while loading — wait for the quality to settle.
- Turn off in-app "data saver" on the app you're viewing in.
- Try a light sharpen in a free editor (CapCut, Clipchamp). This raises perceived crispness but adds no new detail — good for mild softness, useless for real pixelation.
Verdict: free and instant, but it only masks the problem. For genuinely blocky footage, go to Method 3.
Method 2 — Export at a higher bitrate (stops it getting worse)
If you are exporting the video and it looks pixelated afterward, the export settings are the culprit. Re-export with:
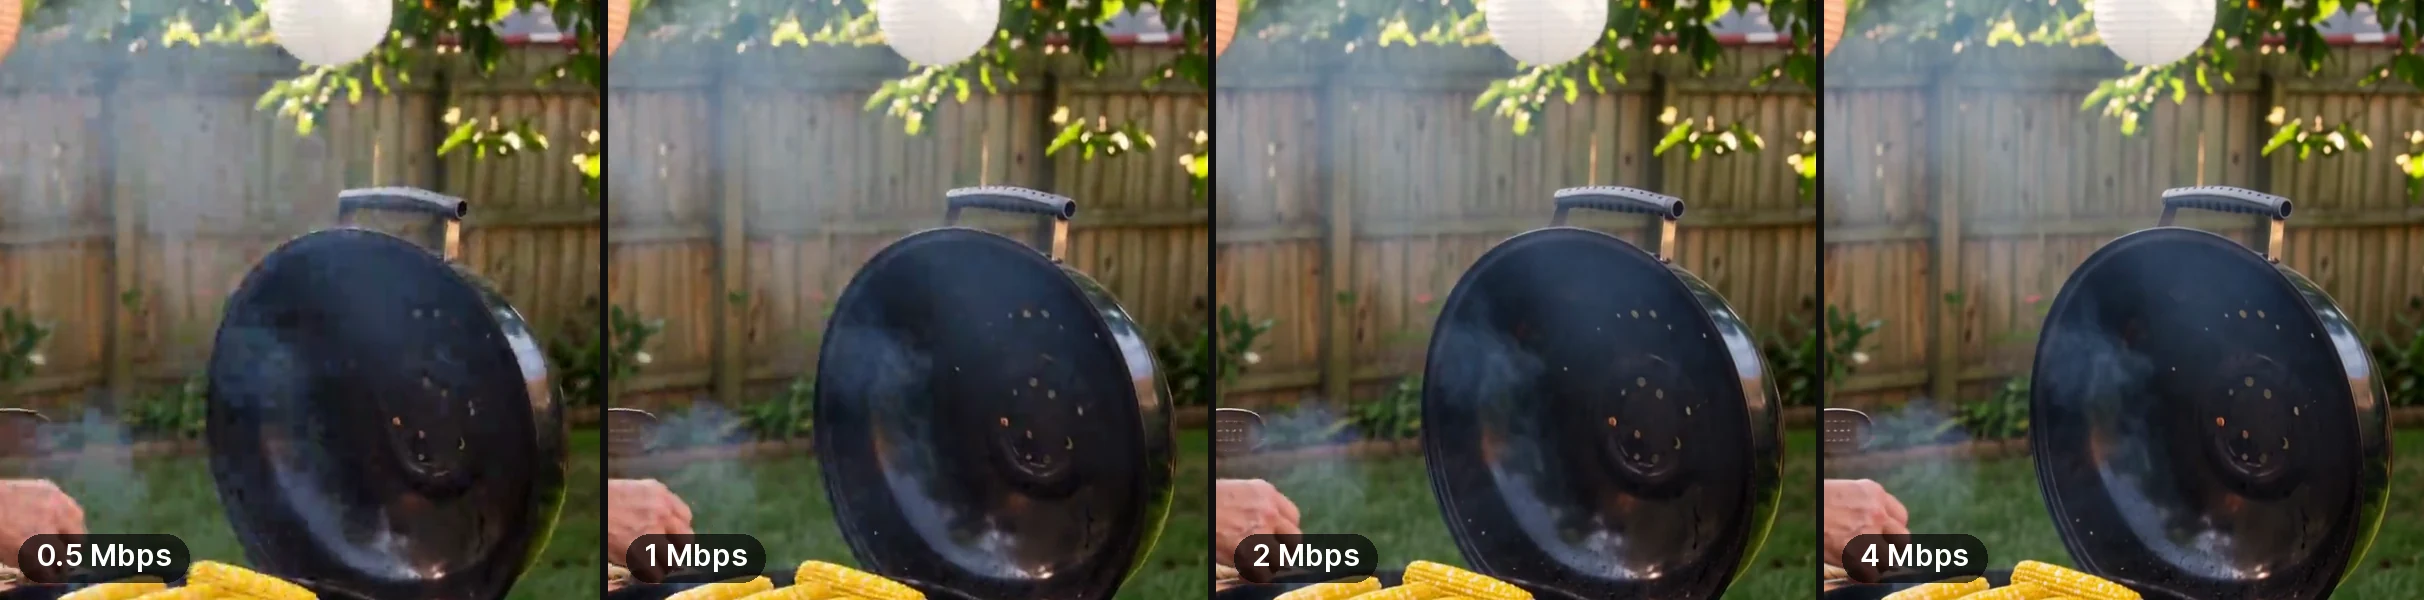
Demonstration: one 720p test clip exported with H.264 at four bitrates, 100% crops of the same frame.
- Bitrate of at least 8–12 Mbps for 1080p, 35–45 Mbps for 4K.
- Codec H.264 or H.265 (HEVC) rather than an old low-quality preset.
- The original resolution — never upscale in a basic editor, which just interpolates blur.
This won't fix an already-pixelated source, but it stops you from re-introducing pixelation every time you save.
Method 3 — AI video enhancer (rebuilds real detail)
This is the method that actually fixes pixelation. An AI enhancer is trained on millions of sharp/blurry pairs, so it can infer what a clean frame should look like: it removes compression blocks, reconstructs edges and texture, and denoises — frame by frame — then upscales to HD or 4K.
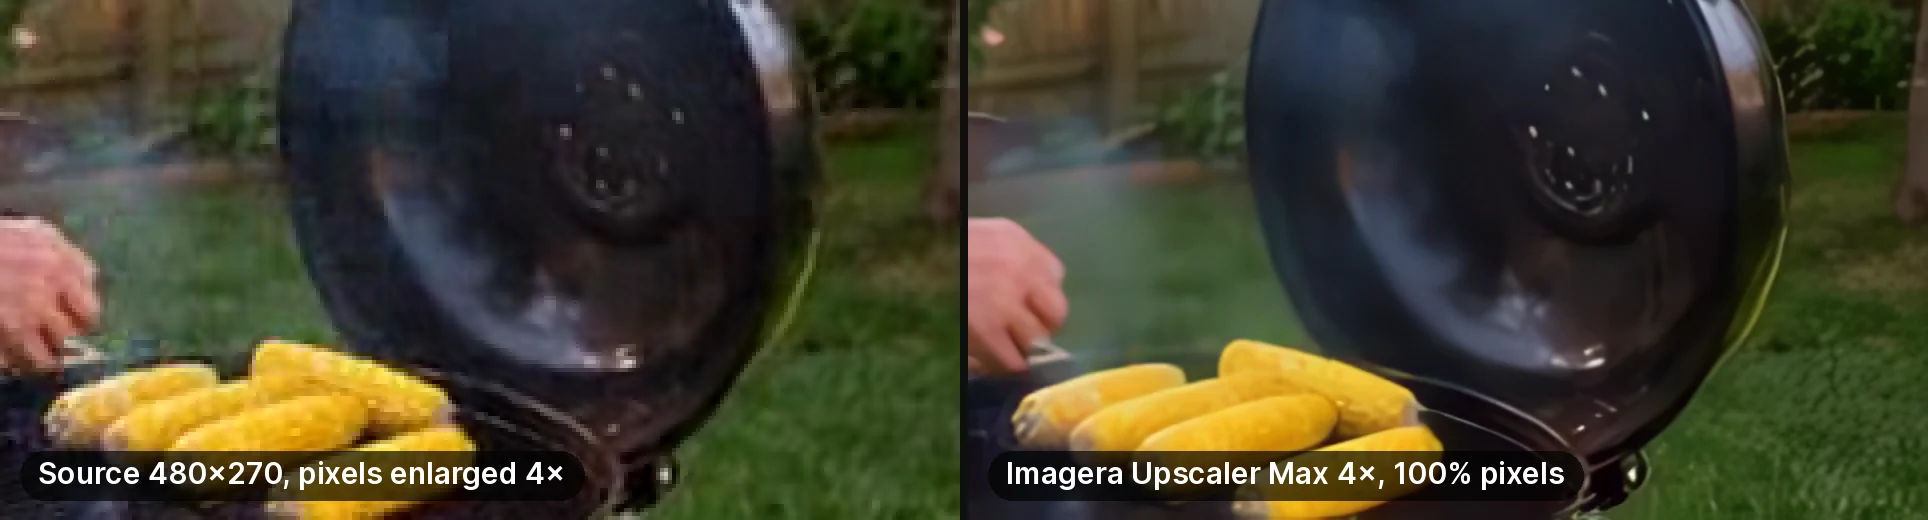
Real result: Imagera Upscaler Max, 4×, the same run as the clip above, 100% crop.
How to do it with Imagera's AI Video Enhancer:
- Open the AI Video Enhancer and upload your clip (no software to install).
- Pick the target quality — 1080p or 4K.
- Let the model process each frame; it reconstructs detail rather than stretching pixels.
- Preview the before/after and download the restored video.
Because it's reconstructing rather than sharpening, blocky compression footage and low-res clips come back genuinely clearer — not just "sharper blur."
Method 4 — AI upscaling for very low-resolution footage
If your source is very small (240p–360p, old camera or webcam), lean on the upscaling built into the AI video enhancer: it increases the pixel count 2×–4× while a super-resolution model paints in plausible detail, so a tiny old clip can reach a usable 1080p or 4K.
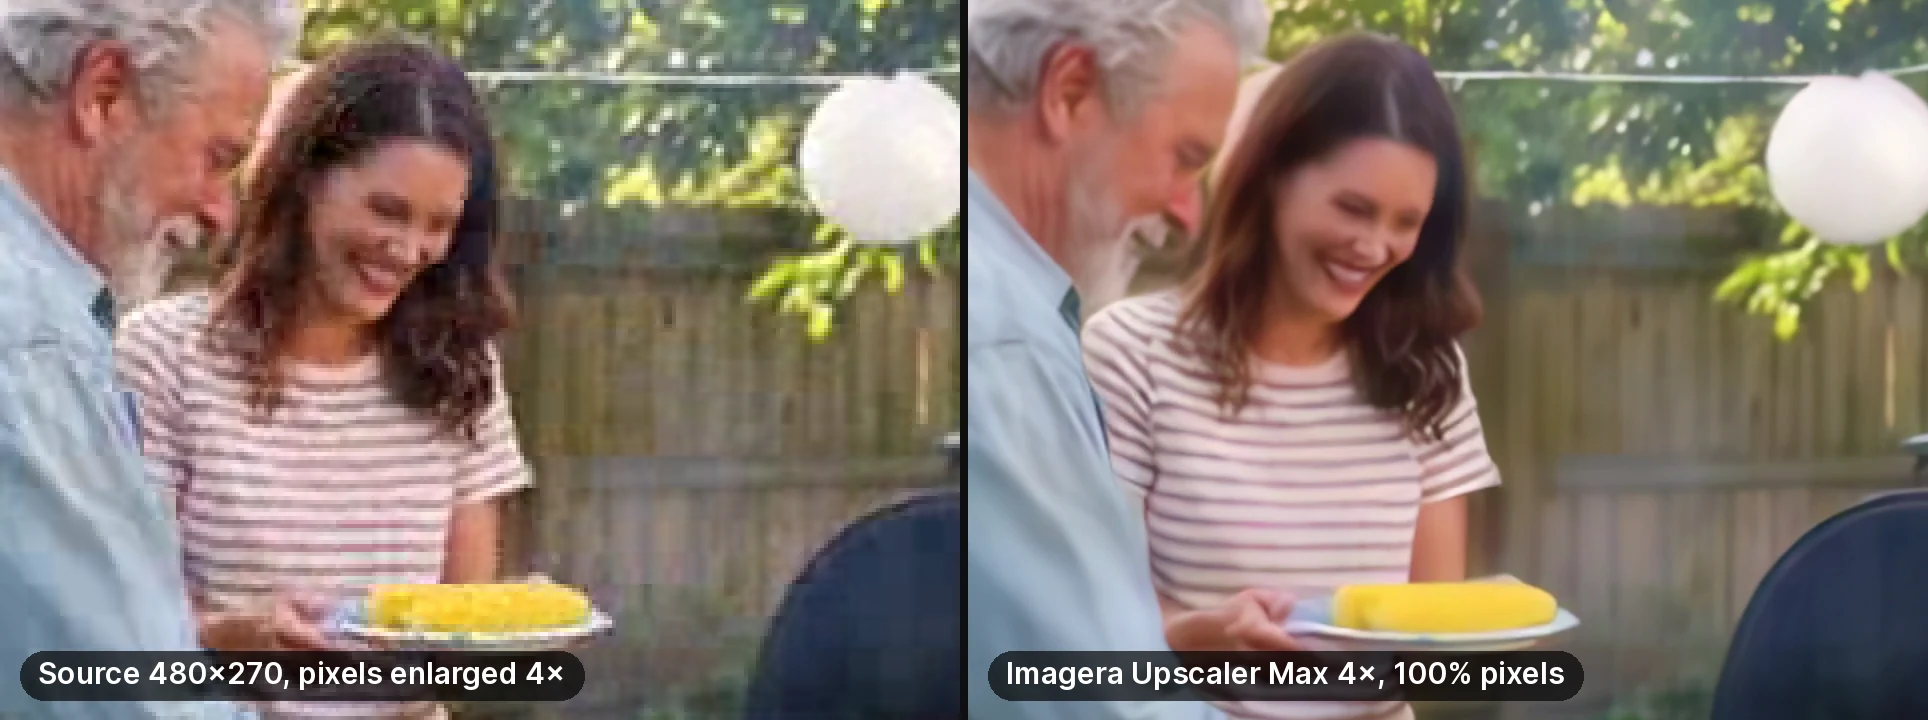
Real result, same run: from a source this small the output is readable but smoothed. Skin and foliage look painted up close.
Use this when the footage is both low-resolution and pixelated — enhance to clean it up, upscale to enlarge it.
Which method should you use?
| Your situation | Best method | Result |
|---|---|---|
| Slightly soft, otherwise fine | Method 1 (sharpen) | Crisper look, no new detail |
| You're exporting it yourself | Method 2 (bitrate) | Stops future pixelation |
| Blocky / compressed / low-res | Method 3 (AI enhancer) | Real detail rebuilt |
| Very small old footage | Method 4 (AI upscaler) | Enlarged + reconstructed |
For most people typing "how to fix a pixelated video," the answer is Method 3 — an AI enhancer does what sharpening can't.
What resolution can you realistically reach from a pixelated source?
The realistic ceiling depends on how much detail the source captured, not on how far you upscale. A 720p clip enhances cleanly to a sharp 1080p or 4K because it already holds real edge and texture information. A 240p–360p source can be enlarged 2×–4× and cleaned up, but it reaches a usable 1080p rather than a native-4K look — the enhancer paints plausible detail where the sensor never recorded any. Compression is the other limiter: heavily re-encoded footage with visible macroblocking needs reconstruction first, and even then the recovered detail is inferred. Match your target to the source so you don't over-promise sharpness that the pixels can't support.
| Source resolution | Realistic clean target | What the enhancer does | Watch for |
|---|---|---|---|
| 720p, lightly compressed | 1080p or 4K | Reconstructs edges + texture, upscales | Best-case, near-native sharpness |
| 480p, moderate compression | Clean 1080p | Removes blocks, rebuilds detail, 2× upscale | Fine text may stay soft |
| 240p–360p, old sensor | Usable 1080p | 3×–4× upscale + super-resolution fill | Detail is inferred, not recovered |
| Heavy macroblocking (any res) | Cleaner, not perfect | De-blocks then reconstructs | Enhance before enlarging |
Should you enhance or upscale a pixelated video first?
Enhance first, then upscale — in that order. Enhancing cleans the frame at its current size: it strips compression blocks, reduces noise, and rebuilds soft edges, which gives the upscaler a cleaner starting point. If you upscale a blocky clip first, you simply enlarge the artifacts, and the super-resolution model then has to fight through amplified noise to invent detail. On Imagera's AI Video Enhancer both steps live in one workflow, so you can de-block and reconstruct, then push the pixel count up to 1080p or 4K in the same pass. The only time you lead with upscaling is when the source is clean but simply too small — rare for pixelated footage, which is almost always both low-resolution and compressed.
Quick verdict
For pixelated video fix, start with the tools below. Imagera is pay-first — credit packs from 350 credits. Measure success by usable published assets, not demo screenshots.
Related tools
Start creating (credit packs from 350 credits)
Imagera cloud tools are pay-first — buy credits, then generate.
Next step: open a tool page, check the credit cost, buy a pack if you need one, then generate.
Operator checklist
- Prepare clean inputs (lighting, crop, rights).
- Generate a minimum viable test.
- QA on mobile.
- Enhance finals only if needed.
- Publish and measure conversion, not vanity views.
- Top up credits only after a winner is clear.
Deep notes for teams
Document winning settings. Share a folder of approved inputs. Assign one owner for credit budget. Revisit this process monthly as models improve.