AI frame interpolation is the technology that generates new video frames between existing ones to increase frame rate and create smooth slow motion. To do it online for free: upload your video to Imagera AI's Frame Interpolator, select a target FPS (30fps to 60fps is the most common conversion), and download the result — no software install, no GPU required. Imagera AI's Video Enhancer goes further, combining frame interpolation with 4K upscaling, denoising, and color correction in a single pass.
You shot a video at 30fps but need smooth slow motion for a highlight reel. Or you have old family footage at 18fps that looks jittery on a modern TV. Or you want your 30fps gameplay footage to look like 60fps on YouTube.
AI frame interpolation solves all three. It generates new in-between frames that never existed in your original video, increasing the frame rate so motion looks smoother. The result: buttery playback, clean slow motion, and restored vintage footage — all from a standard recording.
This guide explains how frame interpolation works, compares the best free tools, walks through optimal settings for different video types, and shows you which videos benefit most (and which ones to avoid).
2.What Is Frame Interpolation?
Frame interpolation is the process of creating new video frames between existing ones. A 30fps video has 30 frames per second. Frame interpolation to 60fps generates 30 new frames for every second of footage — each one a prediction of what should exist between two real frames.
The AI analyzes motion between consecutive frames — tracking the direction, speed, and trajectory of every element in the scene — then synthesizes entirely new frames that blend seamlessly into the sequence.
The term "video frame interpolation online free" has surged in search volume since 2024 because the compute infrastructure needed to run RIFE-class models now lives in the cloud, making browser-based tools viable for the first time. You no longer need a high-end NVIDIA GPU at home to get professional-quality results.
Imagera's Frame Interpolator is built on this same cloud infrastructure — upload any video and get butter-smooth 60fps output without installing a single piece of software. Try the Frame Interpolator free.
2.1RIFE: The Algorithm Behind Modern Interpolation
RIFE (Real-Time Intermediate Flow Estimation) is the algorithm powering most modern frame interpolation tools. Developed at Megvii Research, RIFE directly estimates the motion field at the exact midpoint between two frames, rather than calculating full optical flow maps and reverse-engineering the middle frame like older methods (DAIN, SuperSlomo).
Why RIFE matters:
- 4–27x faster than DAIN while producing equal or better quality
- Processes 2x interpolation of 720p video at 30+ FPS in real time on a 2080Ti
- Supports arbitrary timestep — generates frames at any point between originals, not just the midpoint
- No reliance on pre-trained optical flow models — lightweight and efficient
3.RIFE vs DAIN vs FLAVR: Full Algorithm Comparison
Choosing which algorithm to use matters when selecting a desktop tool or evaluating what powers an online service. Here is how the three most common algorithms compare across every dimension that affects your results.
| Feature | RIFE | DAIN | FLAVR |
|---|---|---|---|
| Full Name | Real-Time Intermediate Flow Estimation | Depth-Aware Video Frame Interpolation | Flow-Agnostic Video Representations |
| Speed (2x on 1080p) | ~15 min for 2-min clip | Up to 10 hours for same clip | Moderate — faster than DAIN, slower than RIFE |
| Real-time capability | Yes (720p @ 30+ FPS on 2080Ti) | No | No |
| Quality (general footage) | Excellent | Good to excellent | Good |
| Quality (complex parallax) | Very good | Slightly better in extreme cases | Good |
| Quality (fast motion) | Excellent | Good | Very good |
| Temporal consistency | Very high | High | Very high |
| GPU requirement | Any Vulkan-capable or CUDA GPU | Primarily NVIDIA CUDA required | NVIDIA CUDA preferred |
| Arbitrary timestep | Yes (any intermediate position) | No (fixed 2x, 4x, 8x) | Limited |
| Scene detection support | Yes (in implementations) | Yes | Limited |
| Open source | Yes (GitHub: hzwer/ECCV2022-RIFE) | Yes | Yes |
| Used in commercial tools | Imagera AI, Flowframes, SVP, Topaz | Flowframes (legacy), older tools | Flowframes |
| Best for | Everything — daily use | Legacy support, extreme parallax | Temporal consistency priority |
| Worst for | 2D animation (same as others) | Speed-sensitive workflows | Real-time workflows |
Verdict: For any ai frame interpolation online free use case in 2026, RIFE-based tools are the right default. DAIN is kept alive mostly for legacy workflows and research. FLAVR is worth knowing but rarely the practical choice for end users.
4.Frame Rate Comparison: What Each FPS Looks Like
Understanding frame rates helps you choose the right target for interpolation:
| FPS | Feel | Best For |
|---|---|---|
| 24fps | Cinematic, film-like | Movies, artistic content |
| 30fps | Standard video | Vlogs, YouTube, casual recording |
| 60fps | Smooth, clear motion | Gaming, sports, action sequences |
| 120fps | Ultra-smooth, premium | Competitive gaming, 4x slow motion, VR |
| 240fps | Extreme slow motion | Scientific analysis, dramatic effects |
The single most noticeable improvement is 30fps to 60fps — universally perceptible, major upgrade for any motion content. Beyond 60fps, improvements are mainly visible during fast action or as slow-motion capability.
4.1Best Interpolation Targets
| Source | Target | Multiplier | Value | Artifact Risk |
|---|---|---|---|---|
| 24fps | 48fps | 2x | Good: removes judder, preserves cinematic feel | Low |
| 30fps | 60fps | 2x | Best bang for buck: highest perceived improvement | Low |
| 30fps | 120fps | 4x | High: enables 4x slow motion | Moderate |
| 60fps | 120fps | 2x | Good: competitive gaming, VR | Low |
| 24fps | 120fps | 5x | Risky: many generated frames compound errors | High |

5.When to Use Frame Interpolation: Decision Table
Not every video needs the same treatment. Use this table to match your content type to the right interpolation strategy before you upload.
| Content Type | Original FPS | Target FPS | Method | Expected Improvement |
|---|---|---|---|---|
| Sports footage | 30fps | 60fps or 120fps | 2x for smoothness; 4x for slow-motion replays | High — motion becomes clean and trackable; 4x gives cinematic slow-motion reveals |
| Drone / aerial shots | 24–30fps | 60fps | 2x | High — wide sweeping camera moves are ideal for interpolation; virtually artifact-free |
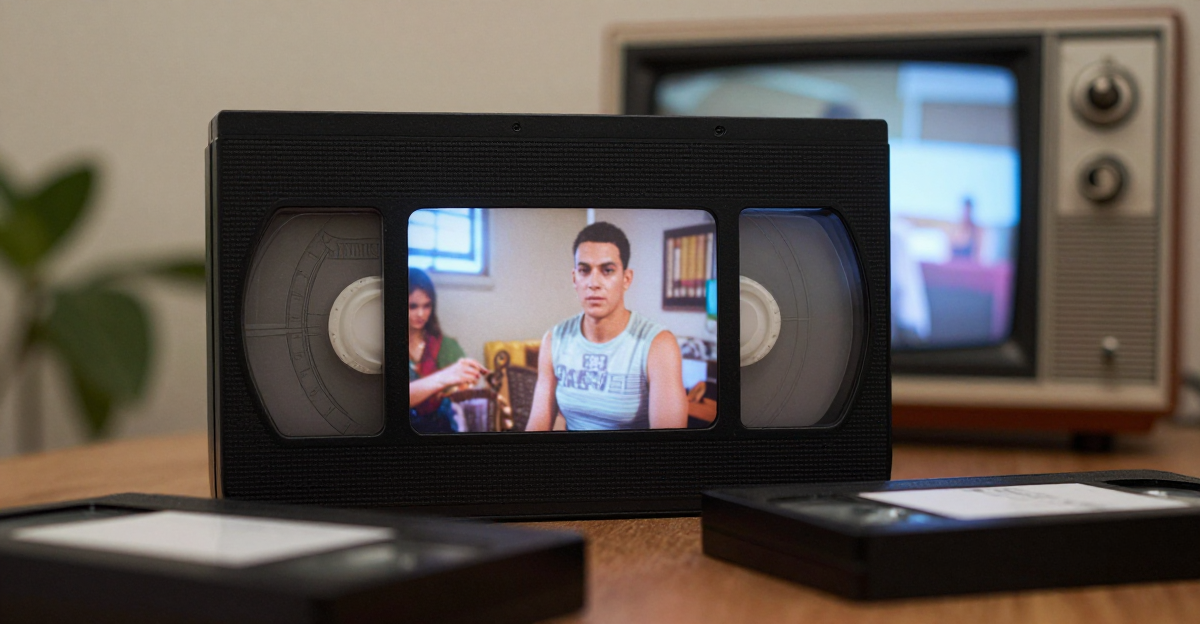
| Old film / vintage home video | 15–18fps | 30fps (first pass) | 2x per pass; denoise before interpolating | Very high — removes jitter entirely; pairs with 16K upscaling for full restoration |
| Hand-drawn animation / anime | 12–24fps | 48fps max | 2x only; accept imperfect results | Low — ghosting and outline smearing are unavoidable; 3D animation interpolates far better |
| Security / CCTV footage | 15fps | 30fps | 2x | Moderate — smoother playback and easier motion review; low-light artifacts possible |
| Gaming clips (console) | 30fps | 60fps | 2x | High — dramatically more competitive on YouTube; keep at 2x to avoid HUD artifacts |
| Cinematic / 24fps film content | 24fps | 48fps | 2x | Mixed — removes judder while preserving film feel; going to 60fps triggers the soap opera effect |
| Music video (fast cuts) | 24–30fps | 48fps | 2x with scene detection on | Fair — tight editing with many cuts makes scene detection critical; smooth shots benefit greatly |
| Influencer / talking-head content | 30fps | 60fps | 2x | Good — background movement and gestures become noticeably smoother for professional delivery |
Rule of thumb: 2x is the safe default for any content type. Go higher only when you specifically need slow-motion playback and your footage has smooth, predictable motion.
6.How to Choose the Right FPS Target: A Decision Guide
Picking the wrong target FPS is the most common mistake beginners make. This flowchart-style decision guide walks you through the right choice based on your footage type and goal.
| Your Situation | Ask Yourself | Recommended Target | Multiplier | Notes |
|---|---|---|---|---|
| Standard smartphone or camera footage | Do you want general smoothness? | 60fps | 2x | The universal starting point for convert 30fps to 60fps online workflows |
| Standard footage, want slow motion | How much slow-down do you need? | 120fps | 4x | Play back at 30fps for 4x slow motion — best for sports and action |
| Standard footage, dramatic slow motion | Want 8x or more slow-down? | 240fps | 8x | Artifact risk is high; keep clips short and motion smooth |
| 24fps film or cinematic content | Do you want to preserve film feel? | 48fps | 2x | Go no higher — 60fps triggers the soap opera effect |
| 24fps film, want modern look | Do you want it to feel like TV? | 60fps | 2.5x (approx) | Intentional aesthetic choice; be aware of the tradeoff |
| Old home video (15–18fps) | Do you want watchable playback? | 30fps | 2x | First step before any upscaling; see old video restoration guide |
| Old home video, want full modernization | Want it to look like modern footage? | 60fps | 3–4x | Apply denoising and upscaling alongside interpolation for best results |
| Gaming footage (30fps console) | Uploading to YouTube? | 60fps | 2x | Viewers perceive 60fps gaming content as dramatically higher quality |
| Gaming footage with UI or HUD | Is the HUD complex? | 60fps only | 2x | Complex UI elements artifact at higher multipliers |
| VR or 360-degree content | Need to prevent motion sickness? | 90fps minimum | 1.5–3x | VR comfort threshold; higher is better |
| Hand-drawn 2D animation or anime | Committed to interpolating anyway? | 48fps max | 2x | Accept that results will be imperfect; see animation section below |
General rule: When in doubt, use 2x (double the original frame rate). It gives the lowest artifact risk with the most consistently noticeable improvement.
7.Best Settings for Different Video Types
Not all footage is equal. The right settings depend on motion complexity, original frame rate, and your output goal. Here are the proven settings for four common scenarios.
7.1Sports and Action Footage
Sports footage is the ideal candidate for AI frame interpolation — motion is fast but usually in a single consistent direction, and there is plenty of real data for the AI to work with.
| Setting | Recommended Value | Reason |
|---|---|---|
| Target FPS | 60fps or 120fps | 60fps for general smoothness; 120fps if you want 4x slow motion replay |
| Multiplier | 2x (for 30fps→60fps) or 4x (for slow-mo) | Higher multipliers work well here because motion is predictable |
| Scene detection | On | Hard cuts between camera angles create severe artifacts if skipped |
| Resolution | Native or upscale after | Interpolate first, then upscale to 4K separately for best quality |
| Artifact mode | RIFE-based | Handles fast directional motion best |
Sports content is where the slow motion video maker AI use case shines most clearly. A 30fps clip of a basketball player dunking interpolated to 120fps then played at 30fps reveals motion that was completely invisible in the original recording.
Imagera's Frame Interpolator handles this automatically — select your multiplier, upload, and download. No manual settings to misconfigure. Smooth your sports footage now.
7.2Old or Vintage Footage (Pre-1990s)
Restoring old footage requires a different approach because source quality is already degraded. Frame interpolation is one part of a multi-step workflow.
| Setting | Recommended Value | Reason |
|---|---|---|
| Target FPS | 30fps (first pass), then 60fps if desired | Start conservative; jumping from 15fps to 60fps in one pass compounds errors |
| Multiplier | 2x per pass | Multi-pass interpolation produces better results than single-pass high multiplier |
| Pre-processing | Denoise before interpolating | Grain and noise confuse motion estimation; clean the footage first |
| Scene detection | On | Old footage often has reel changes and splice artifacts |
| Post-processing | Upscale and color correct after | See the full AI video enhancement guide |
The workflow matters: denoise first, interpolate second, upscale third. Running interpolation on noisy footage produces ghosting because the AI tracks noise particles as if they are moving objects.
For old footage, pair Imagera's Frame Interpolator with the Video Enhancer to handle denoising and upscaling in the same pipeline — one platform, no format conversions, 240p to near-4K cinema quality in minutes.
7.3Gaming Footage
Gaming footage has unique characteristics — a mix of smooth predictable background movement and sharp, fast UI elements that interpolation handles differently.
| Setting | Recommended Value | Reason |
|---|---|---|
| Target FPS | 60fps | The standard target for YouTube and streaming platforms |
| Multiplier | 2x | Keeps artifact risk low around HUD elements and particle effects |
| Scene detection | On | Loading screens and cut scenes cause hard transitions |
| UI complexity | Consider masking | Complex HUDs (maps, ability icons, damage numbers) can smear at higher multipliers |
| Particle effects | Accept minor artifacts | Explosions, magic effects, and particle systems are notoriously difficult for interpolation |
For gameplay content creators, the convert 30fps to 60fps online workflow is a straightforward quality upgrade that makes console footage competitive with PC recordings on YouTube.
7.4Cinematic and Film Content (24fps)
Cinematic content is where you must be most deliberate about target FPS to avoid unintended aesthetic effects.
| Setting | Recommended Value | Reason |
|---|---|---|
| Target FPS | 48fps | Preserves the cinematic feel while removing judder |
| Multiplier | 2x | Only ever use 2x for 24fps source material |
| Soap opera threshold | Stay at or below 48fps | 60fps and above destroys the cinematic aesthetic |
| Scene detection | Critical — must be on | Film editing uses many cuts; artifacts at transitions are unacceptable |
| Dark scenes | Lower expectations | Low-light footage with grain is harder to process cleanly |
If you intentionally want a modern TV-broadcast feel rather than a film look, going to 60fps is a valid creative choice — just go in knowing it will no longer look like cinema.
8.Step-by-Step: Create Slow Motion from 30fps Footage
This is the most popular application of free AI frame interpolation online — taking normal 30fps footage and turning it into smooth slow motion. Here is the complete workflow from upload to final export.
8.1What You Need
- A video clip at 30fps (MP4, MOV, or AVI)
- An Imagera AI account (free credits included)
- The clip trimmed to the section you want in slow motion (shorter clips process faster)
8.2Step 1: Prepare Your Source Clip
Trim your footage to the specific segment you want in slow motion before uploading. Processing a full 10-minute video to get 15 seconds of slow motion wastes credits and time. Most video editors (including free tools like DaVinci Resolve or CapCut) can trim a clip in seconds.
If your footage has noise or grain (low-light, old cameras, phone footage in dark conditions), run the AI video enhancer denoising pass first. Clean footage produces dramatically better interpolation.
8.3Step 2: Upload to Imagera AI Frame Interpolator
Go to Imagera AI Frame Interpolator and drag your clip into the upload area. The platform accepts MP4, MOV, AVI, and WebM files up to the plan limit.
The Frame Interpolator is purpose-built for this exact workflow — choppy AI video to butter-smooth output with one click. If you also want to upscale resolution at the same time, switch to the Video Enhancer which handles both frame interpolation and 4K upscaling in a single pass.
8.4Step 3: Select Frame Interpolation and Target FPS
In the enhancement options, select Frame Interpolation. For slow motion from 30fps source footage:
- 4x slow motion: Select 120fps target (4x multiplier)
- 2x slow motion: Select 60fps target (2x multiplier)
- 8x slow motion: Select 240fps target (8x multiplier — higher artifact risk, best for very short clips with smooth motion)
The 4x option (30fps to 120fps) gives the best balance of slow-motion effect and visual quality for most footage types.
8.5Step 4: Process the Clip
Click enhance and wait. Processing time depends on clip length and resolution:
| Clip Length | Resolution | Approx. Processing Time |
|---|---|---|
| 15 seconds | 720p | 1–2 minutes |
| 30 seconds | 1080p | 3–5 minutes |
| 1 minute | 1080p | 6–10 minutes |
| 1 minute | 4K | 15–25 minutes |
8.6Step 5: Export and Apply Slow Motion in Your Editor
Download the interpolated clip. The file now has 4x the original frame count. To play it as slow motion:
- Import the clip into your video editor
- Set the clip's playback speed to 25% (for 4x slow motion from 4x interpolated footage)
- The clip now plays at 30fps — one second of original footage becomes four seconds of smooth slow motion
Audio is included in the downloaded file but will be pitch-shifted at reduced playback speed. Most editors let you disable audio for slow-motion segments or apply pitch correction.
8.7Step 6: Review and Refine
Scrub through the slow-motion segment and check for:
- Ghosting around fast-moving edges (reduce multiplier if present)
- Smearing at hard cuts (enable scene detection if your tool supports it)
- Warping on rotating objects (unavoidable in extreme cases; choose a different clip)
The majority of sports, nature, and live-action clips will look clean at 4x. Complex, unpredictable motion (crowd scenes, tangled hair, water spray) is where artifacts are most likely.
Once your clip is smooth, combine it with a cinema-quality grade using Imagera's Video Enhancer — upscale to 4K and apply Netflix-grade color processing in the same step. The complete pipeline: generate or record → interpolate → enhance → export.

9.File Size Impact: How Higher FPS Affects Storage and Upload
One aspect that catches users off guard is the significant increase in file size after frame interpolation. Understanding this upfront helps you plan your workflow and storage.
9.1Why File Size Increases
Frame interpolation generates new frames. More frames means more data. A 30fps video interpolated to 60fps has exactly twice as many frames. If the original was 100MB, the output will be approximately 100–200MB depending on the codec and compression settings used during export.
The actual size increase depends on several factors:
| Factor | Effect on File Size |
|---|---|
| Multiplier | Linear relationship — 2x FPS = roughly 1.5–2x file size |
| Codec (H.264 vs H.265) | H.265 (HEVC) compresses 40–50% smaller than H.264 at same quality |
| Motion complexity | High-motion footage compresses less efficiently than static scenes |
| Resolution | Size scales with pixel count — 4K outputs are 4x larger than 1080p |
| Bitrate setting | Lower bitrate = smaller file but visible quality loss at high FPS |
9.2Practical Size Estimates
| Original File | Original FPS | Target FPS | Approx. Output Size (H.264) | Approx. Output Size (H.265) |
|---|---|---|---|---|
| 100MB, 1080p | 30fps | 60fps | 150–200MB | 80–120MB |
| 100MB, 1080p | 30fps | 120fps | 250–400MB | 140–220MB |
| 500MB, 4K | 30fps | 60fps | 700MB–1GB | 400–600MB |
| 200MB, 1080p | 24fps | 48fps | 280–380MB | 160–210MB |
9.3Tips for Managing File Size After Interpolation
- Use H.265/HEVC export when your platform supports it — nearly identical visual quality at roughly half the size of H.264
- Trim before interpolating — only process the segment you actually need, not the full clip
- Match bitrate to platform — YouTube recommends 8 Mbps for 1080p60; encoding at 50 Mbps wastes storage without improving uploaded quality
- For archival, keep the H.265 version; export a web-optimized H.264 version for sharing
- Platform upload limits: Most social platforms (Instagram, TikTok, Twitter/X) have file size caps around 500MB–4GB depending on plan tier — check before interpolating to very high FPS for content you plan to upload directly
The file size increase is a real consideration but rarely a dealbreaker. The perceptual quality improvement from 30fps to 60fps is significant enough that the extra storage cost is almost always worth it for content you care about.
10.Best AI Frame Interpolation Tools (2026)
| Tool | Type | Free Tier | Pricing | Max FPS | Algorithm |
|---|---|---|---|---|---|
| Imagera AI Frame Interpolator | Online | Yes (credits) | From $4.99/mo | Up to 120fps | RIFE-based |
| Topaz Video AI | Desktop | 30-day trial | From $33/mo | Up to 120fps | Proprietary Aion |
| Flowframes | Desktop (Win) | Free (open-source) | Donationware | Configurable | RIFE, DAIN, FLAVR |
| SVP | Desktop | Free core | $24.99 one-time | Up to 144fps | RIFE + proprietary |
| TensorPix | Online | Limited credits | From $12/mo | Up to 120fps | Proprietary AI |
| Wink | Online + Mobile | 60 min/day free | SVIP plan | Not specified | Proprietary AI |
Why Imagera AI stands out: Most free online tools impose strict limits — resolution caps, file size limits, watermarks. Desktop tools (Topaz, Flowframes) require downloading software and a capable GPU. Imagera AI's Frame Interpolator runs in your browser with free credits, no GPU needed, no install required. RIFE-powered processing handles 30fps to 60fps conversions with minimal artifacts — and unlike standalone interpolation tools, Imagera also handles AI video upscaling, denoising, and color correction in the same workflow.
Combine frame interpolation and video enhancement for cinema-quality AI videos — Imagera handles both in one dashboard. Try Video Enhancer
11.How to Do This with Imagera AI
Imagera's video pipeline is designed as an end-to-end production system — generate AI video, smooth it, enhance it, and score it, all without leaving your browser. Here is how each tool maps to the frame interpolation workflow.
11.1Frame Interpolator — Choppy to Butter-Smooth in One Click
The dedicated Frame Interpolator is the fastest path from choppy footage to professional 60fps output. Upload, select your target FPS, and download. No settings to configure. Handles sports, gaming, nature, and AI-generated video equally well.
Imagera's Frame Interpolator turns choppy AI video into butter-smooth 60fps with one click. Smooth your video now
11.2Video Enhancer — 240p to 4K Cinema Quality
Once your video is interpolated, the Video Enhancer handles everything else: upscaling from 240p to 4K, denoising, color correction, and sharpening. The output quality is comparable to Netflix-grade post-processing — applied to any video, including AI-generated clips that started life at low resolution.
The recommended workflow for maximum quality: interpolate first (Frame Interpolator), then upscale and enhance (Video Enhancer). Running them in sequence takes under ten minutes for a one-minute clip.
11.3Video Generator — Generate AI Videos First, Then Smooth Them
If you are building content from scratch rather than working with existing footage, Imagera's Video Generator lets you create AI video from text prompts with LoRA support for consistent style. Generate your base clip, run it through the Frame Interpolator for 60fps smoothness, then push it through the Video Enhancer for 4K output.
Generate AI videos first, then smooth them: Imagera's complete video pipeline from text → video → 60fps → 4K. Start with Video Generator
11.4Music Video Studio — Cinematic Music Videos from Storyboard to Screen
The Music Video Studio combines everything above into a guided pipeline for building cinematic music videos. Upload your track, build a storyboard, generate scene-by-scene clips, and export a polished music video — with frame interpolation and enhancement baked into the workflow. Ideal for musicians, brands, and content creators who want production value without a production budget.
11.5Camera Movement — One Photo Becomes a Hollywood Drone Shot
The Camera Movement tool turns a single still photo into a cinematic video with smooth, controlled camera motion — dolly, pan, orbit, or aerial drone-style moves. The output is already designed for professional smoothness, but running it through the Frame Interpolator afterward pushes the frame rate to 60fps for flawless social media delivery.
One photo = a Hollywood drone shot, smoothed to 60fps. Try Camera Movement
12.How to Interpolate Video with Imagera AI
12.1Step 1: Upload Your Video
Go to Imagera AI Frame Interpolator and upload your video file. Supports MP4, MOV, AVI, and WebM.
12.2Step 2: Select Frame Interpolation
Choose your target frame rate. For most videos, 2x (e.g., 30fps to 60fps) gives the best quality-to-improvement ratio with the lowest artifact risk.
12.3Step 3: Process
Click enhance and let the AI process your video. A 1-minute clip at 1080p typically processes in 2–5 minutes. The AI generates new frames between every existing pair using RIFE-based motion estimation.
12.4Step 4: Download
Preview the result and download in your preferred format. Audio and subtitles are preserved automatically.
13.6 Best Use Cases for Frame Interpolation
13.11. Slow Motion from Normal Footage
Interpolate 30fps to 120fps, then play back at 30fps for smooth 4x slow motion. Wedding videographers, sports coaches, and content creators use this to create cinematic slow-motion moments from standard recordings. This is the most searched application of the slow motion video maker AI category — and RIFE-based tools handle it better than any previous generation of algorithm. For creators building polished short-form content, pairing interpolated slow-motion footage with a custom soundtrack from an AI music generator completes the production without leaving the browser.
13.22. Sports and Action Enhancement
Fast-moving athletes and equipment become clearer at higher frame rates. Motion blur is reduced, making it easier to follow the action. Sports footage is one of the best candidates — motion is generally smooth and predictable.
13.33. Old Video Restoration
Family videos from the 1970s–90s at 15–18fps look jittery on modern 60Hz displays. Interpolation to 30fps or 60fps removes flicker and makes vintage footage comfortable to watch. Pair with AI video enhancement for denoising and upscaling too. For the most dramatic restorations, combining frame interpolation with AI image-to-16K upscaling on key frames can transform low-resolution archive footage into display-quality material.
13.44. Gaming Content
30fps console recordings interpolated to 60fps look noticeably smoother on YouTube. Viewers perceive 60fps gaming content as significantly higher quality. For creators looking to compete with native PC recordings, the convert 30fps to 60fps online workflow is the fastest path to parity. Frame interpolation is just one of several AI tools reshaping content creation — alongside viral image trends like the AI action figure generator, which has dominated TikTok and Instagram in 2026.
13.55. VR/AR Content
VR requires 90fps minimum to avoid motion sickness. Interpolation boosts lower-FPS rendered content to the required threshold, making the difference between a comfortable and nauseating experience.
13.66. Nature and Wildlife
Slow pans and smooth motion make nature footage an excellent interpolation candidate. Old nature documentaries benefit enormously from modernized frame rates.
14.What NOT to Interpolate
Not all video improves with frame interpolation. Here is an honest guide:
| Video Type | Quality | Why |
|---|---|---|
| Sports / Athletics | Excellent | Smooth, predictable motion |
| Nature / Wildlife | Excellent | Slow pans, steady movement |
| Live action (general) | Good | Works well for real-world footage |
| Gaming footage | Good | Some UI/particle artifacts possible |
| Old/vintage footage | Good | Major improvement with denoising |
| Cinematic/film (24fps) | Mixed | Risk of "soap opera effect" at 60fps |
| Music videos (fast cuts) | Fair | Many scene cuts create artifacts |
| Hand-drawn animation | Poor | Hard edges, flat colors confuse AI |
| Anime (2D) | Poor | Ghosting on outlines, melting effects |
| Text-heavy footage | Fair | Text edges can smear during camera movement |
| Stop-motion animation | Poor | Intentional choppiness is part of the aesthetic |
The soap opera effect: When 24fps cinematic content is interpolated to 60fps, it can look unnaturally smooth — like a TV soap opera or home video instead of a film. If you are interpolating movies, try 48fps (2x) instead of 60fps to preserve the cinematic feel.
15.Common Problems and How to Fix Them
15.1Ghosting (Translucent Smearing)
Moving objects leave a ghost trail. Fix: Use RIFE over older algorithms, reduce multiplier from 4x to 2x, interpolate at native resolution before upscaling.
15.2Artifacts at Scene Cuts
Garbled frames at transitions between shots. Fix: Use tools with scene detection (Imagera, Flowframes, Topaz) that automatically skip interpolation at cuts.
15.3Warping on Complex Motion
Objects stretch or bend during rotation or 3D movement. Fix: Accept that some complex motions are imperfect; use scene detection; keep multiplier at 2x.
15.4Animation Smearing
Characters melt between keyframes in hand-drawn animation. Fix: Use lower multiplier (2x), accept that 2D animation is the worst case for interpolation. 3D animation handles interpolation much better.
15.5Blurry or Softened Output
Some RIFE implementations soften the output slightly compared to the source. Fix: Run a sharpening pass after interpolation, or use a tool that includes a sharpening post-process option.
15.6Increased File Size Exceeding Platform Limits
Output file is too large to upload to your target platform. Fix: Re-encode with H.265 at a platform-appropriate bitrate before uploading. See the File Size Impact section above for reference bitrates.
16.Frequently Asked Questions
16.1How do I increase video FPS online for free?
Upload your video to Imagera AI Frame Interpolator and select your target frame rate (e.g., 30fps to 60fps). The AI generates new in-between frames using RIFE-based motion estimation. Free credits are included on signup — no download, no GPU required. This is the fastest way to increase video FPS online without installing any software.
16.2What is the best free frame interpolation tool?
For online use, Imagera AI offers the best balance of quality, convenience, and free credits. For desktop use, Flowframes is the best free option — open-source, supports RIFE and DAIN algorithms, includes scene detection, and preserves audio. SVP ($24.99 one-time) is best for real-time playback without re-encoding. The right choice depends on whether you prefer a browser-based workflow or are comfortable with desktop software and have a capable GPU.
16.3Can I create slow motion from normal 30fps video?
Yes. Interpolate your 30fps video to 120fps (4x multiplier) using Imagera's Frame Interpolator, then slow it down to 30fps playback for smooth 4x slow motion. The AI generates the missing frames so motion looks natural rather than choppy. Works best with smooth, predictable motion like sports and nature footage. This slow motion video maker AI approach produces results indistinguishable from footage shot natively at high frame rates for many types of content.
16.4What is the soap opera effect?
The soap opera effect occurs when 24fps cinematic content is interpolated to 60fps, making films look unnaturally smooth — like a TV soap opera instead of a movie. The human brain associates 24fps with cinema and higher frame rates with live TV. To avoid it, interpolate cinematic content to 48fps (2x) instead of 60fps. If you are enhancing movies or cinematic videos, 48fps is the ceiling that preserves the intended aesthetic.
16.5Does frame interpolation work on animation?
Poorly for 2D animation. Hand-drawn 2D animation and anime produce the worst results — ghosting on outlines, characters appearing to melt between keyframes, and destruction of intentional artistic timing. 3D animation (Pixar, Disney CG) interpolates much better because motion is smoother and more predictable. For 2D animation, use 2x maximum and expect imperfect results.
16.6How much does frame interpolation increase file size?
Roughly 1.5 to 2x for a 2x multiplier in H.264. Using H.265 (HEVC) encoding on export reduces output size by 40–50% compared to H.264 with no perceptible quality loss. A 100MB 1080p30 clip will typically produce a 150–200MB output at 1080p60 (H.264) or an 80–120MB output at 1080p60 (H.265). See the File Size Impact section above for a full breakdown.
16.7Can I use AI frame interpolation to fix choppy screen recordings?
Yes, with caveats. Screen recordings at 24fps or 30fps interpolate well for sections showing smooth UI animations and scrolling. However, sections with rapid cursor movement, drag-and-drop operations, or on-screen text editing can produce artifacts because these motions are not smooth and continuous in the same way real-world footage is. Use 2x only for screen recordings and enable scene detection to handle application transitions cleanly.
16.8What is RIFE frame interpolation and why is it better than DAIN?
RIFE (Real-Time Intermediate Flow Estimation) is a neural network architecture that estimates optical flow directly at the interpolation timestep, rather than computing full optical flow maps first. This makes it 4 to 27 times faster than DAIN while producing equal or better quality in most scenarios. DAIN (Depth-Aware Video Frame Interpolation) was the dominant algorithm before RIFE and added depth estimation to handle occlusion, but its compute requirements made it impractical for online tools. RIFE's efficiency is what made browser-based frame interpolation tools viable — and it is the engine behind Imagera's Frame Interpolator.
16.9How does frame interpolation help virtual influencer content?
Smooth, high-frame-rate video is one of the key signals that separates polished AI virtual influencer content from amateur productions. Interpolating AI-generated clips from 24fps to 60fps removes the mechanical jitter that gives away synthetic video, making influencer content look more natural and scroll-stopping on social feeds.
16.10Can I add music to interpolated videos?
Yes — and pairing smooth 60fps footage with a matching soundtrack significantly elevates the final output. Use a free AI music generator to create a royalty-free track that matches the pacing and mood of your interpolated video, then combine them in any basic video editor before publishing.
16.11Does interpolation help action figure reveal videos?
Smooth motion is critical for product reveal content. Interpolating AI action figure reveal videos from 24fps to 60fps gives the turntable and dolly shots a premium, broadcast-quality feel that performs noticeably better on TikTok and Instagram Reels.
17.Start Interpolating Video for Free
Whether you need slow motion from a standard recording, smoother gameplay for YouTube, or restored family footage, AI frame interpolation delivers results in minutes. Imagera AI's complete video pipeline covers every step: frame interpolation, 4K enhancement, video generation, and cinematic music video creation — all from one browser-based dashboard.
Try Imagera AI Frame Interpolator Free →
No credit card required. Upload any video file. RIFE-powered processing with free credits.
Create an Imagera account to access the full video pipeline →
18.Related Resources
- Best AI Video Upscaler — Upscale video resolution alongside frame rate
- AI Video Enhancer — Complete video enhancement guide
- How to Enhance Old Video Quality with AI — Restore vintage footage
- Best Free AI Music Generator — Add AI-generated soundtracks to your interpolated videos
- AI Action Figure Generator — Another viral AI creative trend for TikTok and Instagram
- Upscale Image to 16K with AI Free — Combine with frame interpolation for full-resolution archive restoration
- Create an AI Virtual Influencer — Smooth interpolated video is essential for polished AI influencer content
Do it now: convert 30fps to 60fps online — no install, no watermark.