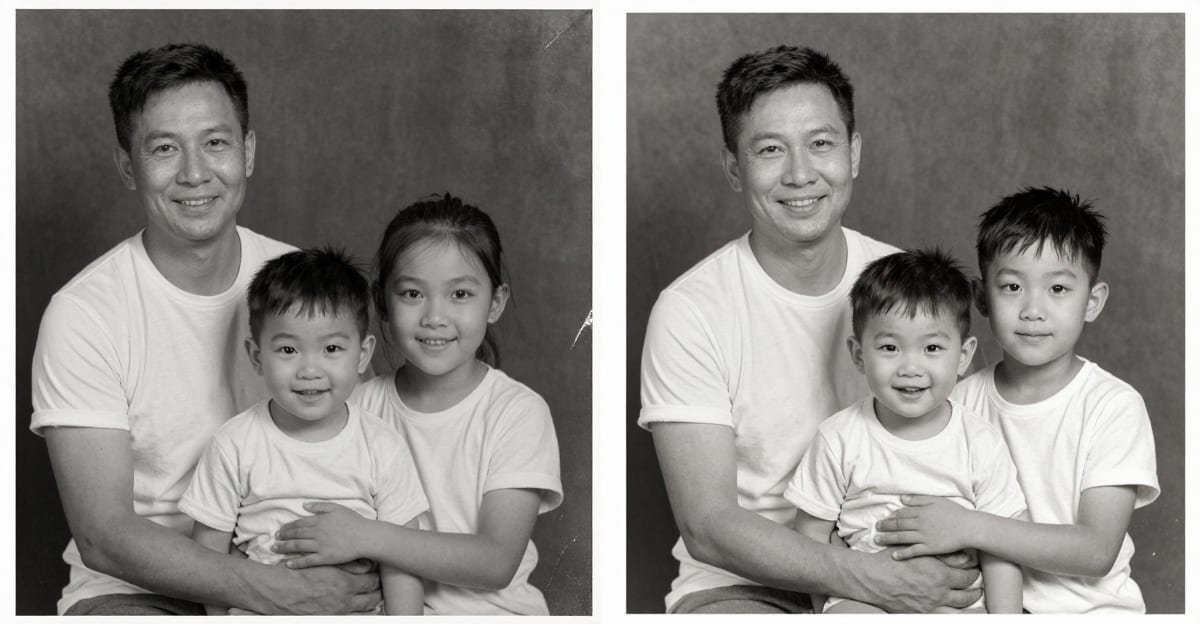
You can complete this on Imagera without installing software: upload a real source file, describe the change, confirm credits up front, generate, and review before you publish. Restore Old Photos with AI Online — Fix Faded Family Pictures — this guide covers the steps, quality checks, pricing, and when to open related tools so an irreplaceable photo ends up clear, dignified, and ready to print.
Old family photos rarely fail all at once. They fade a little each decade, pick up scratches from being handled, curl at the corners in a shoebox, and lose their sharpest detail every time they are copied or scanned. By the time you go looking for the one good photo of a grandparent, a wedding, or a childhood you can barely remember, the print is often the only copy left — and it is soft, spotted, and too small to enlarge. AI restoration is designed for exactly that situation: rebuild the detail that time removed, keep the faces looking like the real people, and produce a file large enough to frame.
Quick answer: Yes — Imagera restores old, faded, or damaged photos online in your browser, typically finishing a single image in under 60 seconds with no software to install.
How does Imagera restore old and faded family photos online?
Upload a scanned print, and Imagera repairs cracks, scratches, and fading, sharpens blurry faces, and can output crisp 4K (and up to 8K) versions with far more visible detail than the original scan. Most single photos finish in under 60 seconds, and you can batch 10+ pictures in one session, starting from a small credit cost per image in 2026.
Can AI recolor and repair badly damaged black-and-white photos?
Yes. Imagera adds natural-looking color to black-and-white prints and reconstructs faces even when large sections are torn, stained, or water-damaged, all in one pass. For best results, scan your originals at 300-600 DPI before restoring — the higher the source resolution, the more detail the AI has to work with, which especially helps on century-old family portraits.
Quick verdict
Best path: scan → Restore Old Photos → optional AI Photo Fixer → Upscaler for print. Pay-first credits from $19.99.
If you only remember one thing: restore the faces first, then upscale the winners for print. Doing it in that order means you are enlarging a photo that is already sharp, rather than baking soft, damaged detail into a bigger file.
Step-by-step
- Flat scan at 300–600 DPI if possible (phone photos of photos work for tests).
- Open Restore Old Photos.
- Review faces carefully — identity > "pretty".
- Fix residual issues with AI Photo Fixer or AI Image Repair.
- Upscale only approved finals.
- Archive both original and restored masters.
What Restore Old Photos does
Restore Old Photos on Imagera is a browser-based tool for repairing faded, scratched, and low-resolution family pictures. It runs two kinds of work: a dedicated face restoration pass that sharpens blurred, faded, or low-detail faces while keeping the person's real bone structure, expression, and features — so the result still looks like them — and whole-image repair that reconstructs detail lost to scratches, faded contrast, soft focus, film grain, and scanner compression.
Because old scans are usually too small to print, restoration is paired with a print-ready upscale pass to 2K, 4K, or 8K. That means an 8×10″, A4, or 16×20″ print lands crisp at 300 DPI, ready for any photo lab. Everything runs on cloud GPUs behind the browser — no scanner, no desktop install, and no queue with a human retoucher.
The tool is deliberately split into two jobs because they solve different problems. Restoration is about quality — undoing the damage. Upscaling is about size — making the file big enough to print. A generic one-tap "enhance" filter tries to do both at once and usually sharpens everything equally, which is how faces end up looking plastic or subtly wrong. Treating faces as their own priority pass, then enlarging afterward, keeps the person recognizable and the print sharp.
Two things Restore Old Photos does not do, so there are no surprises. It cannot invent information that is physically gone — a large torn-away corner or a heavy stain sitting directly over someone's face has no detail underneath for the model to recover. And it keeps the original tones by default: a black-and-white or sepia photo stays black-and-white or sepia. If you want color added, that is a separate, optional step in the Edit Image studio after restoring.
How it works
- Upload a scan or phone photo. No scanner needed — lay the original print flat in bright, even light, avoid glare and shadows, and photograph it parallel to the frame. JPG, PNG, and WebP are all supported.
- Restore the faces. Run the face restoration pass so faces come back sharp and identity-accurate. For the most important photos, a higher-quality face detailer pass does deeper reconstruction.
- Upscale for print. Enlarge the restored photo to 2K for small frames and order-of-service programs, 4K for crisp 8×10″ and A4 prints, or 8K for 16×20″ and poster-size memorial prints.
- Review before you export. Check faces first — accuracy matters more than a "prettier" render. Compare against the original master.
- Download and archive. Export the winners, print anywhere, and keep both the original scan and the restored master.
Behind those five steps, the work runs on cloud GPUs, which is why a restore that a manual service would quote in days finishes in minutes. You confirm the credit cost before anything runs, and if a generation fails, the credits for that run are refunded automatically — so you only ever pay for output you actually receive. Restored and original files stay in your private account vault, visible only to you, and you can download or delete them whenever you want.
Step-by-step walkthrough
Here is the full workflow in practice, from a shoebox print to a framed enlargement.
- Get the best source you can. A flatbed scan at 300–600 DPI is ideal, but a phone photo of the print is perfectly usable — most people start there. Lay the photo flat on a table near a window, turn off harsh overhead lights, avoid glare, fill the frame with the photo, and hold the phone parallel so the edges stay square.
- Upload to Restore Old Photos. Drag in the JPG, PNG, or WebP. Nothing installs; the studio opens in the browser on a phone, tablet, or laptop.
- Run the face restoration pass. Start with the fast pass. For the single most important photo — the one going on the order of service or the mantel — run the high-quality face detailer instead for deeper facial reconstruction.
- Review the face at 100%. Zoom in on the eyes, mouth, and jawline. The goal is recognition, not glamour. If the person no longer looks like themselves, that result is a fail, no matter how clean it looks.
- Clean up any leftover damage. If a scratch, stain, or soft area survived the pass, send the result through AI Photo Fixer or AI Image Repair as a second step.
- Upscale only the approved final. Once the face is right, run the print upscale at the size you actually need — 2K, 4K, or 8K. Enlarging a photo you have already rejected just wastes a credit.
- Download and print. Send the file to a same-day print shop, an online photo lab, or a home printer.
- Archive both masters. Keep the original scan and the restored file. The original is the source of truth; the restored master is what you reprint from next time.
Common use cases
- Memorial and funeral services — turn the one photo you have of a loved one into a clear, dignified portrait for the order of service, a display board, or a framed remembrance, often the same day. When a service is only days away, minutes-per-photo turnaround is the entire point.
- Anniversary and milestone gifts — restore a wedding photo for a 50th anniversary or a childhood portrait for a milestone birthday, then print and frame it. A restored print is a gift people keep.
- Family archive projects — digitize and repair the album before the originals fade further, batch-upscaling photos so a whole album side becomes an afternoon project instead of a multi-month chore.
- Reprints of damaged one-of-a-kind photos — recover a single surviving copy with scratches, fade, or blur into something print-worthy.
- Genealogy and heritage work — sharpen ancestor portraits for a family tree, a heritage book, or a slideshow, keeping the authentic period tones rather than modernizing them.
- Insurance and keepsake recovery — bring a water-damaged or sun-faded photo back to a usable state after a move, a flood, or years in an attic.
Who it's for
- Families organizing a memorial who need a specific, irreplaceable photo ready fast and looking respectful.
- The relative who inherited the boxes and wants to preserve an archive before the prints degrade any further.
- Gift-givers turning an old photo into a framed anniversary or birthday present.
- Genealogists and local-history keepers working with fragile source material they cannot risk re-scanning repeatedly.
- Anyone without Photoshop or restoration skills who wants a clean result without a design learning curve or a desktop install.
Comparison
Old-photo restoration has traditionally meant one of two extremes: pay a specialist by the hour, or fight with desktop software yourself. Here is an honest look at how the browser-based AI workflow compares. Competitor prices are shown in dollars where they are typically advertised; the Imagera column is in credits, because our per-credit rate varies by plan.
| Approach | Turnaround | Typical cost per photo | Skill needed | Print-ready size |
|---|---|---|---|---|
| Imagera Restore Old Photos | Minutes | ~30 credits for a typical full restore (face pass + 4K upscale) | None — browser workflow | Built-in upscale to 2K–8K |
| Manual restoration service | Days to weeks | $30–90 | None (you hand it off) | Depends on the service |
| Desktop editing software | Hours, per photo | Software license + your time | High — retouching skill | Manual resize only |
| Free one-tap "enhance" apps | Seconds | Free / limited | None | Usually small, screen-only |
The trade-offs are real. A skilled human retoucher can still handle catastrophic physical damage that no automated tool can — but you pay for their time and wait for their queue. Free one-tap apps are genuinely fine for a soft phone snapshot, but they rarely produce a file large enough to print and often distort faces. The AI workflow sits in the middle: fast and inexpensive, identity-aware on faces, and it outputs a genuinely print-ready file — with the honest limit that information physically gone from the print cannot be recovered.
Tips for best results
- Photograph the original flat in daylight and fill the frame — a good source scan does most of the work.
- Restore first, then upscale. Sharpening faces before enlarging avoids baking in soft detail.
- Prioritize elders and irreplaceable photos first, rather than dumping an entire box at once.
- Use the high-quality face detailer pass on the single most important photo, and the fast face pass for everything else — it is a better use of credits.
- Keep the authentic black-and-white or sepia tones for memorial and archive photos; if you do want color, add it as a separate colorization step in the Edit Image studio after restoring.
- Match the upscale tier to the print, not the maximum: 2K for a small frame or program, 4K for an 8×10″ or A4, 8K only when you are going to 16×20″ or a poster.
- Always human-check faces on your phone before printing — a quick zoom on the eyes and mouth catches most problems.
Common mistakes to avoid
- Upscaling before restoring. Enlarging first locks in the very softness and scratches you are trying to remove. Always restore the face, then upscale the approved result.
- Chasing "prettier" over accurate. A cleaner-looking render that no longer looks like the person is a failed restore, especially for a memorial. Recognition beats polish.
- Feeding a bad source. A glare-covered, angled phone shot of a print will limit the result no matter what. Two minutes spent shooting the original flat in good light pays off more than any setting.
- Maxing out the upscale for no reason. An 8K file for a wallet-sized print wastes credits and produces an unwieldy file. Size to the actual print.
- Not keeping the original. The restored file is a derivative. Always archive the original scan too — it is what you re-restore from if the tools improve later.
- Batch-dumping the whole box first. Restore the important photos one at a time and review them, then batch-upscale the rest. It is faster to catch a face problem on one photo than on fifty.
Examples
A memorial three days out. You have one soft, slightly yellowed portrait of a grandmother — the only good one anyone can find. You photograph it flat by a window, upload it, run the high-quality face detailer so her features come back sharp and unmistakably her, then upscale to 4K for a framed 8×10″ on the display table and to 2K for the order-of-service program. Both files are ready the same afternoon, and you send them straight to a same-day print shop.
A 50th-anniversary gift. You find a creased, faded wedding photo from decades ago. The fast face pass brings both faces back, AI Photo Fixer cleans a stubborn crease that ran across the background, and an 8K upscale makes a 16×20″ enlargement crisp enough to hang. The original stays in your vault; the restored master is what you reprint from for other relatives.
An album weekend. A parent's photo album has one whole side of small, fading prints. You scan them, restore the faces on the handful with people you want front-and-center, and batch-upscale the rest for a printed keepsake book — a project that used to feel like a "someday" turns into an afternoon.
When free unblur tools are enough
Minor soft phone shots may use /free/image-upscaler for enlarge. Deep scratches, chemical fade, and torn edges need cloud AI restore — credits apply.
The dividing line is simple: if the photo is just slightly soft and already reasonably clean, a free enlarge is fine. If it has real damage — scratches, cracking, chemical fading, torn edges, or faces that have lost their detail — that needs the dedicated restoration and face passes, which run on cloud GPUs and use credits.
Pricing
Packs from $19.99. A fast face restoration pass and a print-ready upscale are each priced in credits, and a typical full restore is a face pass plus a 4K upscale — a modest credit total per photo compared with the $30–90 that manual services often charge. If a generation fails, the credits for that run are refunded automatically. Batch family archives by priority (elders first), not entire boxes at once.
In credits, the pieces break down as: a fast face restoration pass, a high-quality face detailer pass for your most important photos, and a print upscale that scales with output size (2K for small frames, 4K for 8×10″ and A4 prints, 8K for 16×20″ and posters). A typical full restore — the fast face pass plus a 4K upscale — is about 30 credits per photo. There is no subscription lock-in for restoration you only need to do once; credits come with every plan, and you confirm the cost before each run.
Start here (product links)
See it in action — real Imagera output
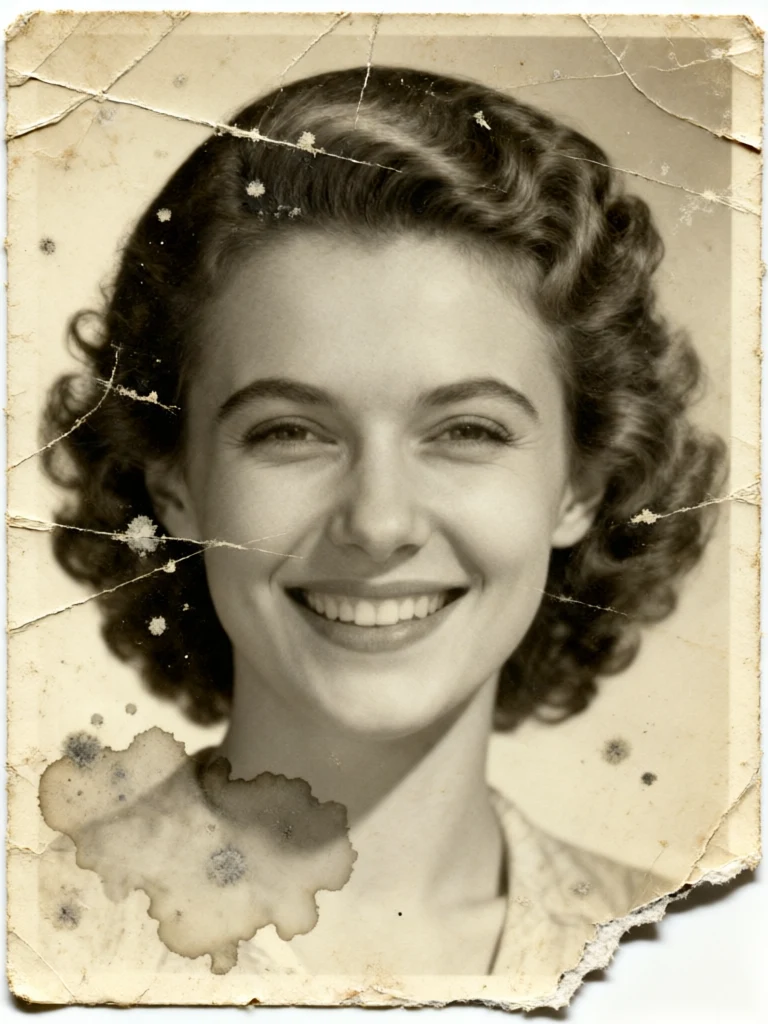
These are real, unedited results from the Imagera restore old photos — the exact tool this guide covers.

Bottom line
Imagera Restore Old Photos repairs faded, scratched, and soft family photos in the browser with pay-first credits from $19.99. Pair with upscaler and photo fixer for print-ready archives.
CTAs: Restore Old Photos · AI Photo Fixer · AI Image Repair · Pricing
Tools and next steps
| Goal | Open |
|---|---|
| Image edits & pose | Imagera Image Editor · Identity Editor |
| Headshots | AI Headshot |
| Product / person reels | Product Reel Maker · Human Reel Maker |
| Talking photo | Avatar Generator · Talking Avatar |
| Pricing | Pricing |
How to ship: upload a master file → write a clear instruction → confirm credits → generate → review on phone → export winners only.