Google Meet Recording to Clips: Step-by-Step (2026)
You ran a webinar, a team Q&A, or a client demo on Google Meet. The hour-long recording is sitting in your Drive right now. Everyone on your marketing team knows there are three or four brilliant moments buried inside it — and none of them want to spend an afternoon in a timeline editor finding them.
This guide covers the exact Google Meet-specific workflow that most "clip your meetings" articles skip: where the file actually lands and why it is not an MP4, what the recording captures when you have multiple speakers on screen, how to get the file onto your machine, and how to hand it to an AI tool that does the heavy lifting — finding the moments, cropping them to vertical, and burning in synced captions — without you touching a timeline.
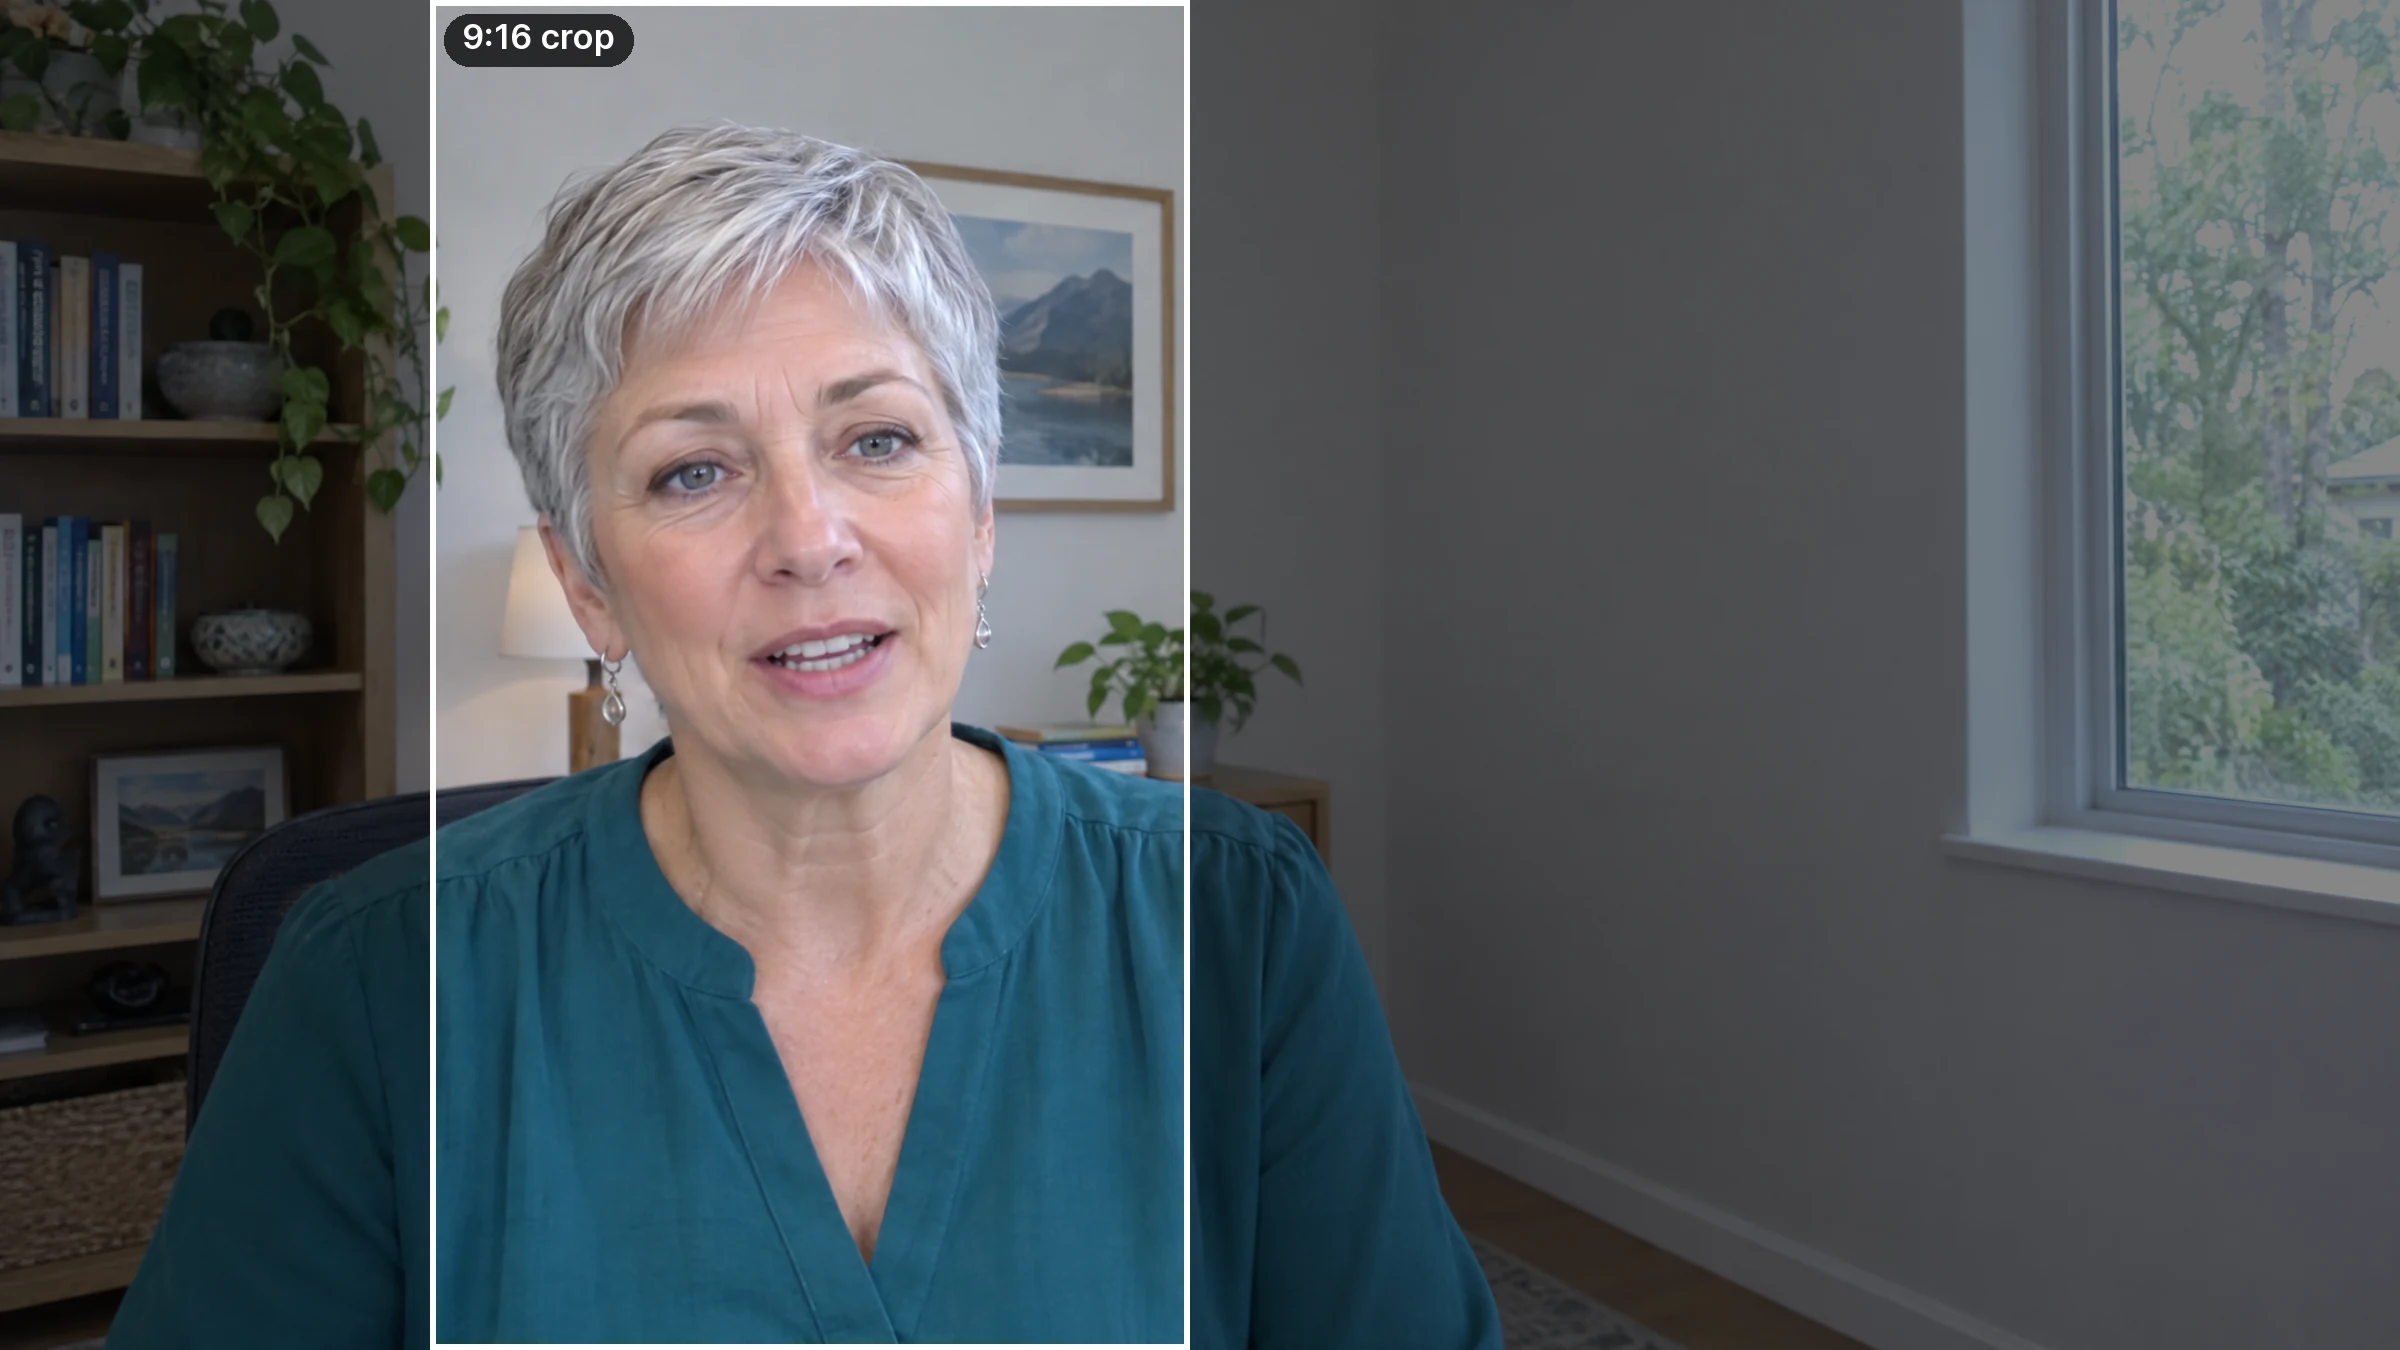
Illustration: generated 16:9 meeting frame of an invented speaker, with the 9:16 area a vertical clip keeps outlined.
Quick answer: Yes. You can turn a Google Meet recording into short vertical clips with Imagera in minutes: upload the MP4 from your Meet Drive folder, and the AI auto-detects highlight moments and reframes them to 9:16.
How long does it take to turn a Google Meet recording into clips?
Most 30-to-60-minute Meet recordings render into 5-10 vertical clips in under a minute per clip on Imagera. The AI scans the full timeline, ranks the top candidate moments, and auto-crops each to 9:16 at up to 4K. A typical 45-minute call yields around 8 clips, far faster than trimming and reframing each one by hand.
Which parts of a Meet call make the best clips?
Aim for 15-to-60-second segments built around one clear idea: a decision, a customer quote, or a punchy answer. Imagera flags the strongest moments across your recording, then you keep the 5-8 best. Clips that open with a clear hook in the first few seconds tend to hold attention better than slow build-ups, so trim dead air aggressively and lead with the payoff.
Where is my Google Meet recording saved?
Google Meet recordings are automatically saved to the organizer's Google Drive, inside a folder called Meet Recordings — regardless of who pressed the record button. The person who started the recording also receives an email with a direct link, and if the meeting was scheduled via Google Calendar, the link is appended to the calendar event automatically.
There are two common points of confusion here. First, if you joined someone else's meeting and pressed record, the file lands in their Drive, not yours. You will receive the email notification, but access depends on the sharing settings the organizer has applied. Second, the recording does not appear instantly. Short calls typically process within a few minutes; recordings from longer sessions — a two-hour webinar, for example — can take several hours. Google sends a notification email the moment processing completes, so that email is your reliable signal that the file is ready.
To navigate there manually: open Google Drive, go to My Drive, and look for the Meet Recordings folder. If it is not visible in your directory tree, type "Meet Recordings" in the Drive search bar and it will surface immediately.
Who can record a Google Meet call?
Recording is a paid-plan feature. Native cloud recording is available on Business Standard, Business Plus, Enterprise Standard, Enterprise Plus, and Education Plus plans. Free Gmail accounts, Business Starter subscribers, and external guests cannot use the built-in recorder.

Even when your plan qualifies, recording stays hidden until a Workspace administrator enables it in the Admin console under Apps → Google Workspace → Google Meet → Meet video settings → Recording. If you have a qualifying plan but see no record button, your admin has likely left it off.
The meeting host and any co-hosts can start a recording by default. If the host has disabled Host Management, anyone in the same Workspace organisation can start recording. External attendees — even if they are on a qualifying Workspace plan themselves — cannot start a recording unless the host explicitly promotes them to co-host.
What format does a Google Meet recording download as?
Google Meet recordings download as .webm, not MP4. The file uses H.264 video inside a WebM container and AAC stereo audio. Most modern browsers and VLC play .webm files without any conversion, but many video editors and all upload forms for social media expect an MP4.

To download the file: open the Meet Recordings folder in the organizer's Drive, right-click the recording, and select Download. The .webm file lands in your local downloads folder.
If you need an MP4 for a traditional editor, tools like HandBrake (free, open source) or any online .webm-to-MP4 converter handle the remux in a few minutes without quality loss for the H.264 stream. Notably, if you plan to upload directly to Imagera's AI Video to Reels tool, the .webm format is accepted directly — no conversion step required.
What is the maximum resolution of a Google Meet recording?
Google Meet records at up to 1080p for the speaker's video feed on eligible plans and devices. Screen share content can also reach 1080p. The baseline resolution is 720p, and what you actually get depends on three variables: the plan tier, the camera capability of the person speaking, and network conditions during the call.
For most business recordings — a talking head presenter, a panel discussion, a customer webinar — you will get a 720p or 1080p landscape file at a 16:9 aspect ratio, typically around 1920×1080 or 1280×720. This is wide-format footage that needs to be transformed before it is usable on Instagram Reels, TikTok, or YouTube Shorts, which all require 9:16 vertical (1080×1920).
How does Google Meet record a call with multiple speakers?
This is the detail that most repurposing guides miss. Google Meet's native recorder does not capture the gallery (tile) view that you see on your screen during the live call. Instead, it uses an active speaker focus: the recording zooms to whoever is talking at that moment, automatically switching between participants as the conversation moves.

Community threads in the Google Meet support forums confirm this is the platform's intended behaviour, not a bug. Even if you manually switch to tile view during the meeting, the cloud recording continues to prioritise and enlarge the current speaker. If someone shares their screen, the recording captures the shared screen in the primary frame and places the speaker's camera in a smaller picture-in-picture tile.
What this means in practice: your recording is already attempting to follow the speaker, but it is doing so inside a 16:9 frame with letterboxing, sidebars, and the Meet UI chrome baked into the background. When you then want a vertical clip, you need a tool that can reframe that wide active-speaker footage to fill a 9:16 canvas — keeping the speaker's face centred — rather than simply cropping blindly from the edges.
Imagera's AI Video to Reels handles exactly this: it reads the active-speaker area within your Meet recording and performs an intelligent crop to vertical, tracking the speaker's position frame by frame so their face stays centred in the 9:16 window rather than drifting to the edge.
Can you turn a Google Meet recording into vertical clips automatically?
Yes. Upload the downloaded Meet recording to Imagera's AI Video to Reels and the tool handles the full pipeline without a timeline editor. It transcribes the audio, scores each segment for self-contained value (moments that open with a clear thought and end with a conclusion, rather than mid-sentence fragments), reframes the 16:9 footage to 1080×1920 following the active speaker, burns in word-synced captions with a bold hook line at the top, and delivers a set of ready-to-post vertical clips.
You choose the number of reels (3, 5, 8, or 10) and the target length (15, 30, or 60 seconds) before the tool runs. The file size limit is 500MB, which covers a 60-to-90-minute Meet recording at 720p with room to spare. Billing is per-reel on a pay-as-you-go basis; there are no subscriptions required and the output comes with full commercial rights.
For a deeper look at the multi-model pipeline behind this kind of automated editing, the AI video editor studio overview covers how the transcription, moment-detection, and captioning layers interact.
How to turn a Google Meet recording into clips: step by step
This numbered workflow takes you from a finished call to a set of vertical clips ready to post.
Step 1 — End the meeting and wait for processing. Stop the recording before leaving the call. A banner confirms the recording has started saving. For a 60-minute webinar, allow 10 to 30 minutes for processing; longer sessions may take a few hours. You will receive an email when the file is ready.
Step 2 — Open Google Drive and locate the recording. Go to drive.google.com and open My Drive → Meet Recordings. If you are not the organiser, check the link in your notification email — it points directly to the file in the organiser's Drive. Confirm you have download permission; as of April 2026, new recordings can be downloaded by viewers by default unless the owner restricts access.
Step 3 — Download the file.
Right-click the recording and choose Download. The file arrives as a .webm. Rename it to something descriptive (for example: client-demo-july-2026.webm) so you can identify it easily after upload.
Step 4 — Upload to Imagera AI Video to Reels. Go to AI Video to Reels and drag your .webm file into the upload area. The 500MB limit accommodates most single-session Meet recordings. If your recording is larger — for instance, a three-hour all-day workshop — trim it in Google Drive's built-in player (which supports basic in-and-out cuts) before downloading.
Step 5 — Select your reel count and target length. Choose how many clips you want (3, 5, 8, or 10) and the clip duration (15, 30, or 60 seconds). For a 60-minute educational webinar, 5 reels at 30 seconds each typically gives you a full week of social content. For a tight product demo, 3 reels at 15 seconds extracts the sharpest sound bites.
Step 6 — Review and download your vertical clips. The tool returns individual MP4 files at 1080×1920. Each clip has captions already burned in and a hook line above the first spoken word. Review each clip in the browser, then download the ones you want to post. No additional editing is required, though you can of course trim or reorder in any video app before publishing.
Google Meet vs. Zoom: what changes for clipping?
The platform you recorded on affects what file you get and what your clipping tool has to work with. The differences below matter when you are choosing a workflow.
| Feature | Google Meet | Zoom |
|---|---|---|
| Where the recording saves | Organiser's Google Drive, "Meet Recordings" folder | Cloud: Zoom Cloud (paid plans). Local: MP4 in your Zoom folder |
| Default file format | .webm (H.264 video, AAC audio) | .MP4 directly |
| Recording resolution | 720p default, up to 1080p on eligible plans | 720p default, up to 1080p on paid plans |
| Speaker view in recording | Active speaker auto-focused; gallery view is not preserved | Cloud recording supports separate gallery-view and active-speaker MP4 files |
| Screen share capture | Shared screen as primary; speaker in PiP | Shared screen recorded alongside speaker |
| Who can record (native) | Business Standard and above; free accounts cannot | Free accounts can record locally; cloud recording requires paid plan |
| Processing delay | Minutes to hours depending on length | Cloud recordings process similarly; local recordings are instant |
| Clip tool compatibility | Upload .webm directly to Imagera; no conversion needed | Upload .mp4 directly; no conversion needed |
The practical upshot: Zoom gives you an MP4 immediately, which some editors prefer. Meet gives you a .webm that requires one extra step if you are going to a traditional editing tool — but Imagera accepts .webm directly, so the workflow is the same number of steps either way.
How do you get the speaker in frame when the recording is a gallery view?
Google Meet's recording does not preserve a true gallery view (see the multi-speaker section above), so what you have is footage that already prioritises the speaker. The challenge is that this footage is still 16:9, and the speaker occupies perhaps one-third of the frame width — the rest is empty video call background, Meet UI, or other participant thumbnails at the edges.
A blind horizontal crop (just taking the centre strip of the wide frame) often works when the speaker is centred, but breaks down when the camera is off-centre or when the recording has captured screen share content on one side. Imagera's active-speaker tracking analyses each frame and adjusts the 9:16 crop window dynamically, so even if the speaker's face is slightly left or right of centre in the original file, the vertical output keeps them in frame throughout the clip. The system does not add or synthesise any new footage — it reframes what was already captured.
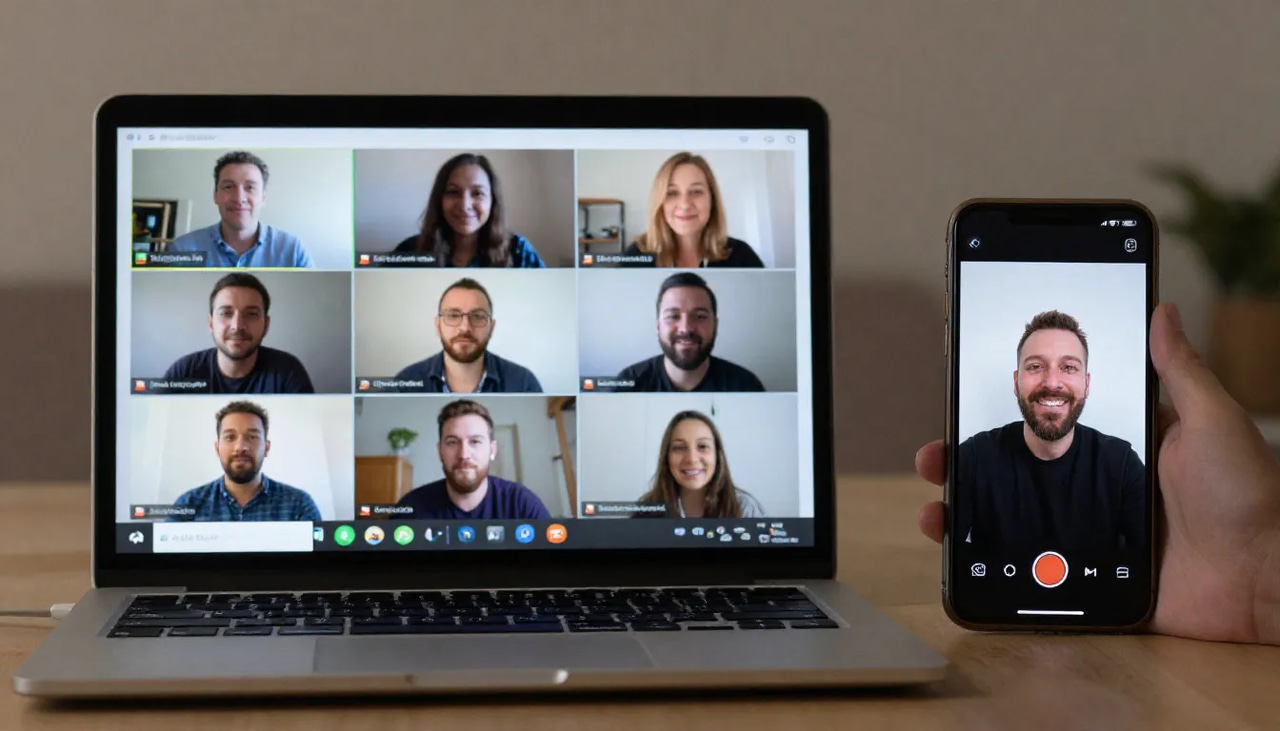
For calls where you used a screen recorder instead of Meet's native recorder (capturing the full gallery grid as you saw it on screen), the crop logic works the same way: the AI identifies where faces are in the frame and centres the vertical window on the most prominent speaker.
What about captions for a repurposed meeting clip?
Captions are not optional for short-form social video. Research by major platforms consistently shows that a substantial portion of Reels and Shorts are watched without sound, particularly in feed scroll contexts. A clip from a meeting recording — where the speaker may be using technical language or moving quickly — is harder to follow without text support.
Imagera burns word-synced captions directly into the video during the clipping process. The transcription runs as part of the pipeline: each word appears on screen as it is spoken, rather than as a static block of text. A hook line — typically the most quotable phrase from that clip — appears as a bold title at the top of the frame. No separate captioning step, no third-party tool, no manual subtitle timing.
If your meeting was recorded in a language other than English, check Imagera's supported transcription languages before uploading, as caption accuracy depends on the transcription quality for that language.
Manual editing vs. AI clipping: which approach makes sense?
| Factor | Manual editing (Premiere, DaVinci, CapCut) | AI clipping (Imagera AI Video to Reels) |
|---|---|---|
| Time per clip | 20–60 minutes including reviewing, trimming, reframing, captioning | 5–10 minutes upload-to-download for a full batch |
| Editor skill required | Intermediate to advanced | None — upload and configure |
| Moment selection | Human judgement; you review the full recording | AI scores and selects self-contained high-value moments |
| Vertical reframing | Manual crop and position in timeline | Automatic active-speaker tracking |
| Captions | Separate tool or manual typing | Included, word-synced, with hook line |
| Cost | Software subscription + editor time | Per-reel credit cost, pay-as-you-go |
| Best for | Highly scripted clips, brand-specific edits, custom graphics | High-volume repurposing, time-limited teams, regular webinar series |
The manual approach gives you finer control over every frame. The AI approach gives you a week of social content from a single upload in under an hour. For most teams running regular webinars or recurring client calls, the AI workflow is the practical choice for the first pass — manual refinement can happen selectively on the clips that need it.
The practical case for repurposing meeting recordings
A 60-minute webinar or customer Q&A call represents the same production cost whether you post one clip from it or ten. The recording is already paid for in presenter time, platform access, and promotional effort to get people onto the call. Turning that archive into a week of short-form social content is not a secondary project — it is extracting the return you have already invested in.
Google Meet's recordings land in Drive automatically, they are indexed by date and meeting title, and they sit there at full resolution indefinitely (within your plan's storage limits). Most teams never touch them again after the call ends. The gap between "we have the recording" and "we have clips ready to post" has historically required a video editor, a captioning tool, and several hours of work. That gap is now a single upload.
The workflow — download from Drive, upload to AI Video to Reels, choose your reel count and length, download vertical clips — takes the average team under 15 minutes of active effort. Everything else is processing time you spend doing something else.
If your team runs webinars on a regular cadence, or if you have a library of past Meet recordings you have never repurposed, that is a content archive with real distribution potential waiting to be used. Start with one recording and one set of five clips, and the workflow becomes repeatable from there.
Sources:
- Google Meet Recordings: Find, Download, Share — Notta
- Where Do Google Meet Recordings Go — Noota
- Google Meet now supports high definition video for recording — Google Workspace Updates
- Turn Meet recording on or off — Google Workspace Help
- How to Record Google Meet in 2026 — Fireflies
- Google Meet Recording Views: Active Speaker vs. Tile — Workalizer
- Google Meet vs. Zoom: Which One to Choose in 2026 — MeetGeek
- How Long Does It Take to Process Google Meet Recordings — itGenius
- Can I save a Google Meet recording as an MP4 file — Google Support
- Set recording quality limits for Google Meet — Google Workspace Help