To remove flyaway or stray hair from a photo, choose a tool by how it finds the hair: a brush you paint over each strand, a slider that detects frizz automatically, or a typed instruction. For a handful of visible strands, the instruction is the quickest route. Upload the portrait to Smart Detail Enhancer, say which strands go and where they are, then list what must stay: hairstyle, part, length, colour, volume and face. One run costs 20 credits on the default engine. Before you keep the result, check the hairline and the face at 100%, because faces shifted in most of our runs.
What flyaway hair apps actually do
Most tools sold as an "AI hair remover" use one of three methods, and the method decides what can go wrong.
| Method | How it works | Examples | Where it struggles |
|---|---|---|---|
| Brush and erase | You paint over each strand; the app fills from surrounding pixels | Magic Eraser (magiceraser.live), BeFunky Object Remover | Dense frizz takes many small passes; the fill cannot recover detail the hair was covering |
| Automatic slider | The software detects stray hair; you set the strength | Evoto AI Stray Hair Remover, Aftershoot | Set too strong, hair can look flat; you get little say over which strands go |
| Typed instruction | You describe the edit; the whole image is regenerated from photo plus sentence | VSCO AI Lab prompt, Smart Detail Enhancer | Vague wording can restyle the hair; faces and other details can shift |
The vendors say as much. The stray-hair page on magiceraser.live (updated 21 June 2026) says it "cannot recover hidden detail exactly" and that "dense frizz needs careful section-by-section brushing." Evoto's AI Stray Hair Remover page (updated 11 June 2026) says results vary with "image quality, lighting, subject pose, file format, and selected settings." A Retouching Labs guide (last edited 18 May 2026) warns that overdoing it gives "helmet hair," and that "a few remaining flyaways can actually make a portrait look more authentic and human." WeEdit's February 2026 roundup notes that smoothing too much in AirBrush can leave hair "overly flat or unrealistic". We checked VSCO's AI Lab page, BeFunky's Object Remover page and Aftershoot's retouching page on 22 September 2026.
The prompt that keeps the hairstyle
An instruction editor re-renders the whole frame, so your sentence must say what goes and what stays. This prompt kept the hairstyle in our halo test:
Remove only the fine flyaway strands standing up around the crown and temples. Keep her hairstyle, centre part, hair length, colour and volume exactly the same. Do not change her face, freckles, expression or skin texture, and keep the warm backlight, sweater, window and plants as they are.
Use the same three parts for your own photo:
- What and where. Name the kind of hair (fine flyaways, loose strands, a single hair) and the place (crown, temples, across the lips, on a lapel). Location words keep the edit away from the rest of the hair. "Left" can mean either side, so write "the viewer's left" or name a landmark, such as "the strands nearest the window".
- The hairstyle's features. Part, length, colour and volume are what an editor changes when it decides to tidy the hair. Listing them tells it not to.
- Everything that must not move. Name the face and the light. On a backlit shot, an editor treats glowing strands as part of the warm rim of light.
Our tested prompt is 291 characters. Imagera Queen accepts up to 800 characters and Imagera Warrior up to 5,000.
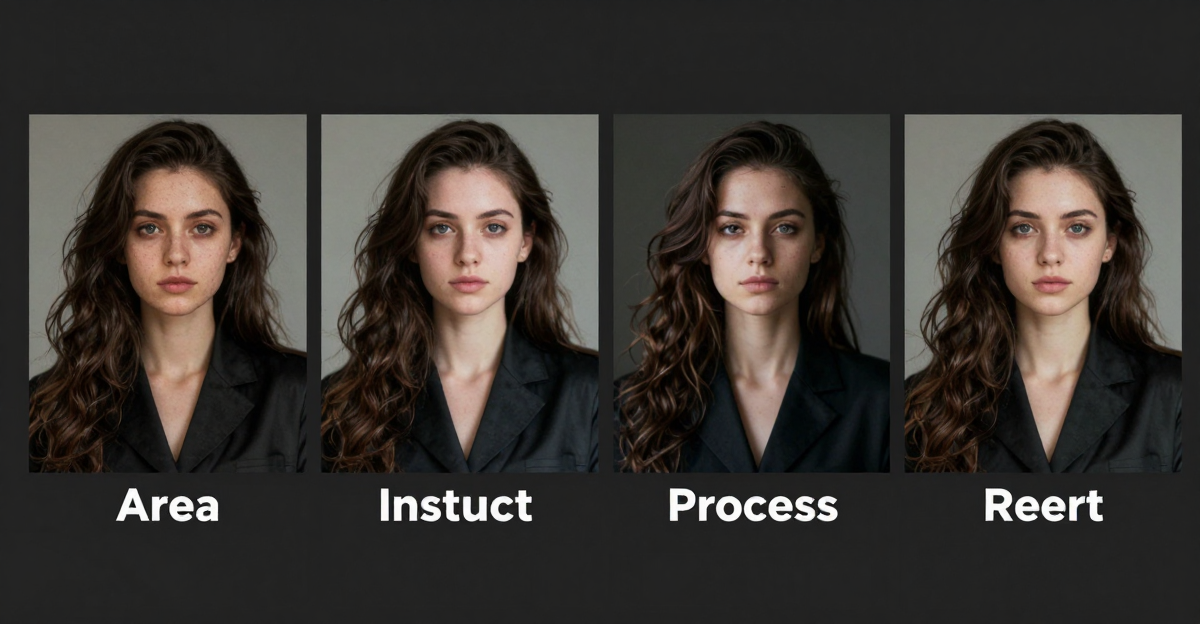
"Fix the hair" asks for a restyle, and that is what came back: part of the halo stayed, and the hair returned with a new wave pattern and more texture.
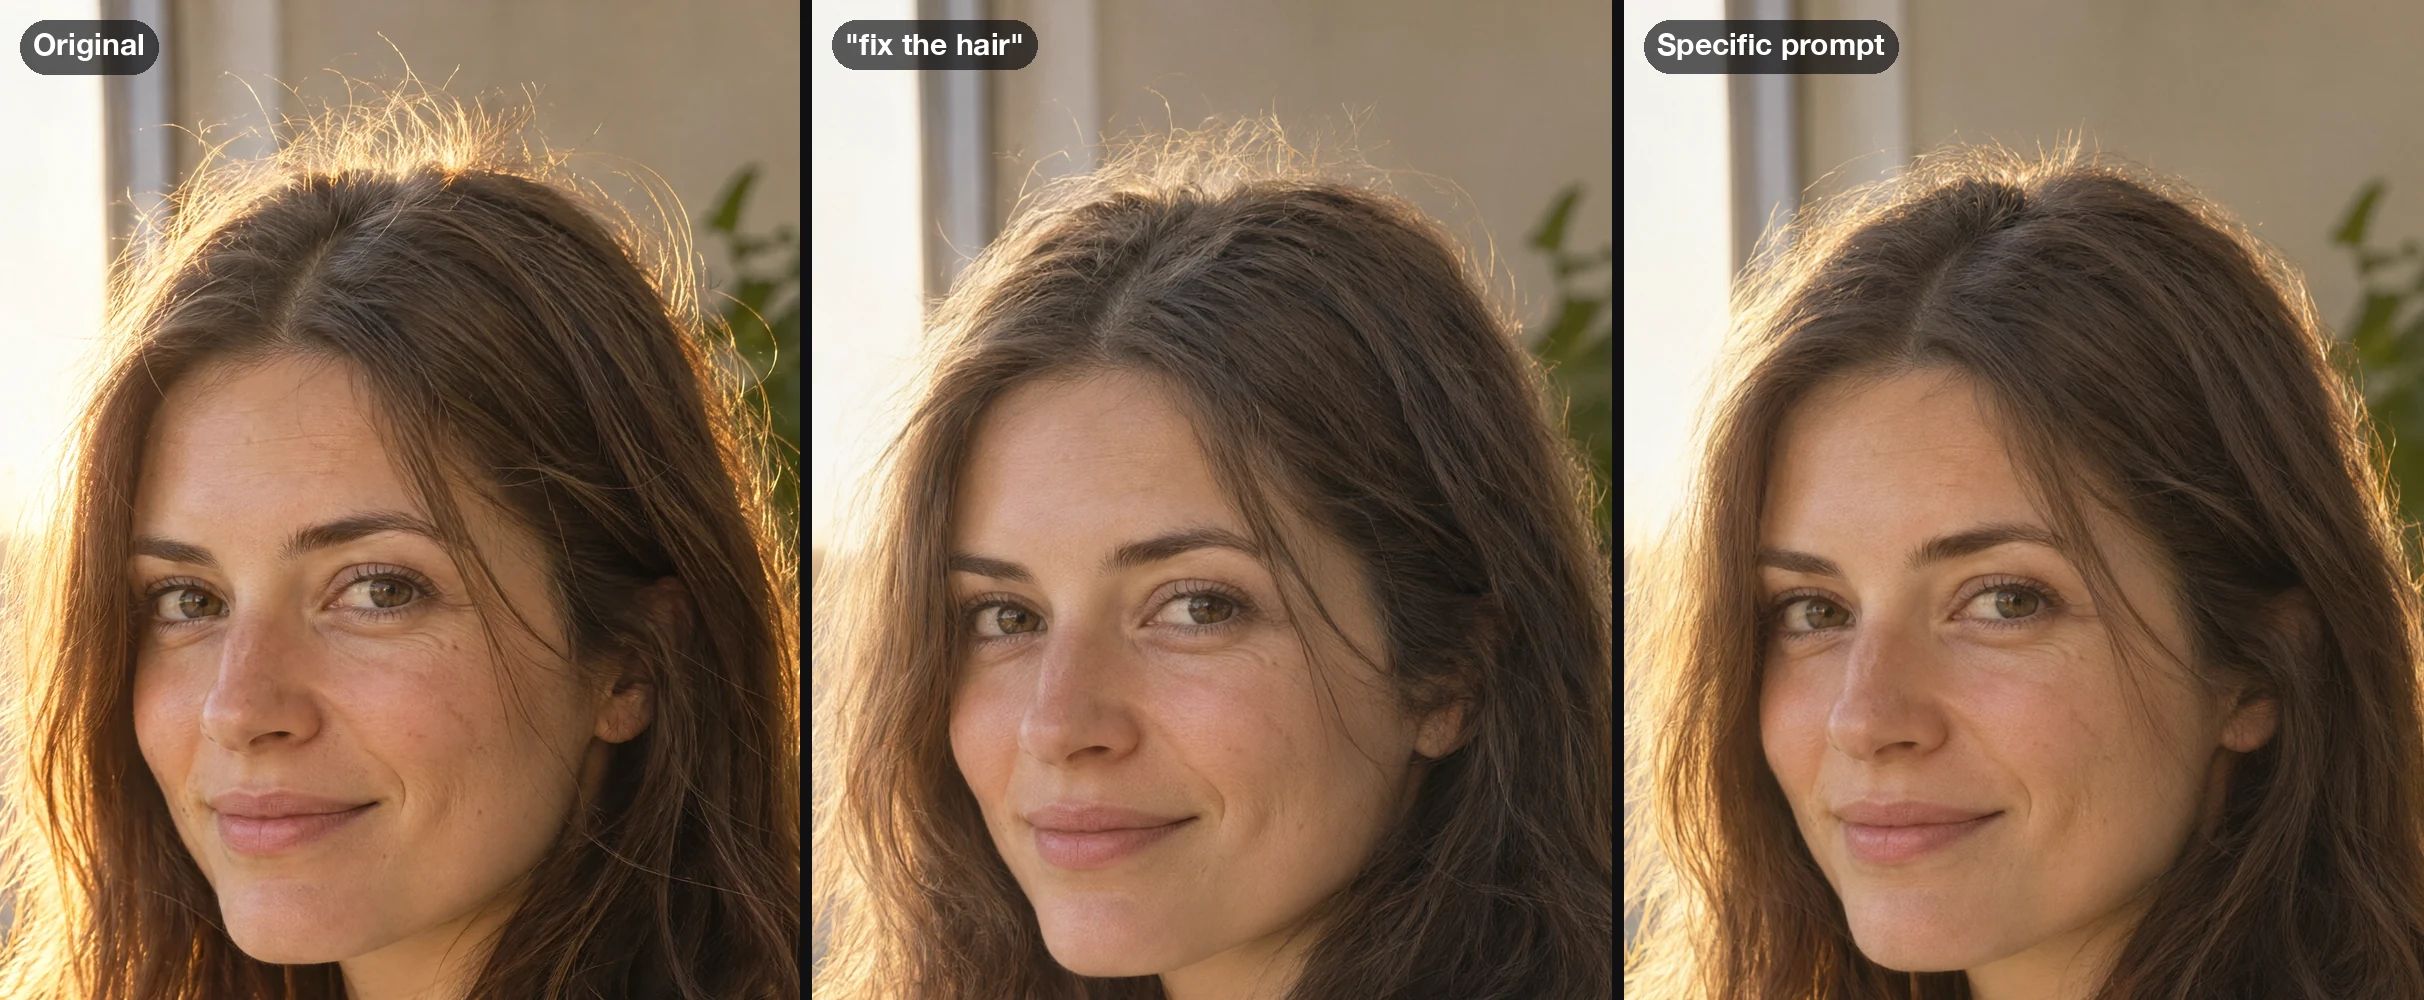
Crops at output size; the original is reduced to the same scale. Left: generated test portrait (illustration). Centre and right: real Smart Detail Enhancer outputs on Imagera Queen, from "fix the hair" and from the specific prompt above.
How we tested: four hard cases
In September 2026 we ran each case through Smart Detail Enhancer with PNG output and Auto shape, then compared results with the originals at 100%. Every before photo is a generated portrait of an invented person.
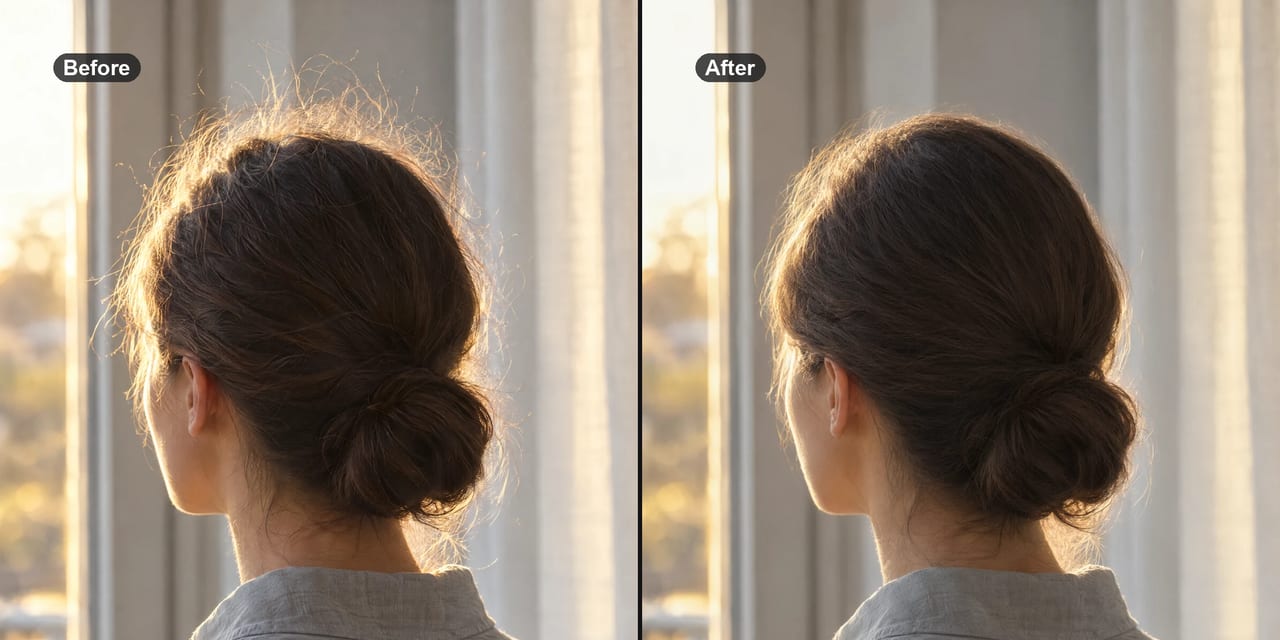
The lead image at the top of this page is the easiest case: a halo around a low bun, seen from behind, cleaned with the same three-part prompt. Imagera Queen cleared it for 20 credits, kept the bun and the warm rim of light, and left a few fine wisps; the square photo came back at 1440 × 1440.
1. A backlit halo, face to camera
Dozens of strands, each lit brighter than the hair beneath: the hardest halo for a brush. Imagera Queen removed most of it and held the centre part, length and colour; a few soft wisps remain at the crown and read as natural.
The face did not hold. In both specific-prompt runs on Queen, her face came back noticeably different at 100%: longer, with reshaped brows and nose bridge and most freckles gone, despite the prompt. Imagera Warrior, given the same prompt, kept the face closer (though not identical) and cleared more of the halo, but returned 768 × 1024 pixels against Queen's 1232 × 1648.
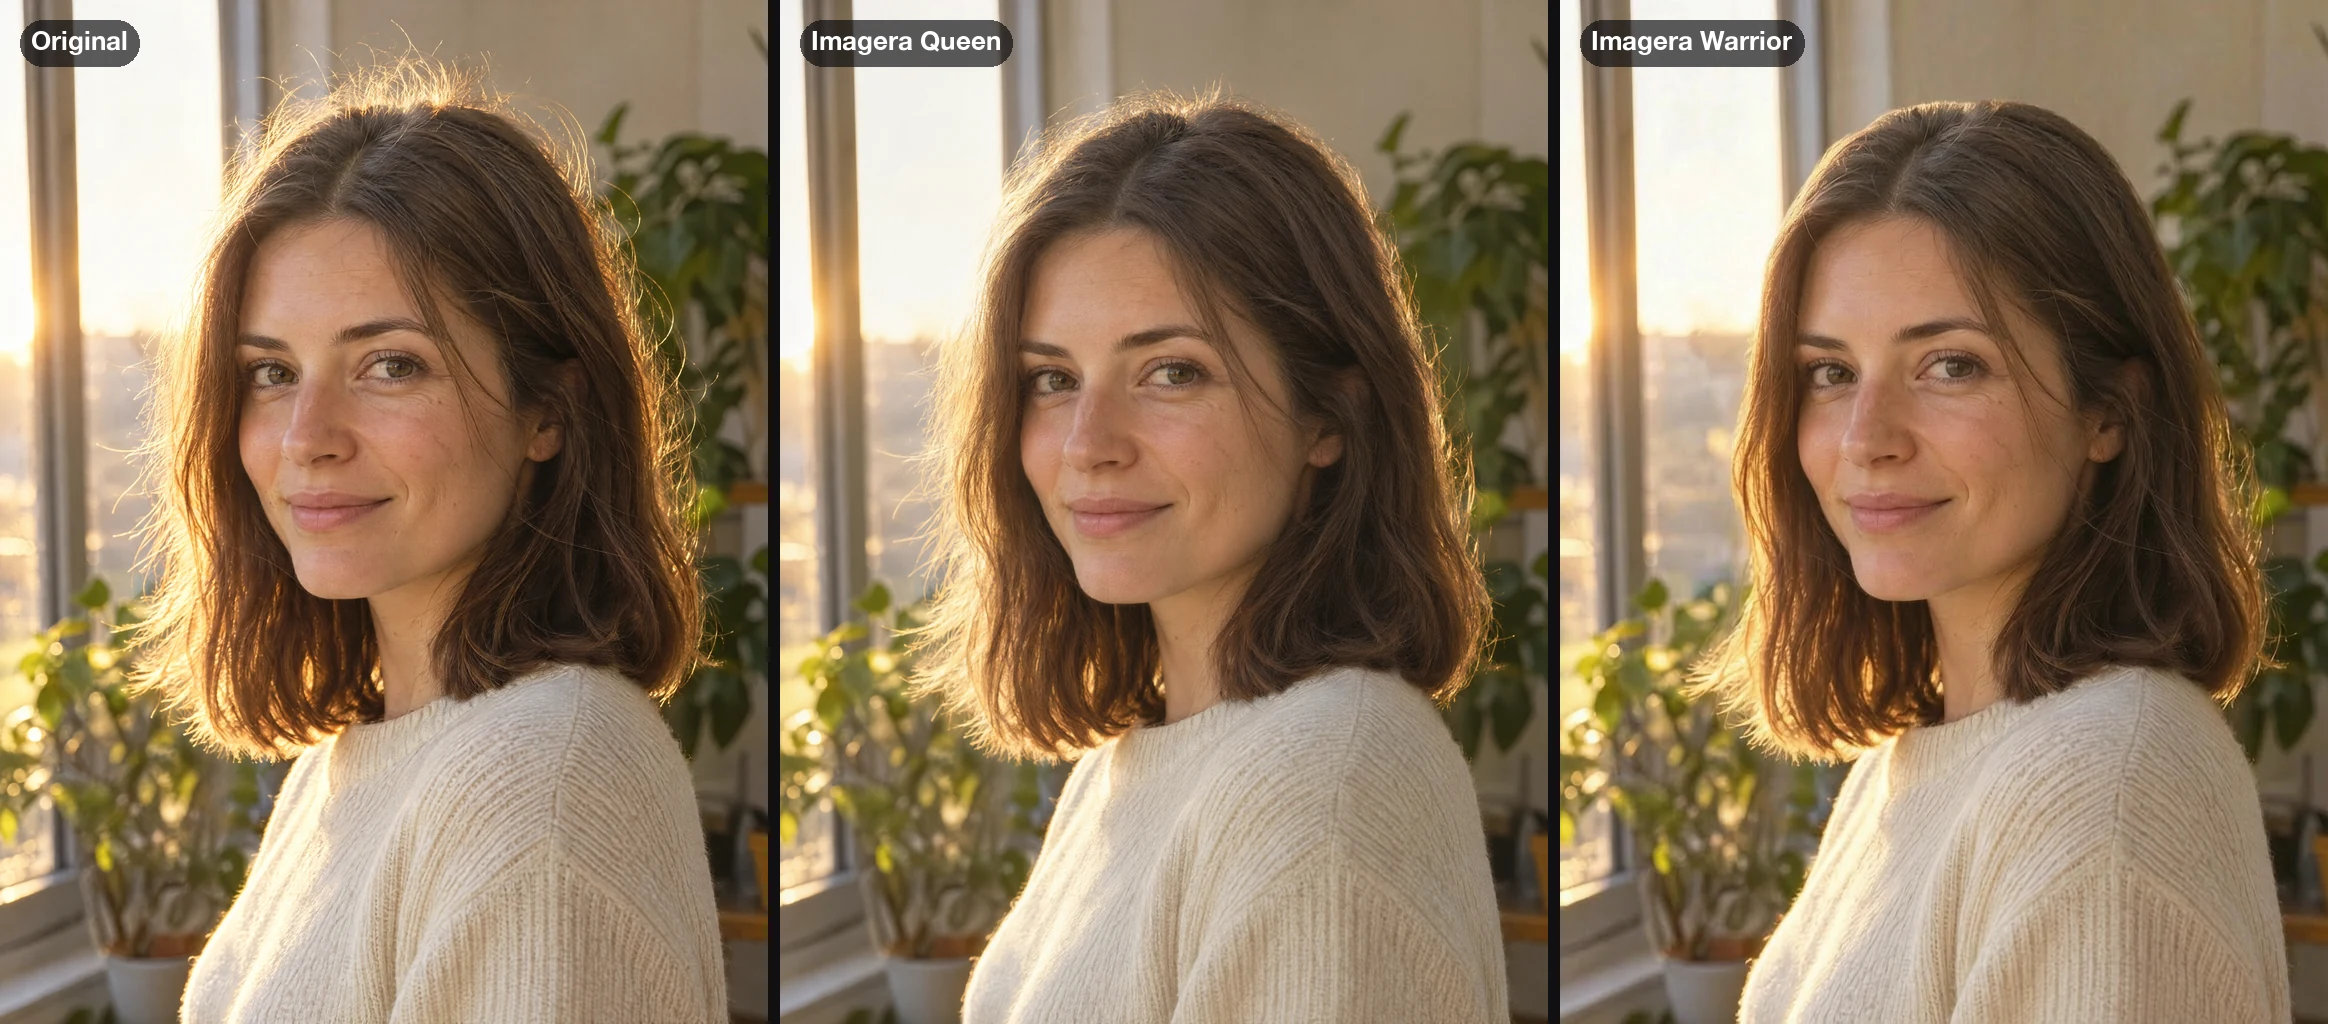
Left: generated test portrait (illustration). Centre: Imagera Queen, 20 credits, 1232 × 1648 native. Right: Imagera Warrior, 25 credits, 768 × 1024 native. All shown at 768 × 1024: Queen reduced, Warrior not enlarged.
If the face must match, start with Imagera Warrior; for web or social use, its smaller file was enough.
2. Windblown hair across the face
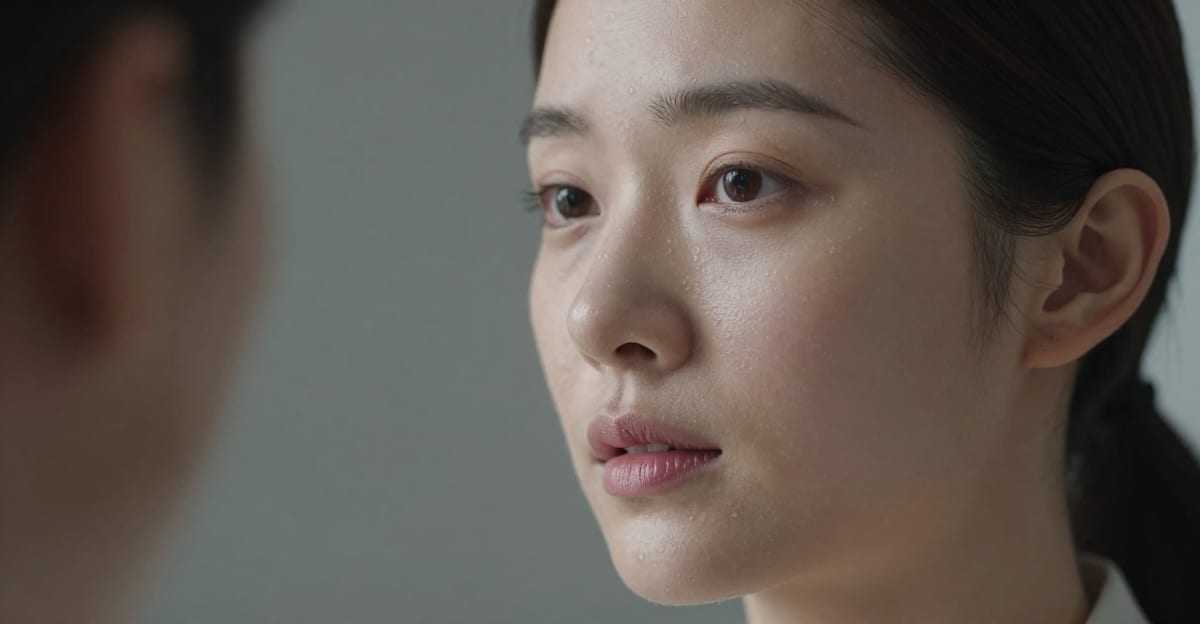
Strands crossing the eyes, nose and lips force the tool to invent the skin underneath. This was the one case where our prompt pattern failed on the default engine:
- Imagera Queen, typed prompt. Two wordings both left most strands across her forehead, nose and lips.
- Imagera Queen, prompt box left empty. The tool then sends its built-in instruction, which cleared every strand but turned her head towards the camera and moved the framing.
- Imagera Warrior, typed prompt. Cleared the strands and stayed closest to her face, freckles and smile, with her head slightly more upright; a faint strand remains near her jaw.
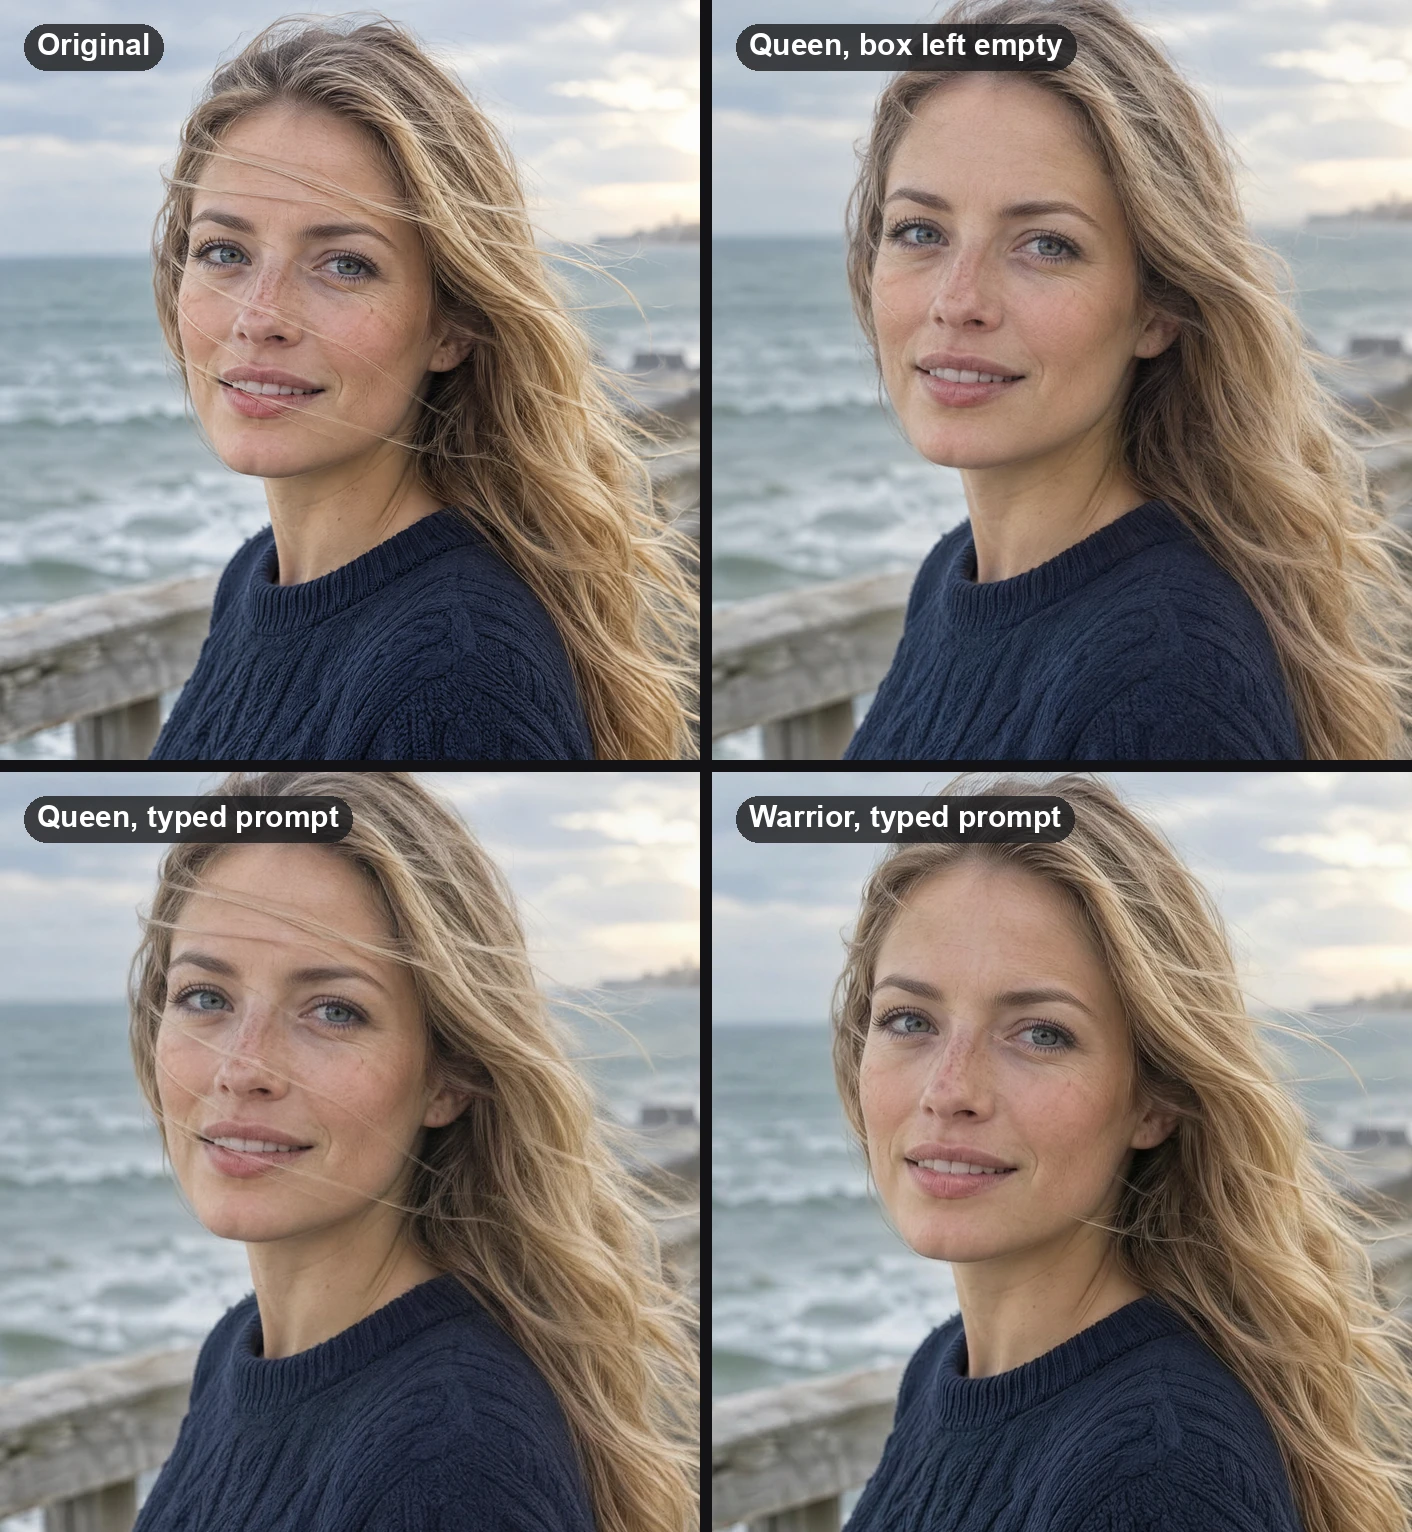
Faces at the same scale. Top left: generated test portrait (illustration). The others are real Smart Detail Enhancer outputs; the Queen results were reduced to match and the Warrior result is at native size. Bottom-row prompt: "Remove every loose strand of hair that crosses her face: the strands over her forehead, across her eyes, over the bridge of her nose and across her lips, and show the skin and freckles underneath. Do not change her face shape, head angle, expression or smile. Keep the hair beside her face, its colour and waves, the sweater and the background as they are."
The shape setting shows here too. The test portrait is 2:3, the shape of a full-frame camera file, and on Auto every result came back 3:4, so the framing changed. On Imagera Queen, picking 2:3 instead of Auto would have kept the 2:3 frame.
3. A single stray hair on a dark jacket
One light hair on dark wool looks easy; the risk is a smooth patch in the weave. The hair went and the weave held, but the edit reached further than asked: at 100%, the shirt's collar points and V were reshaped, and his face came back broader and smoother, with changed brows and nose.
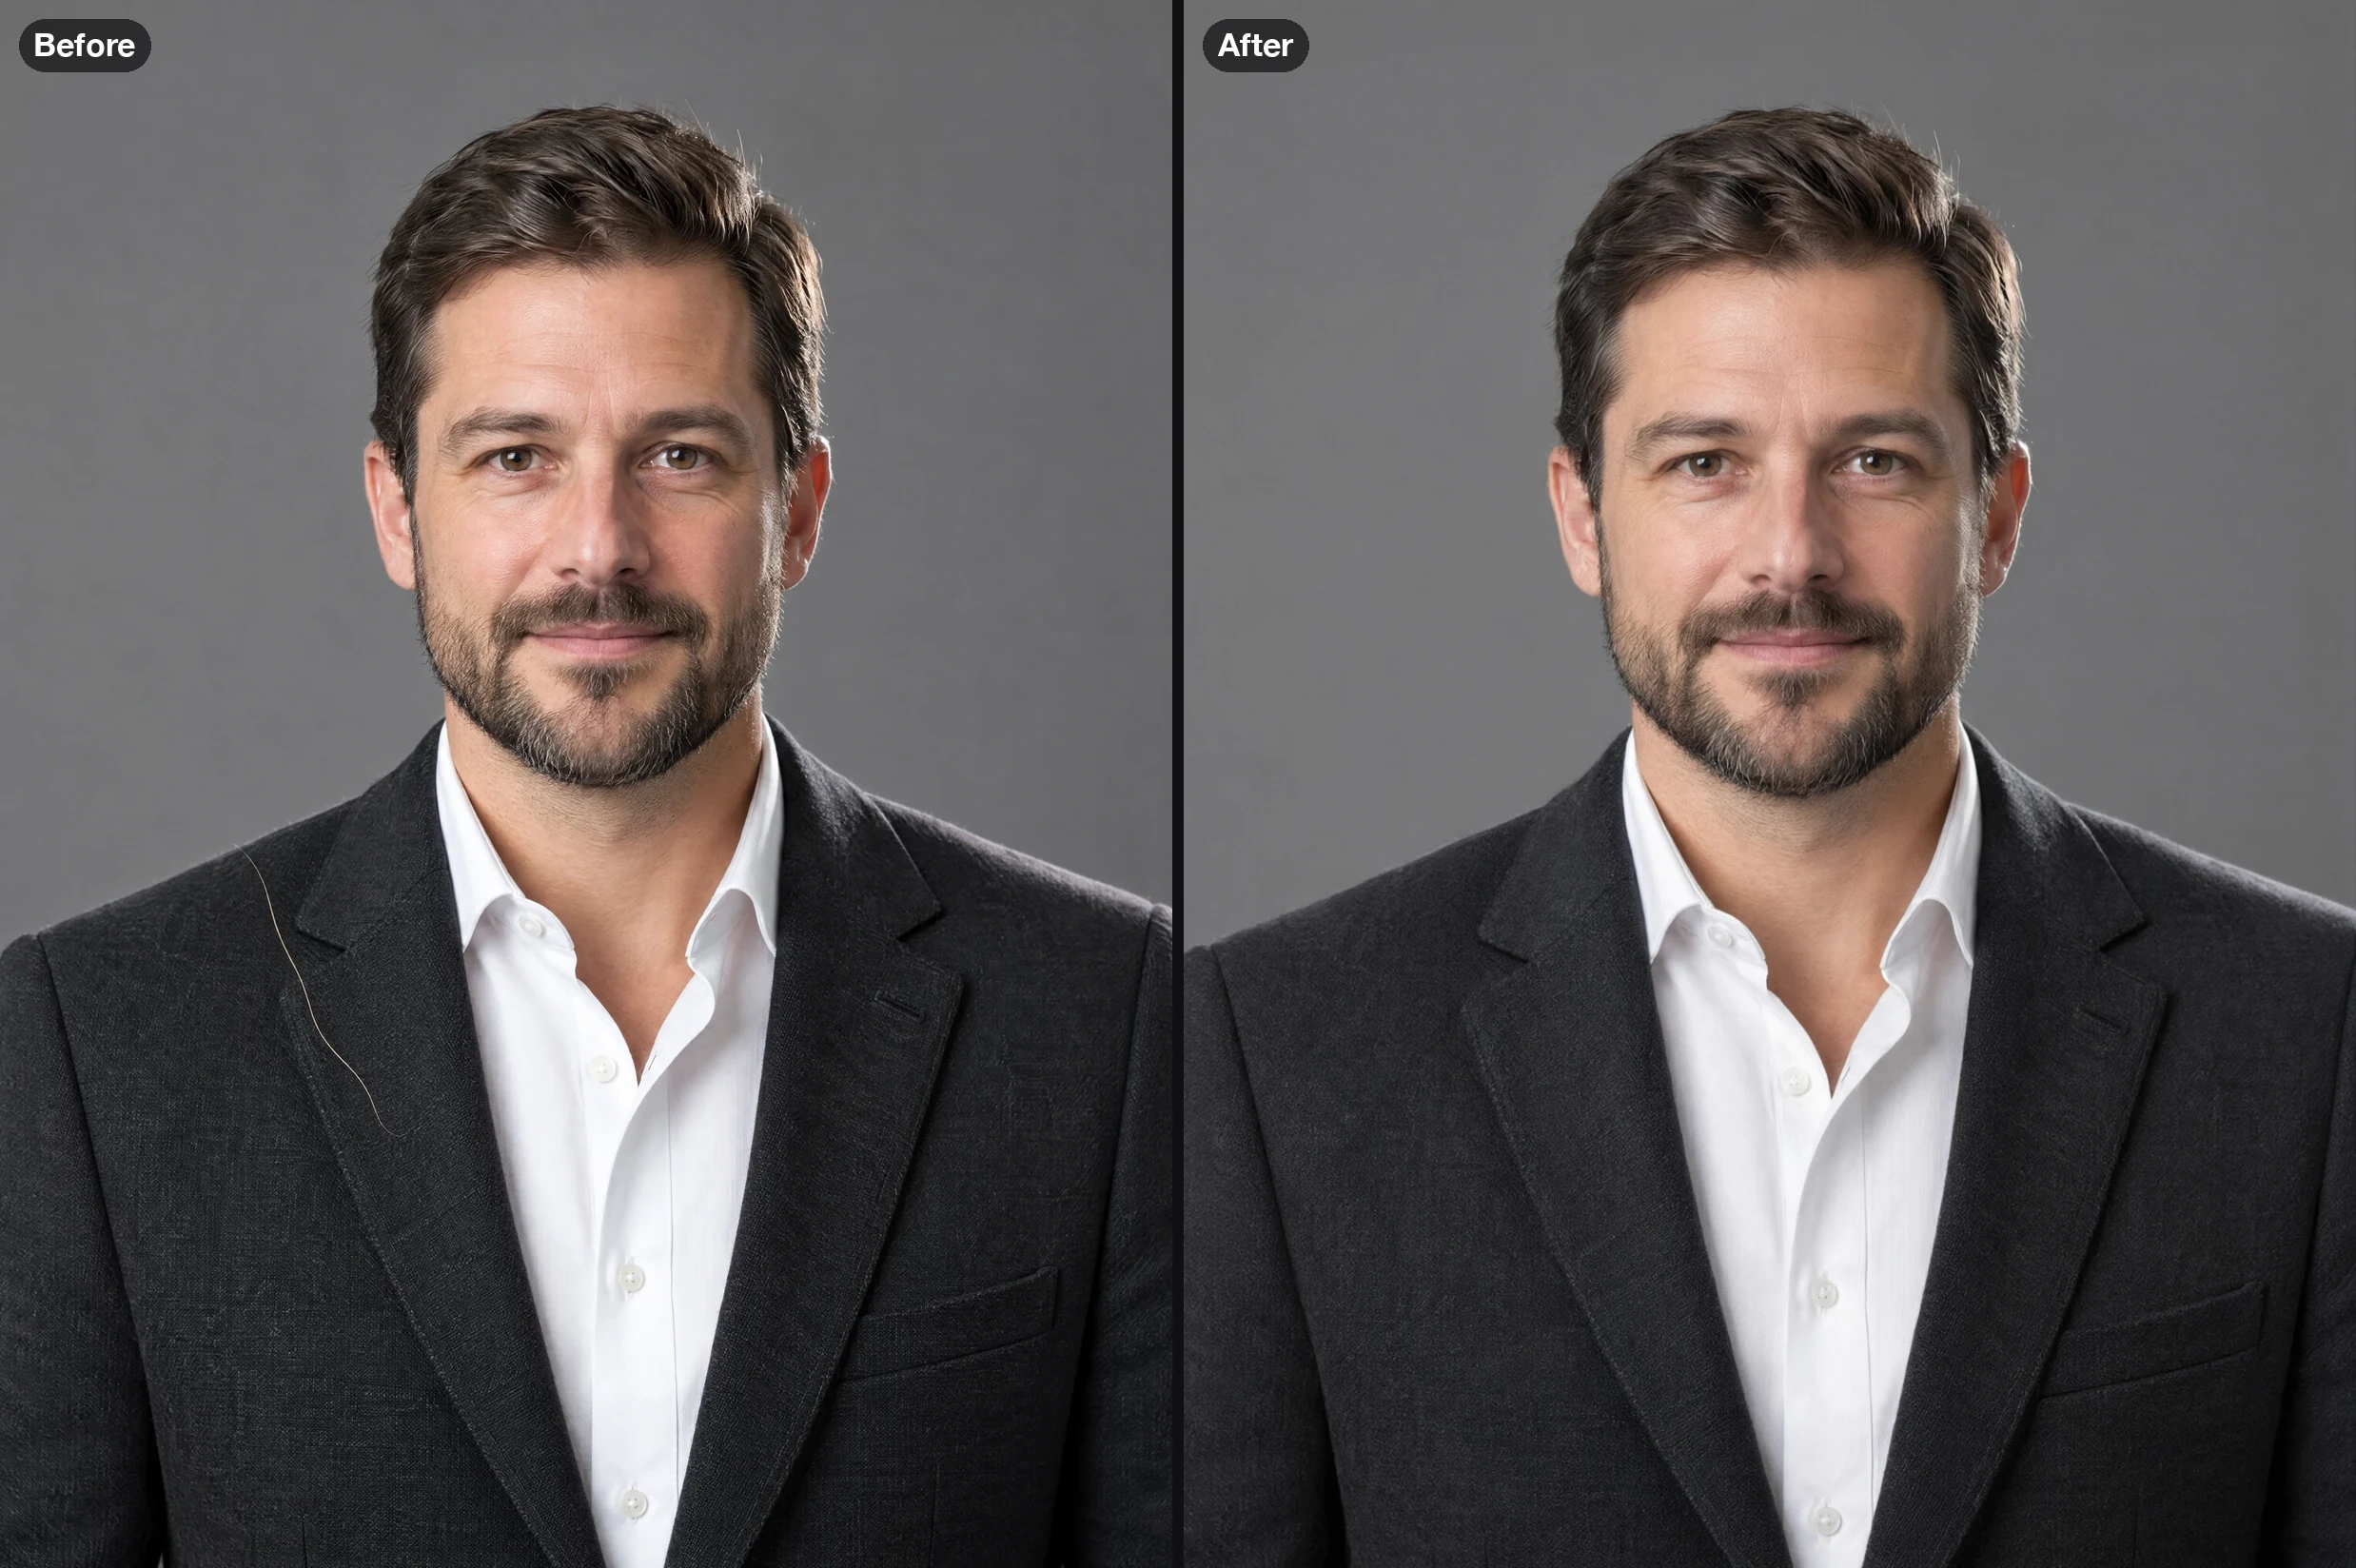
Before: generated test headshot (illustration). After: real Smart Detail Enhancer output on Imagera Queen, 20 credits. Prompt: "Remove the single loose blonde hair lying across the left shoulder and lapel of the black blazer. Keep the fabric texture, lapel shape, shirt, face, beard and background exactly the same." "Left" here meant the viewer's left, and the model read it that way.
How to remove flyaway hair in Smart Detail Enhancer
- Add the portrait. To remove flyaway hair, open Smart Detail Enhancer and put the photo in the Portrait slot. One photo is enough; two optional slots take references if a hairstyle or texture must be matched.
- Set the shape if the framing matters. Auto returns the nearest of 1:1, 3:4, 4:3, 9:16 or 16:9. On Imagera Queen, pick 2:3 or 3:2 in the shape control to keep a camera-shaped frame. Imagera Warrior offers only those five, so crop a 2:3 or 4:5 photo first if you use it.
- Write the instruction. In "What should disappear?", use the three-part prompt. Left empty, the box sends a built-in instruction to remove fine flyaways around the face and hairline.
- Pick the engine. Imagera Queen is the default at 20 credits per image and returns the larger file; Imagera Warrior costs 25. Use Warrior when the face must match or hair crosses the skin, and Queen when output size matters more, as with a halo or clothing.
- Generate, then inspect at 100%. JPEG is the default output format; PNG is available. Check the hairline, the eyes and fine patterns such as lace or fabric. Your upload is never modified; if a strand survives, run again naming only that area.
Honest limits
- The engine takes no mask. It regenerates the whole frame, so changes can appear outside the hair. Painting in the upload editor does not confine the edit, and marks, boxes or arrows drawn there become part of the photo that is sent.
- Output size is capped. Imagera Queen returns roughly 2 to 4 megapixels depending on the run (up to 1728 × 2304 for a 3:4 portrait, 2048 × 2048 square; our test runs came back at 1232 × 1648 and 1440 × 1440); Imagera Warrior returned 768 × 1024. For a large print, a healing brush on the original keeps every pixel.
Which approach fits your photo
| Your photo | Start with | Why |
|---|---|---|
| A halo or a few strands on a portrait for web or social | A typed instruction in Smart Detail Enhancer | One sentence replaces strand-by-strand painting |
| Strands across the face, or a close-up where the face must match | Imagera Warrior with a prompt that names the skin underneath, checked at 100% | It cleared face-crossing strands and kept faces closest in our tests |
| One hair on clothing or a plain background | Either method | Both handle it; check the fabric and collar afterwards |
| Hundreds of event or wedding portraits | A batch slider tool | Built for volume and consistent strength |
| A large print from a high-resolution file | A brush or heal tool on the original | Keeps full resolution |
For more on writing edit instructions, see the guide to editing images with AI text prompts. If skin looks too smooth after a retouch, Skin Detailer restores texture, and fixing plastic-looking skin explains why it happens. For edits beyond hair, use Edit Image.
Got a portrait with flyaways? Open Smart Detail Enhancer, paste the three-part prompt, change the location words to fit your photo, and check the hairline and face at 100% before you download.